
Power Query: Double Access Savings – Part 2
3 August 2022
Welcome to our Power Query blog. This week, I filter and expand the data in the two Access databases from last week.
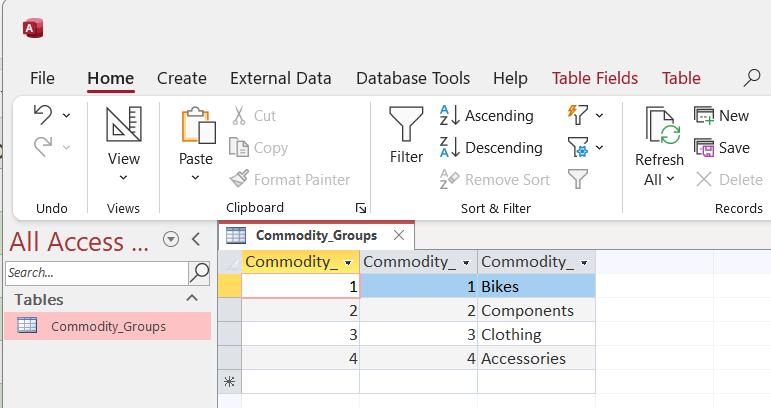
I have two Access databases. These are deliberately very simple, as I am demonstrating a concept here. The first database (imaginatively called ‘Commodity Groups’) contains the Commodity_Groups table:
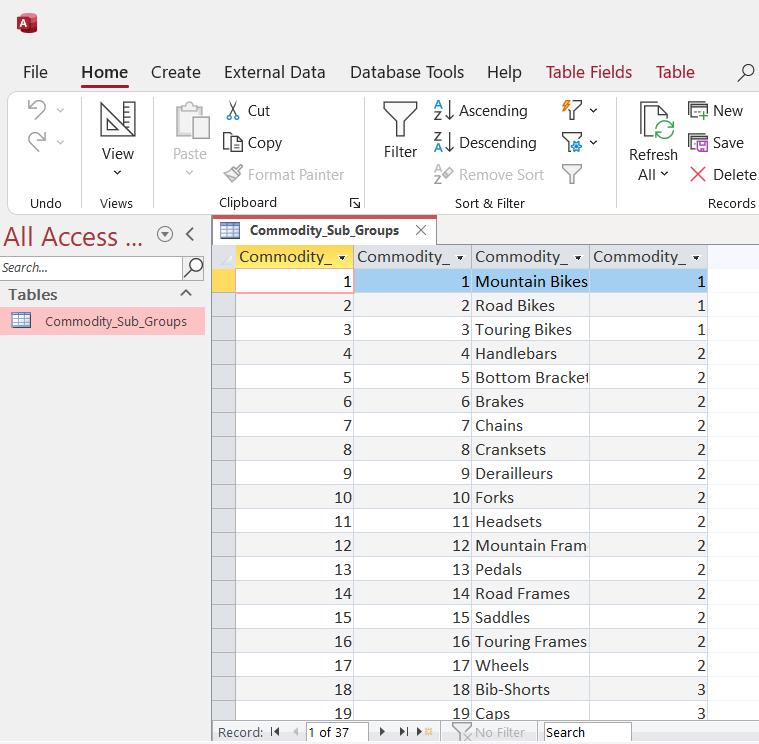
In another database, in the same directory, I have the Commodity_Sub_Groups table. Funnily enough, the name of this database is ‘Commodity Sub-groups’:
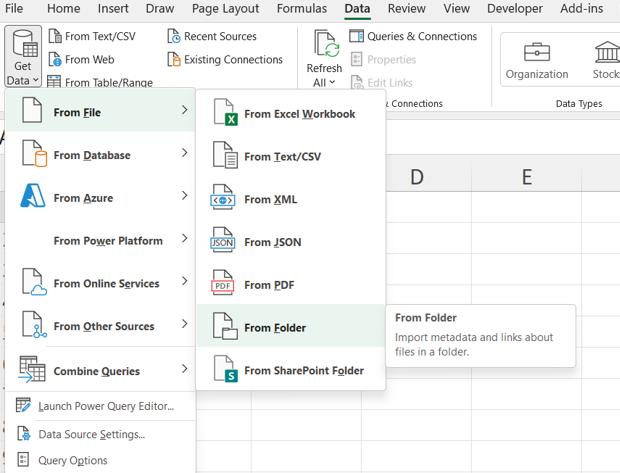
Last time, I used ‘From Folder’ to extract the databases into Power Query:
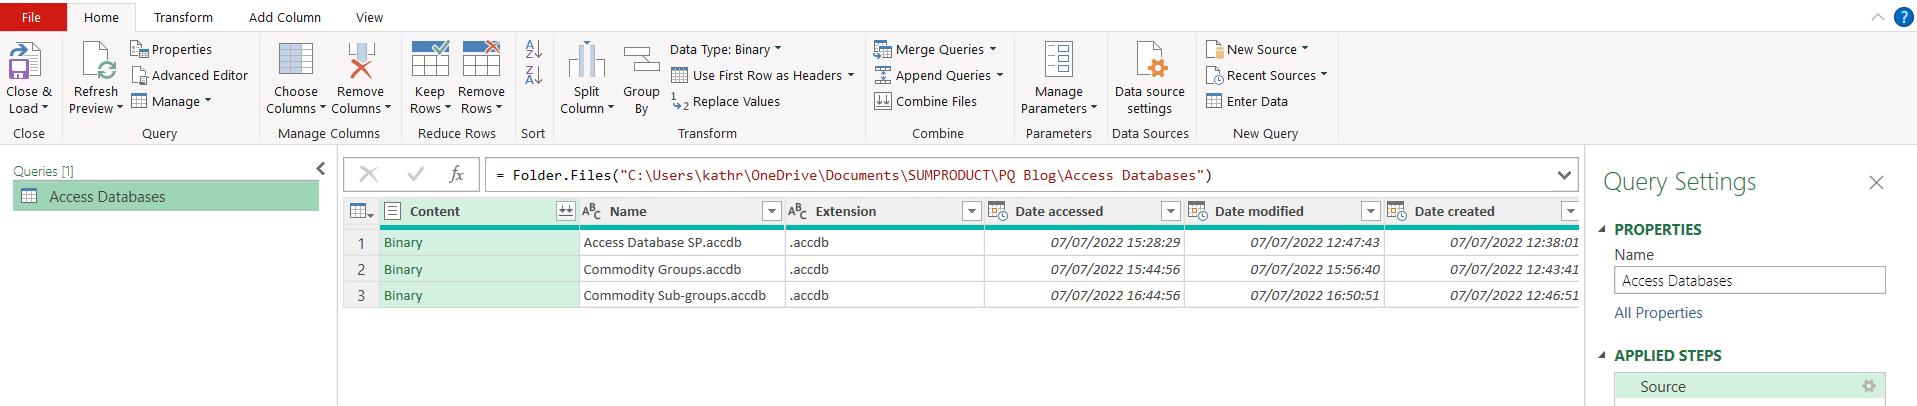
I then chose to transform my data in the Power Query editor:
This week, I shall start by filtering my data, so I only keep the files I want. For this example, I could add other databases to the folder, so I want to allow these to be selected, but I want to exclude the large ‘Access Database SP’, as I do not need tables from this database and including it could slow down my query. In the filter dropdown on Name, I unselect ‘Access Database SP’.
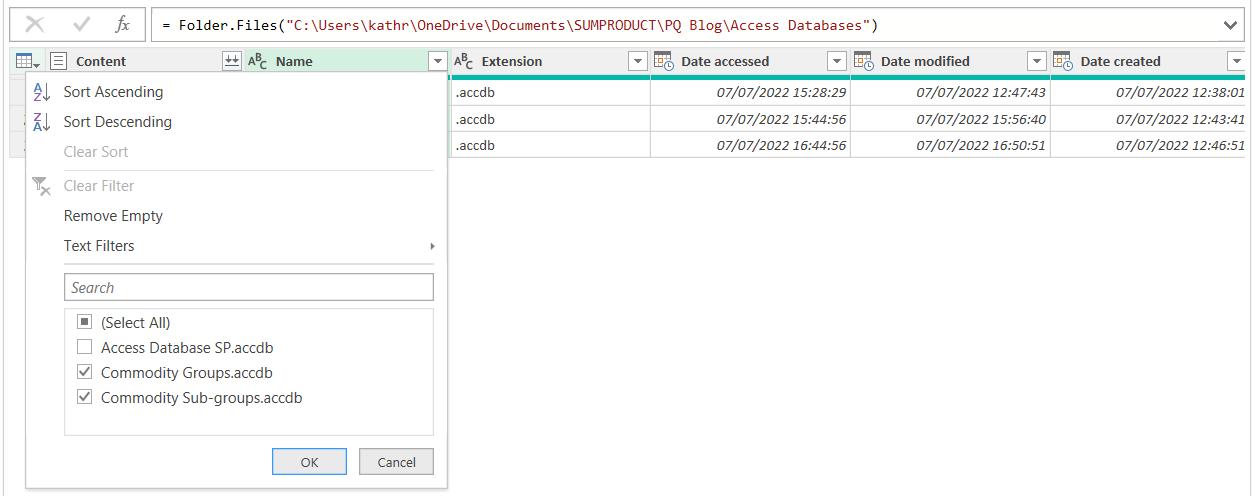
There is another filter I need to do, in order to ensure that I only pick Access database files. I need to use ‘Text Filters’ in the filter dropdown for Extension, as there is only one value currently, so I can’t select it on the checkbox without selecting everything:
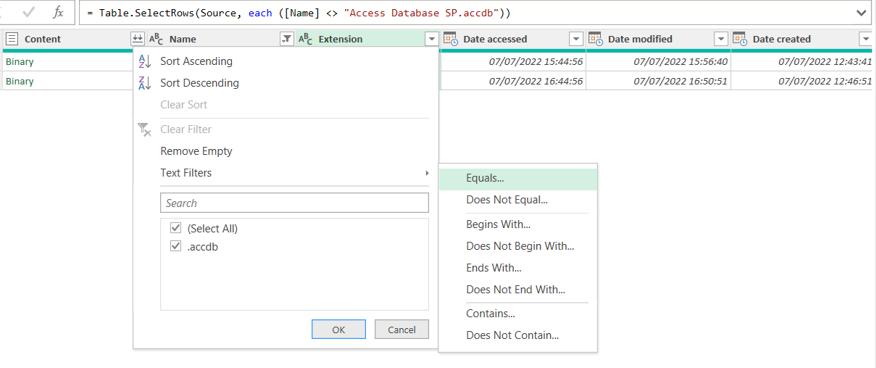
I choose only those files where the Extension equals ‘.accdb’. This is the only item in the dropdown for the value.

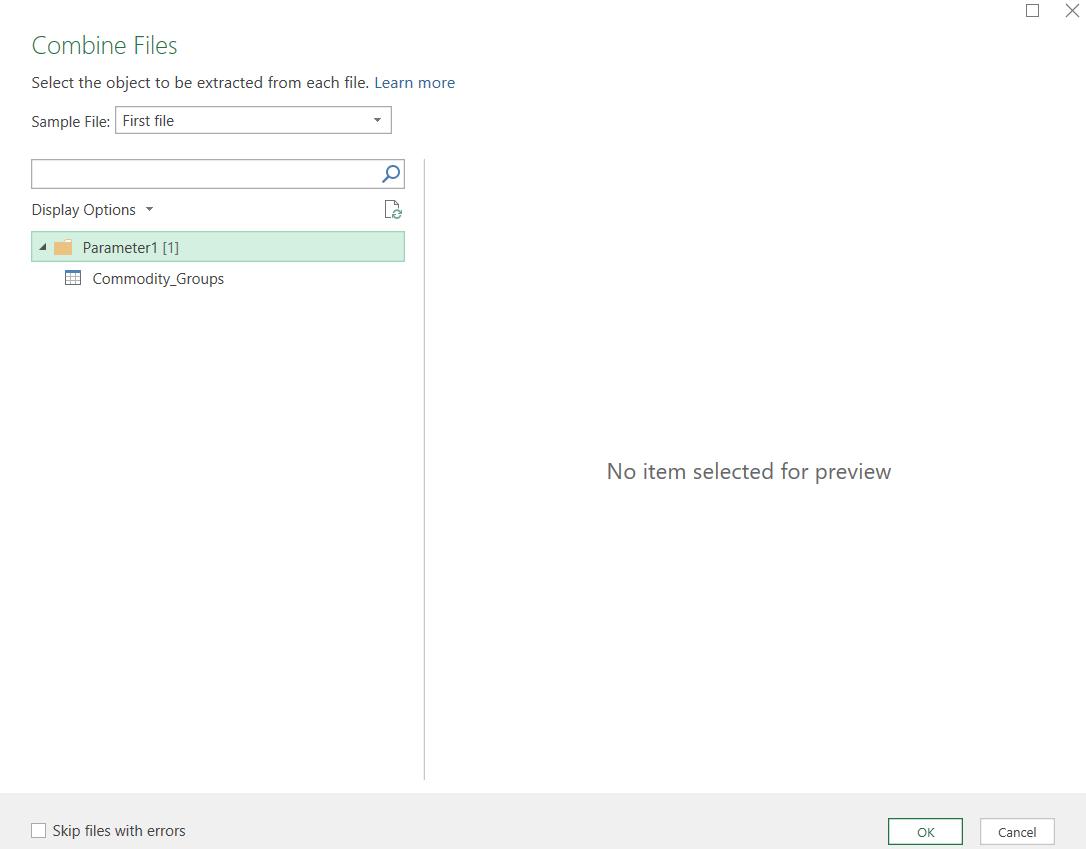
Note that I must include this step even if there are only Access database files in my folder; I will show why later. Now I have the files I need; I can choose to ‘Combine Files’ using the icon to the right of the Content heading.

(Also notice that Power Query has not managed to combine the ‘Filtered Rows’ and ‘Filtered Rows1’ steps!)
This takes me to the ‘Combine Files’ dialog:
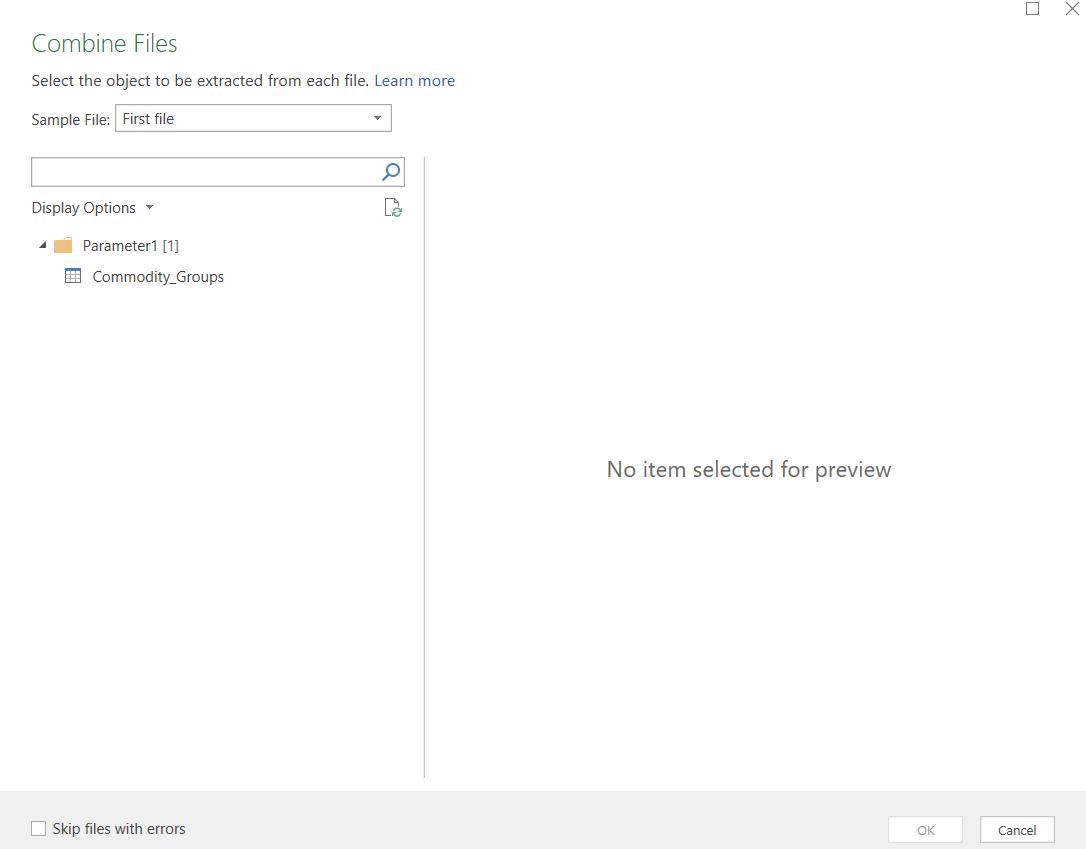
I can click on the table icon to check the data, but I must not click OK, as the process would then try to append the data in the tables.
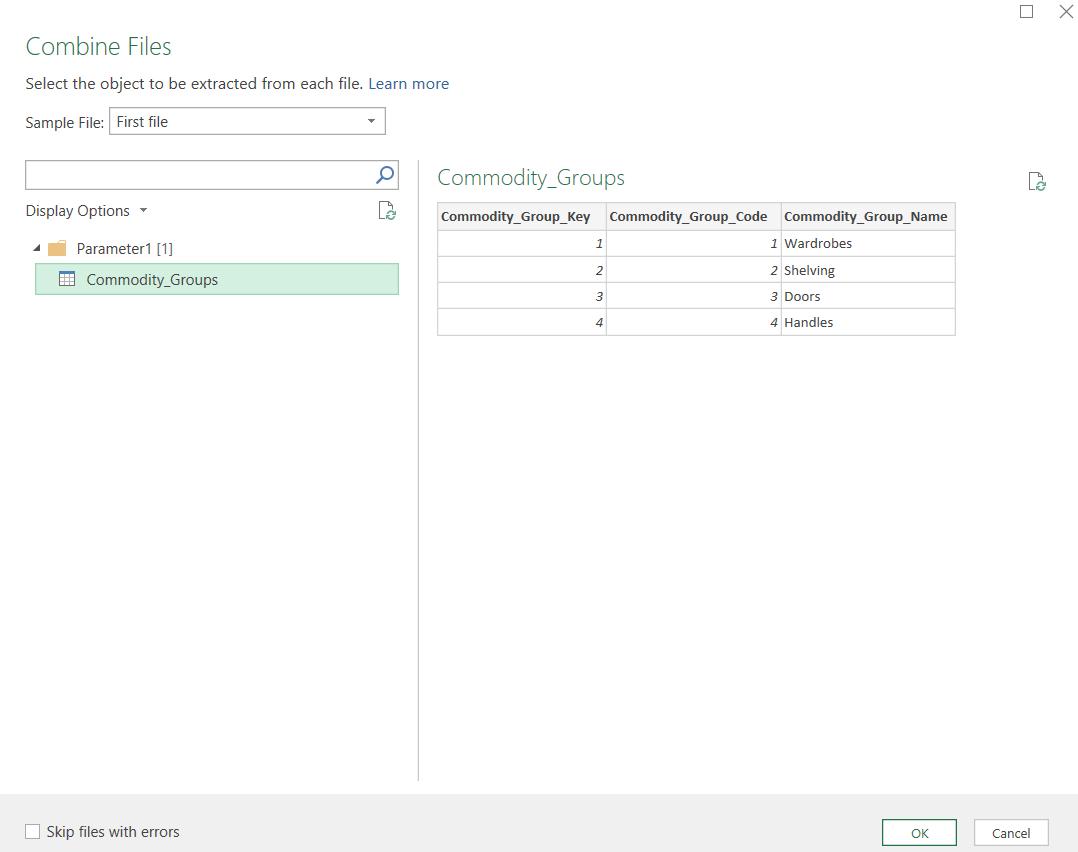
Instead, I click on the folder icon, and then I can click ‘OK’.
Next time, I will continue examining and combining my data in the Power Query editor.
Come back next time for more ways to use Power Query!