
Reducing File Size
Are your spreadsheets always as small as they could be? This article considers common methods of reducing file size. By Liam Bastick, director with SumProduct Pty Ltd.
Query
My files always seem to grow to epic proportions. Any tips on how I can keep the file size manageable?
Advice
Larger files can take longer than necessary to open, be more difficult to email, may cause you to print extra pages, may increase the chance of “Out of Memory” error messages occurring, or produce other unusual spreadsheet behaviour.
In an Excel world with 16,384 columns and 1,048,576 rows, it is all too easy to generate massive sprawling spreadsheets that test the patience of even the most sophisticated of end users. Sometimes, Excel ‘bloats’ of its own accord. Either way, please find below some common methods of reducing Excel’s file size and potential megalophobia.
However, it should be noted that reducing file size should not be the be all and end all of modelling. For example, arrays (see Array of Light) and Data Tables can reduce the physical file size but increase system memory requirements as a consequence. This is not necessarily a good thing as heavy usage of system resources (especially with several applications open) can increase the likelihood of files crashing and / or corrupting.
The following list is not intended to be an exhaustive list, but covers some of the basic ideas.
Common sense still applies
Before instigating more involved approaches, do undertake the simpler things first. If your file contains redundant calculations, unused charts and outdated worksheets, remove these items before implementing any of the following alternatives. Similarly, graphics and pictures take up a lot of space: do consider reducing the size of graphics and using compressed images.
Locate CTRL + END cell on each worksheet
Excel saves only the part of each worksheet that is in use, meaning the section that contains data or formatting. Sometimes the last cell of a worksheet may be beyond the range of your actual used data. Clearing the excess rows and columns to reset the last cell can help to resolve these issues.
To find what Excel considers to be the last cell of the active worksheet use the keyboard shortcut CTRL+END:
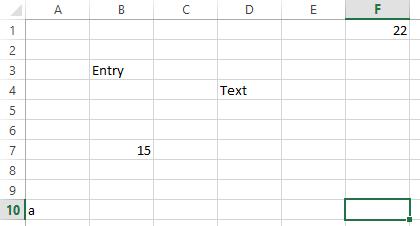
In this above example, there is no additional formatting so the last used row is row 10 and the last used column is column F. In this instance, cell F10 would be the “end cell”. However, in this second example things are not so straightforward:

In this example, cell L14 is deemed to be the “end cell”. This may be because cells to the right of column G and / or below row 10 have been formatted or were non-empty previously (deleting alone does not reset the end cell). Sometimes, the end cell may be many rows and columns from the genuine final cell.
This may be resolved by firstly, ensuring there is nothing to be retained in the additional columns / rows, secondly deleting these additional cells and thirdly, re-saving the file, preferably with a new filename.
In particular, if excess cells are attributable to unnecessary formatting, if you are feeling lazy, Microsoft offers an add-in that will work through a workbook automatically removing the formatting. For more details on the free XSFormatCleaner, please go to the following link.
Clear Blank Cells
The above suggestion removes unnecessary formatting etc. after the end cell – but what about seemingly blank cells that would be in the active range of the spreadsheet?
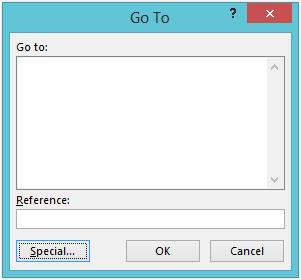
One tip is to select a worksheet (and importantly, just one arbitrary cell within it rather than a selection) and then press ‘F5? or CTRL + G to activate the ‘Go To’ dialog box, viz.
Clicking on the ‘Special…’ button brings up a second dialog box:
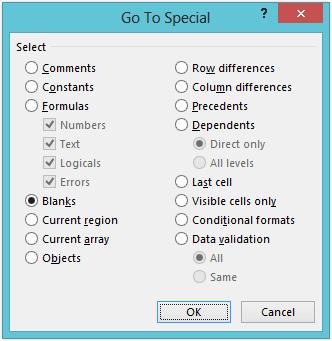
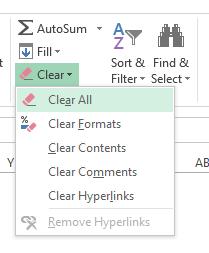
Select the ‘Blanks’ option button and press ‘OK’. This selects all cells in the active range deemed blank. Now, we need to clear all of their contents. To do this, go to the Home tab on the Ribbon and select ‘Clear All’ from the ‘Editing’ group (ALT + H + E + A):
Reducing size using *.xlsb as an intermediary
For files in general, another technique is to save the file to Excel in binary (.xlsb):
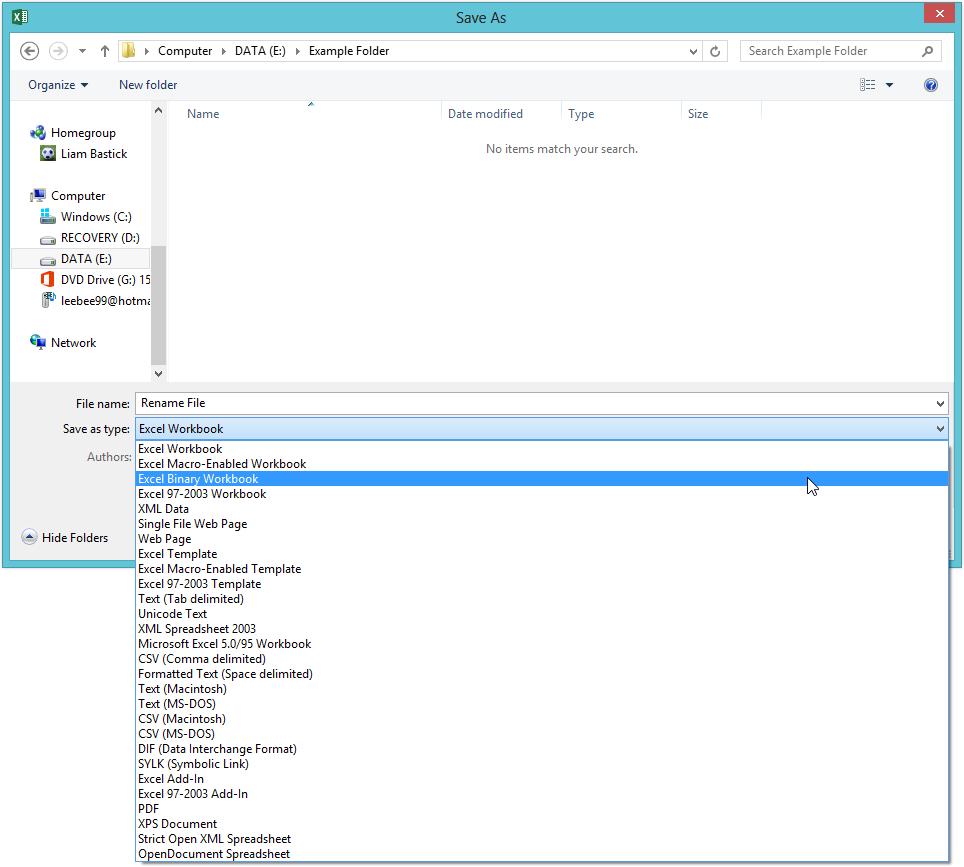
This action structures the workbook into a compressed folder that has many binary files. The precise amount of compression depends upon the contents of the workbook. However, these types of file may take longer to open, close and save.
But this is just an intermediate step.
Next, with the file open as an *.xlsb file, highlight and delete all of the cells outside the data range as described above. Excess formatting inside the range should also be removed. Then resave the file as its original file type (e.g. *.xlsx, *.xlsm). You should note a significant reduction in file size.
Finally, save the workbook as the same file type but use a new filename. This last action may also remove additional inefficiencies within the file.
Reducing size for workbooks specifically containing charts and / or formatting
Here, the technique as above, but initially save the file as an *.html format (this may appear as file type ‘Web Page’):
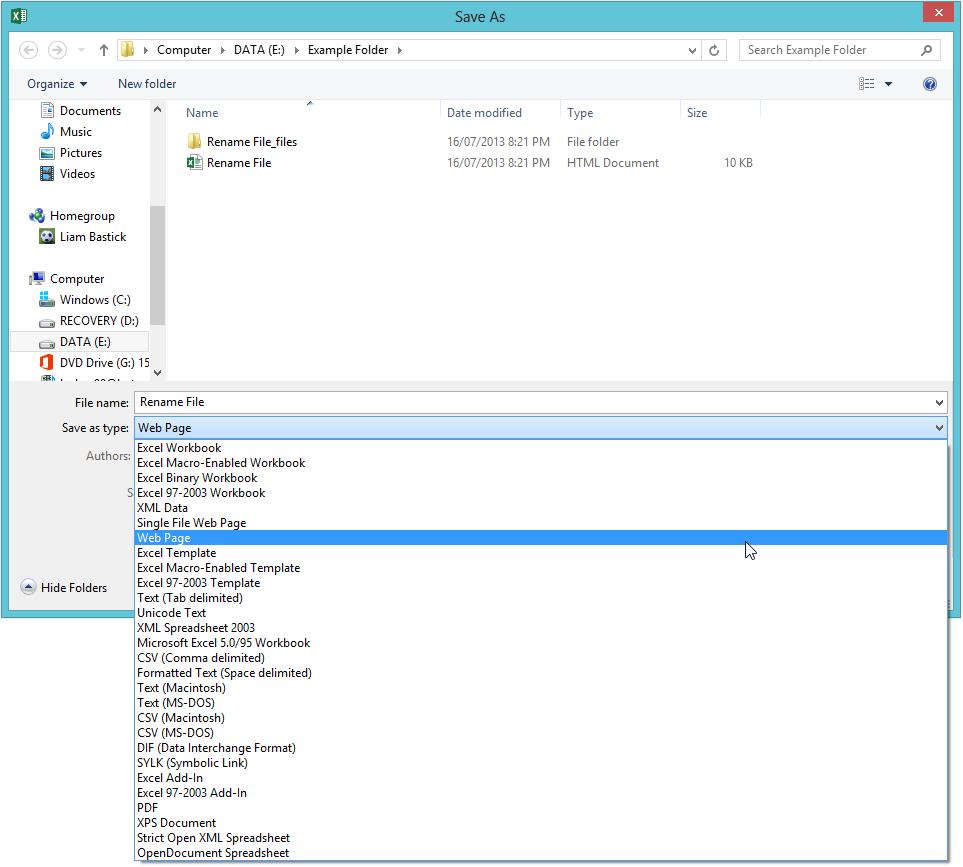
Then, continue the process as before. It should be noted that this approach may cause some functionalities to be removed, so it is worthwhile saving a copy of this file before saving in HTML format before commencing.
Reducing size for workbooks specifically containing text only
Here, the technique as above, but initially save the file as an *.xml format. Again, this approach may cause some functionalities to be removed, so ensure you retain a copy of the original file.
Zipping the file as an intermediate step
Since Excel 2007, zipping Excel files has had little effect in general. However, if you possess a compression (zip) program in Excel such as WinZip or 7-Zip and especially if you have an Excel 2003 or earlier file, there is another alternative. In File Explorer (Windows Key + E), select the document you wish to compress by right-clicking on the name and select ‘Rename’:
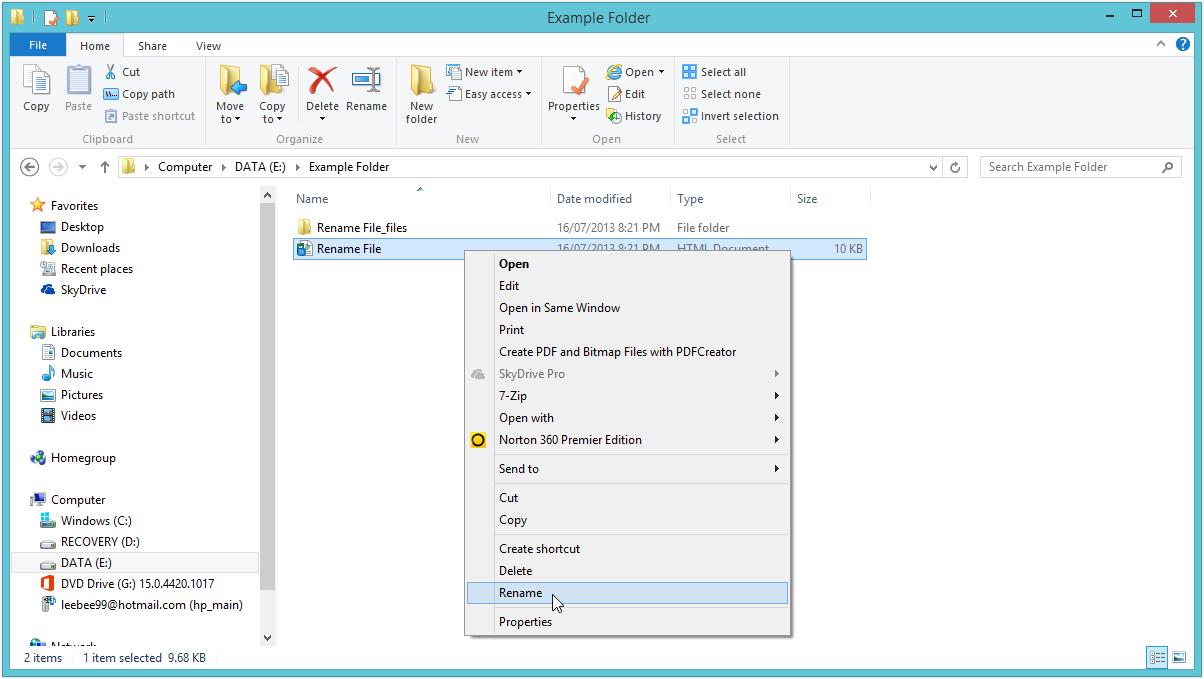
With the filename now in edit mode, change the suffix to ‘.zip’. Once editing is complete, right click on the file once more and choose ‘Open With…’ selecting the zip program you have (this will not be there by default).
Once opened, open the file and select a destination location for the extracted contents. Then, without opening the file, re-zip the file as before. In File Explorer once more, rename the file by changing the suffix back to ‘.xlsx’ (say). This should reduce the file size noticeably too.
Word to the Wise
As I have clearly stated above, please be careful to take backups before changing file types or deleting / reformatting worksheets. This article is presented “as is”: we cannot be held responsible for any lost information or damaged files: caveat emptor!