
VBA Blogs: Going Through the Visual Basics – Part 2
10 August 2018
We thought we’d run an elementary series going through the rudiments of Visual Basic for Applications (VBA) as a springboard for newer users. This second part looks at how to record a macro.
Recording a macro is pretty straightforward and is the typical well users get their feet under the table with VBA. There are several ways you can do this:
- From the ‘View’ tab on the Ribbon
- From the ‘Developer’ tab on the Ribbon
- From the Status Bar
- Keyboard shortcut.
Let’s take a brief look at each in turn.
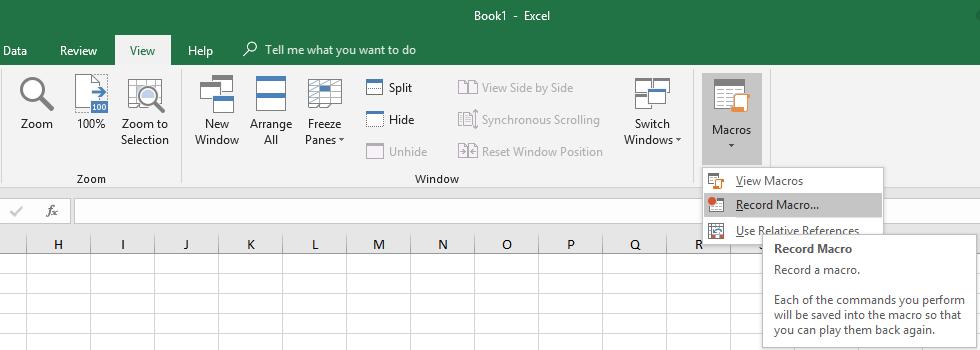
1. From the ‘View’ tab on the Ribbon
In the ‘View’ tab of the Ribbon, there is a category called ‘Macros’ with a ‘Macros’ button, funnily enough. Click on the button and a drop-down menu will appear. Select ‘Record Macro…’.
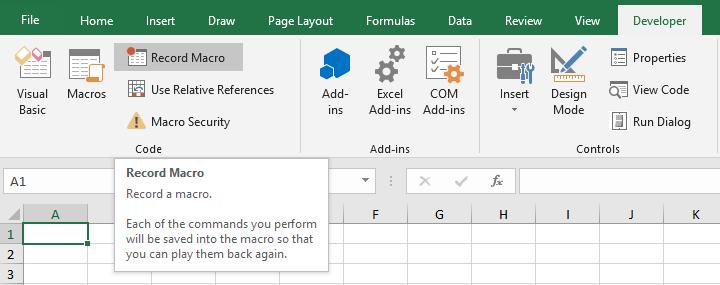
2. From the ‘Developer’ tab on the Ribbon
Similarly, in the ‘Code’ grouping on the ‘Developer’ tab and then select ‘Record Macro’, viz.
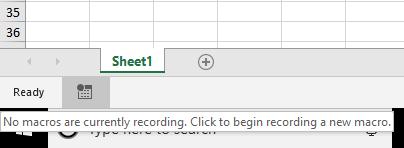
3. From the Status Bar
We can find a small button next to the word ‘Ready’ in the status bar at the bottom of Excel.
After pressing a “Record Macro” the Record Macro dialog box will appear.
4. Keyboard shortcut
Perhaps not the easiest keyboard shortcut in the world to remember, ALT + W + M + R activates the first method (‘View’ tab on the Ribbon). It also stops the macro recording. This keyboard shortcut isn’t pretty, but it’s robust. The ‘Developer’ tab isn’t always on the Ribbon (see here for details) and the status bar has no readily accessible shortcut.