
VBA Blogs: DataBodyRange Part 1
8 December 2017
This week our usual VBA blog writer is out and I will be sparing you the cringe-worthy song references.
Last time we modified the contents of a table, but now we will learn how use DataBodyRange property to manipulate table ranges.
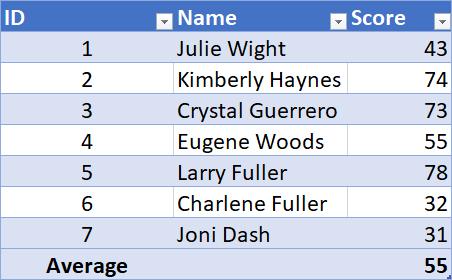
The DataBodyRange property refers to the part of a Table that contains the main body of data. That is, it includes all of the rows of data, but does not refer to the headers or any subtotals.
Say we have the following table, with the table name of 'StudentScores':
Let’s define our table using the following lines of code in VBA:
Dim MyTable As ListObject
Set MyTable = Range("StudentScores").ListObject
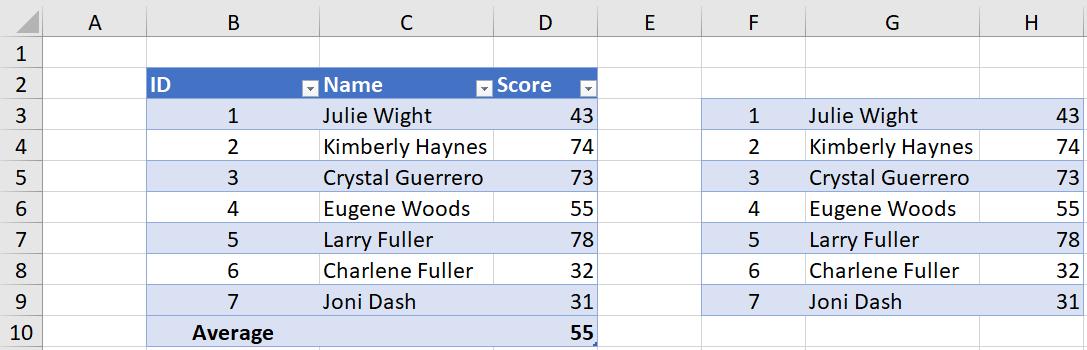
If we want to copy this entire table and paste it somewhere else, we can use this code:
MyTable.DataBodyRange.Copy
Range("F3").PasteSpecial xlPasteAll
If you have forgotten how to reference tables, check out our previous blog here.
Once we run the macro, our sheet should look something like this:
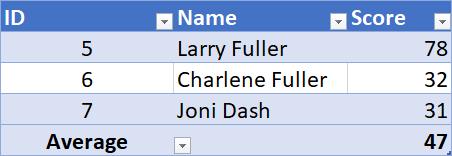
We can also use the DataBodyRange property to resize tables. Using the following code, we can keep the last 3 rows of the table and delete the rest:
MyTable.DataBodyRange.Resize(MyTable.DataBodyRange.Rows.Count - 3, _
MyTable.DataBodyRange.Columns.Count).Rows.Delete
To explain some syntax:
- “Resize(MyTable.DataBodyRange.Rows.Count – 3”: counts the total number of rows in the table and subtracts 3, this means that the last three rows will not be deleted
- The underscore next to "-3" simply tells VBA that we're not done with the line of code yet, allowing us to more efficiently organise code.
After running the code above, we should end up with a table looking like this:
That’s it for this VBA blog. Join us next time for more on the DataBodyRange property!
Meanwhile, a complete list of all of our VBA blogs can be found here.