
Power Query: Changing Dates
27 June 2018
Welcome to our Power Query blog. This week I look at some useful ways to manipulate dates in M.
I will take a look as some Date() M functions that can be used to create dates from an existing date, for example, by adding days or weeks to the original date. I will give an example for each function.
Date.AddDays
Date.AddDays(datetime, days as number)
Returns a Date / DateTime / DateTimeZone value with the day portion incremented by the number of days provided. It also handles incrementing the month and year portions of the value as appropriate.
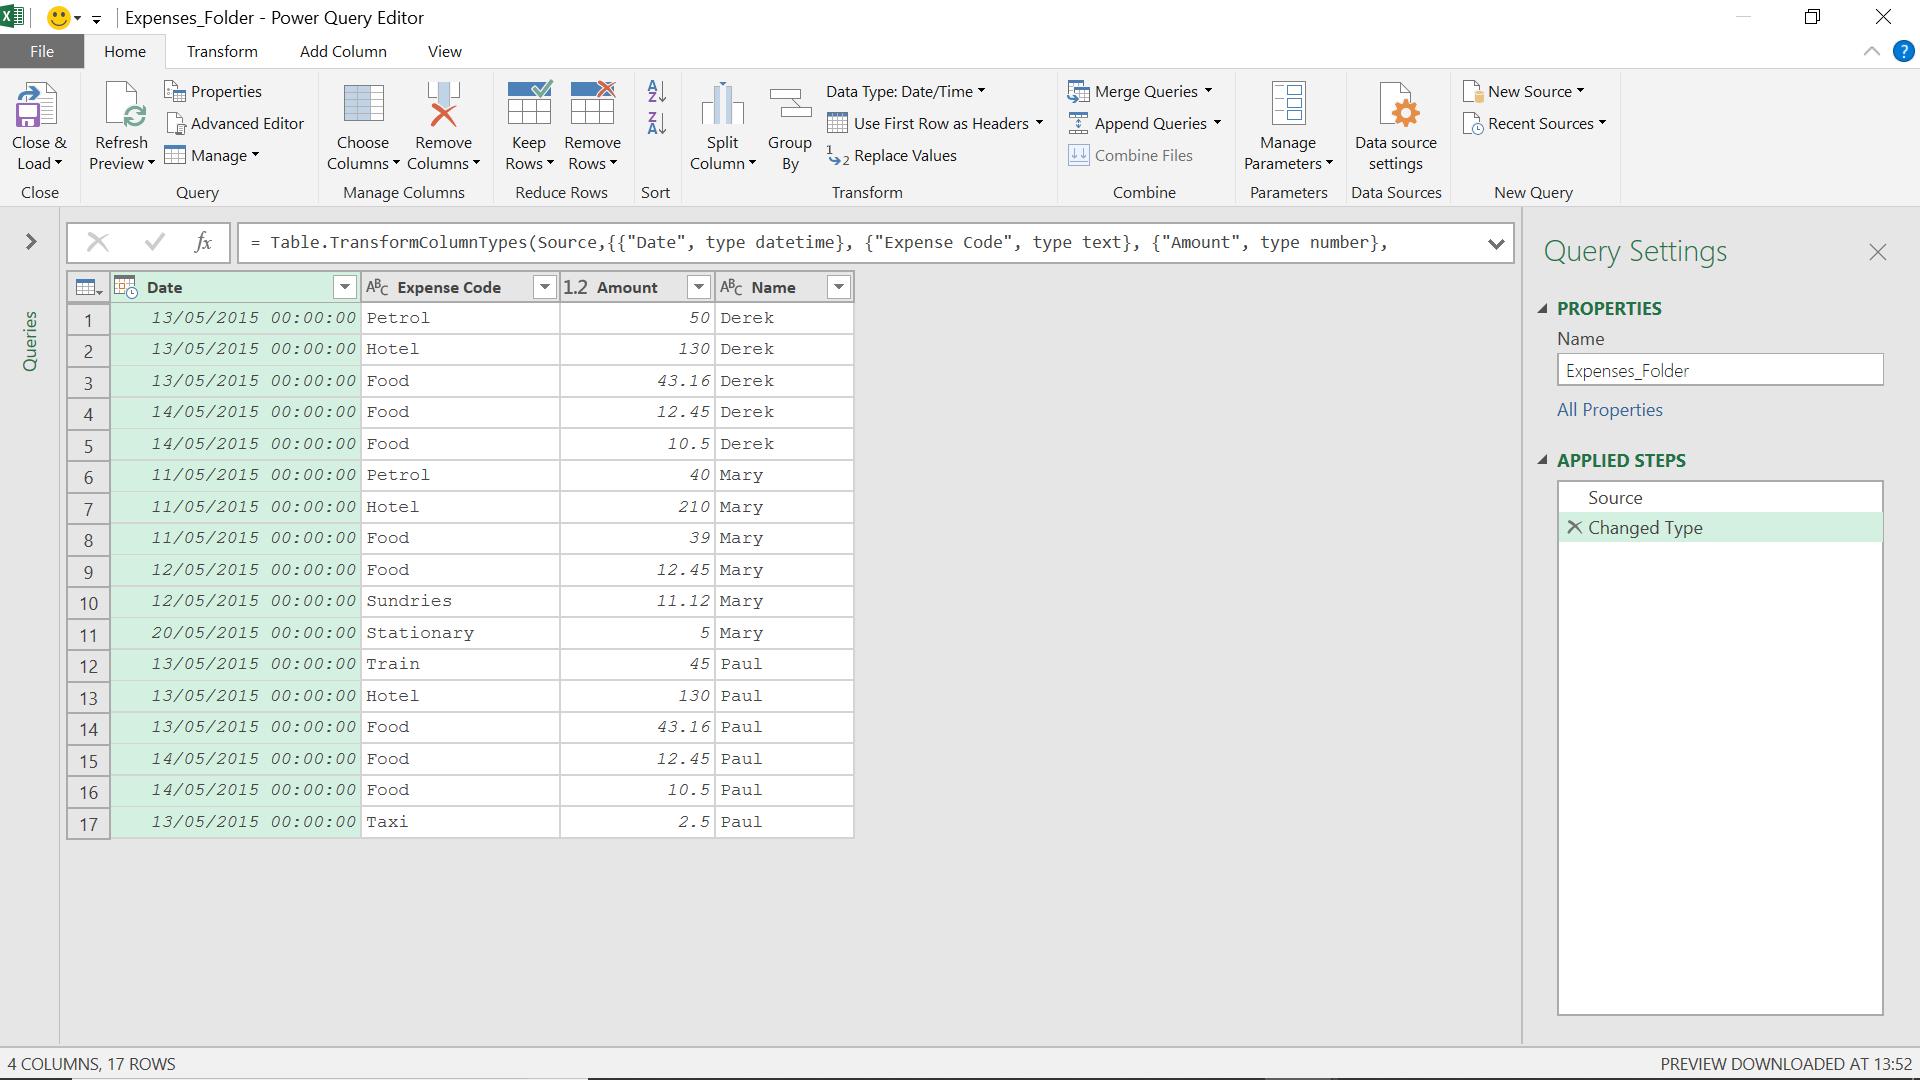
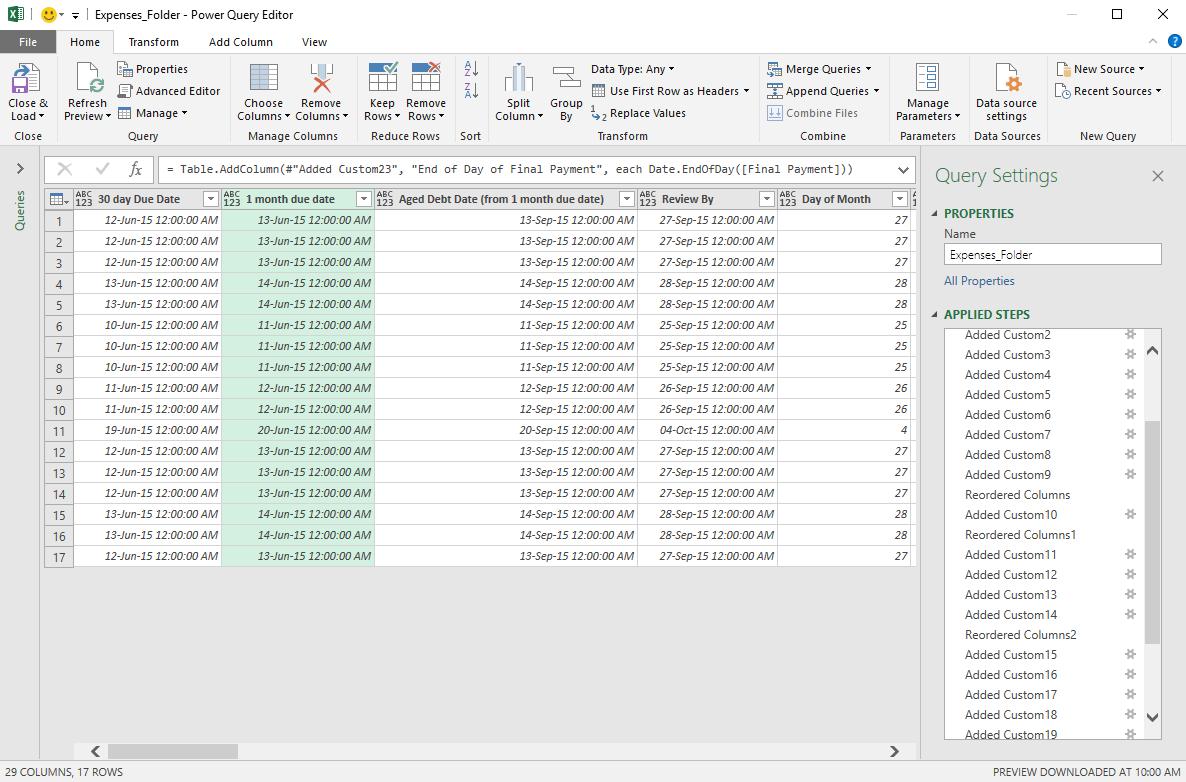
Below, I have some expense data from my reliably non-existent salespeople. It is in their contracts that they will be reimbursed within 30 days of an expense being incurred, so I need to calculate when this date will be.
In ‘Custom Column’ on the ‘Add Column’ tab, I create my new column.
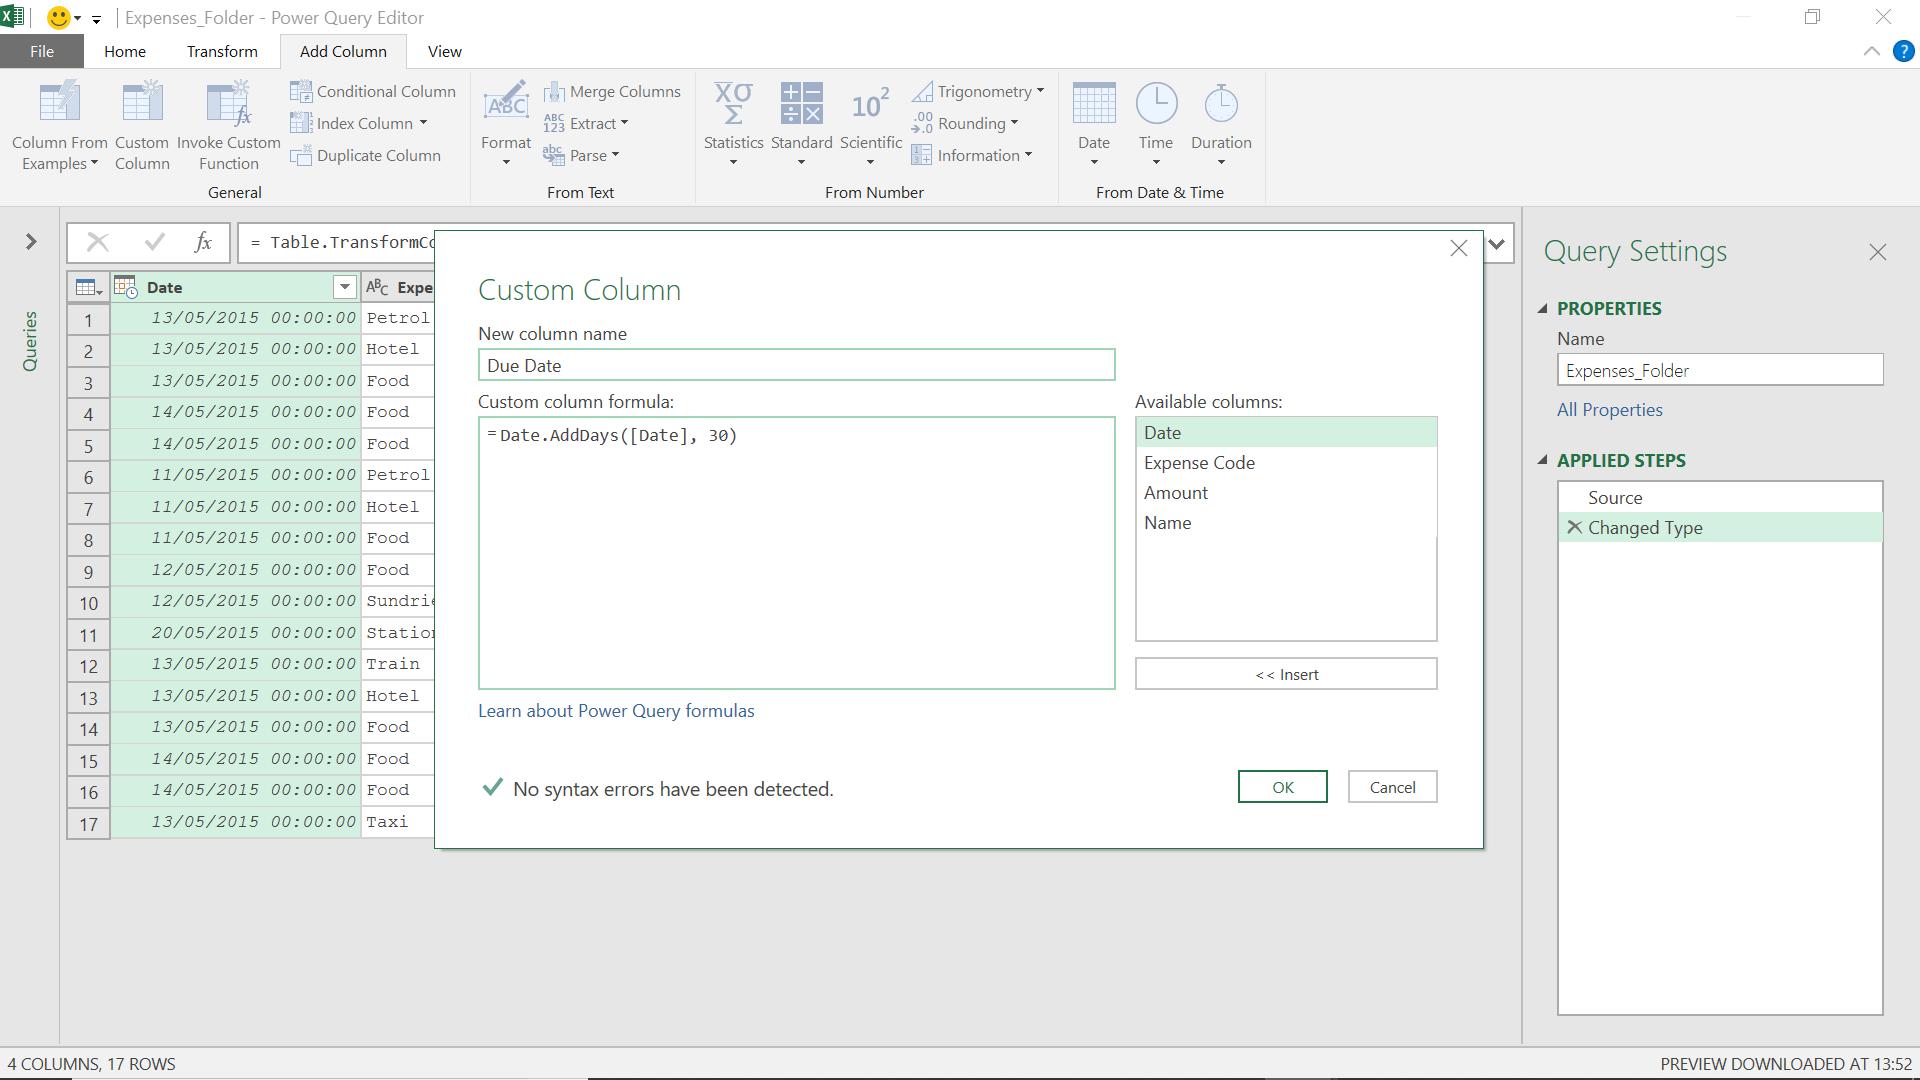
The M functionality I have used is
= Date.AddDays([Date], 30)
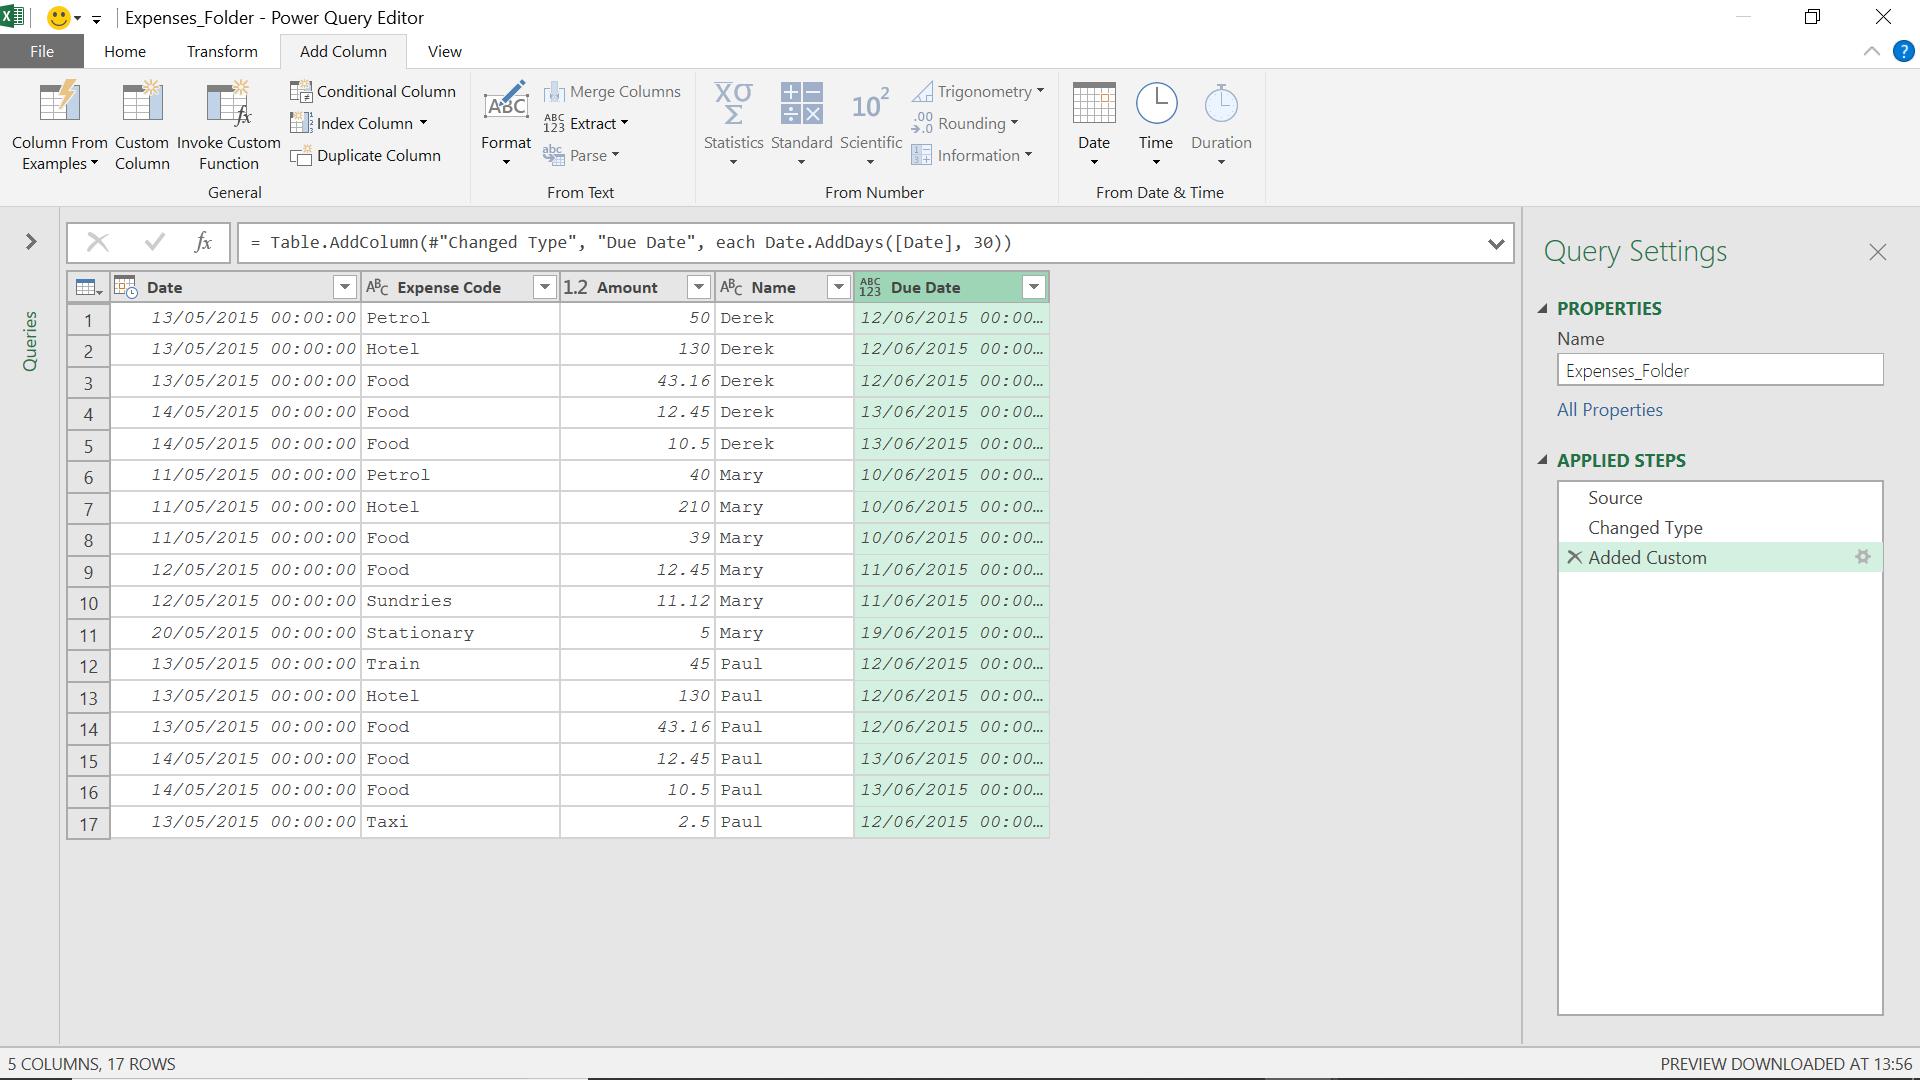
I can now see the deadline of when I should pay each expense.
Date.AddMonths
Date.AddMonths(datetime as datetime, n as number) as nullable datetime
Returns a DateTime value with the month portion incremented by n months.
If the salespeople’s contracts showed that they must be paid for their expenses within a month of incurring them, I could use this M function to calculate the due date.
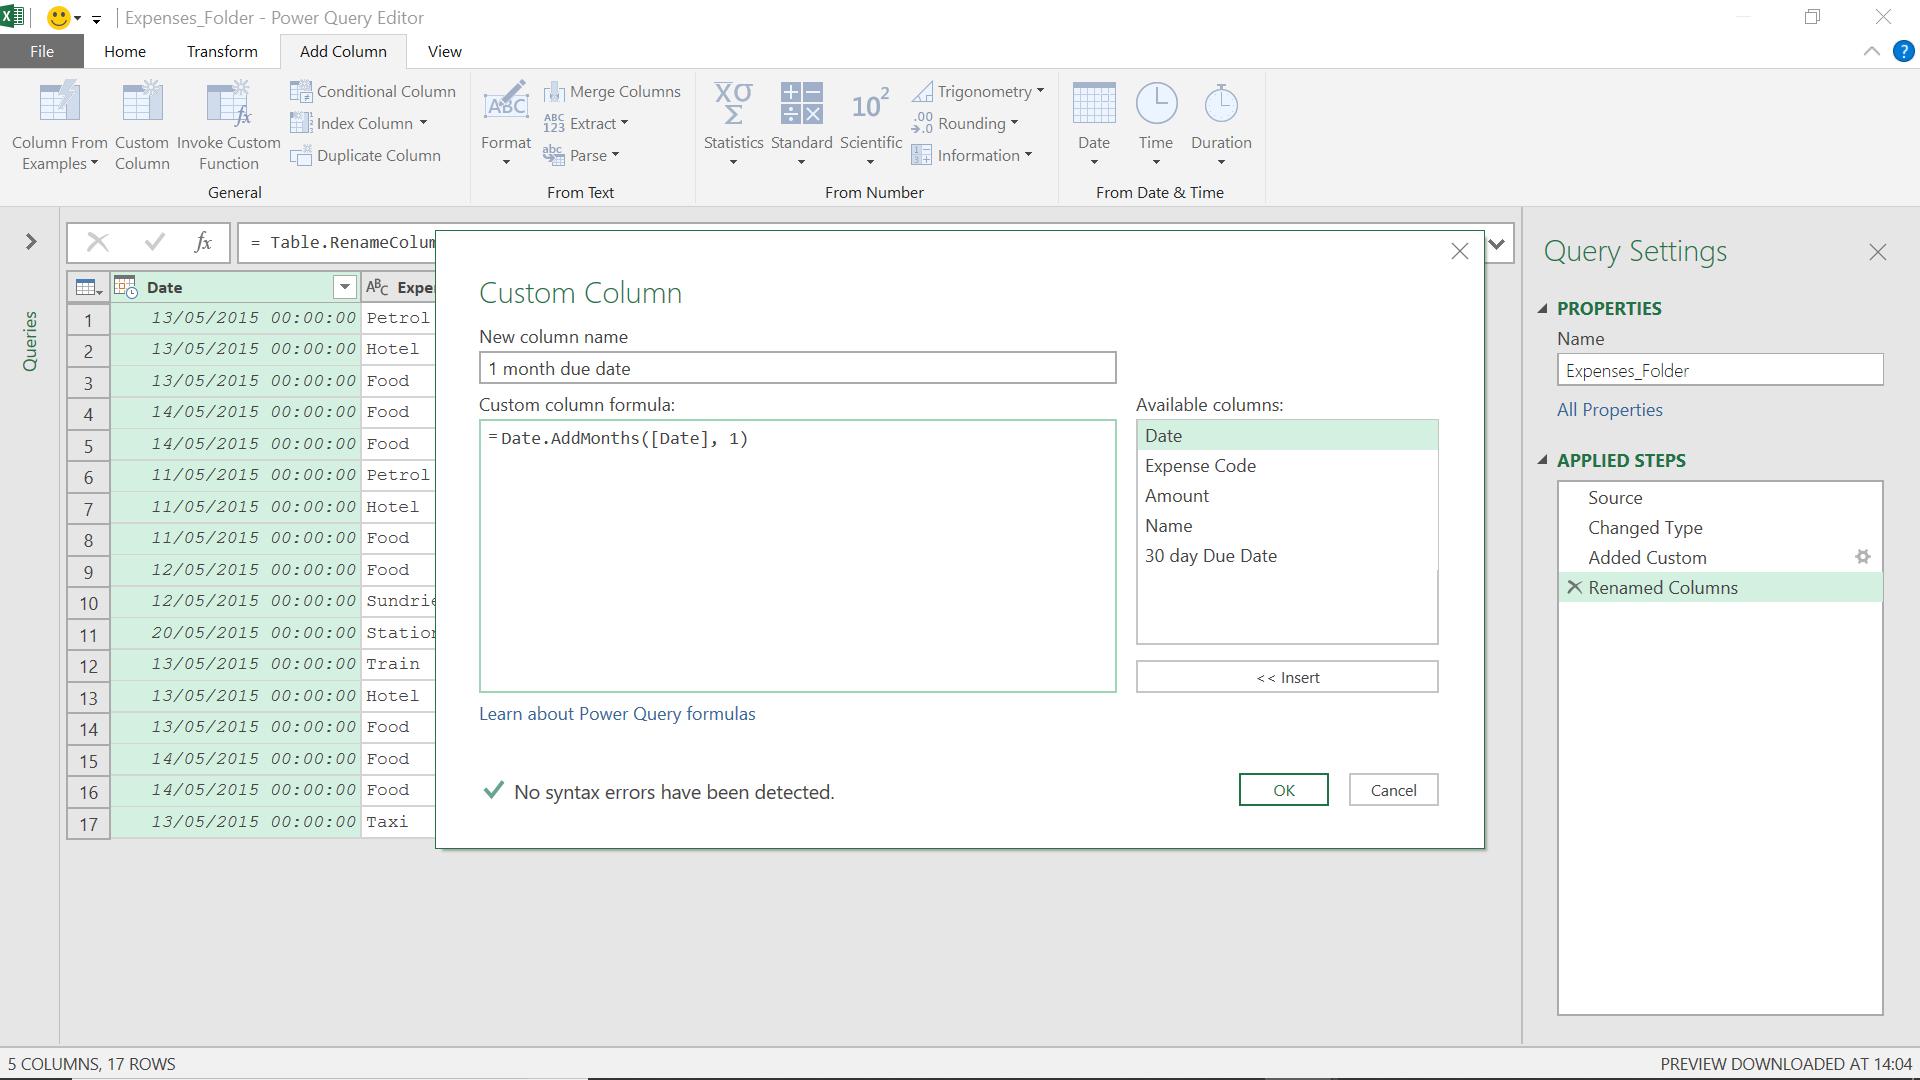
The M functionality I have used is
= Date.AddMonths([Date], 1)
The new due date has been calculated correctly.
Date.AddQuarters
Date.AddQuarters(datetime, quarters as number)
Returns a Date / DateTime / DateTimeZone value incremented by the number of quarters provided. Each quarter is defined as a duration of three months. It also handles incrementing the year portion of the value as appropriate.
I have decided that the payment will be marked as ‘aged’ once we reach the same position in the next quarter. To determine the date this will happen, I add a quarter to my due date.
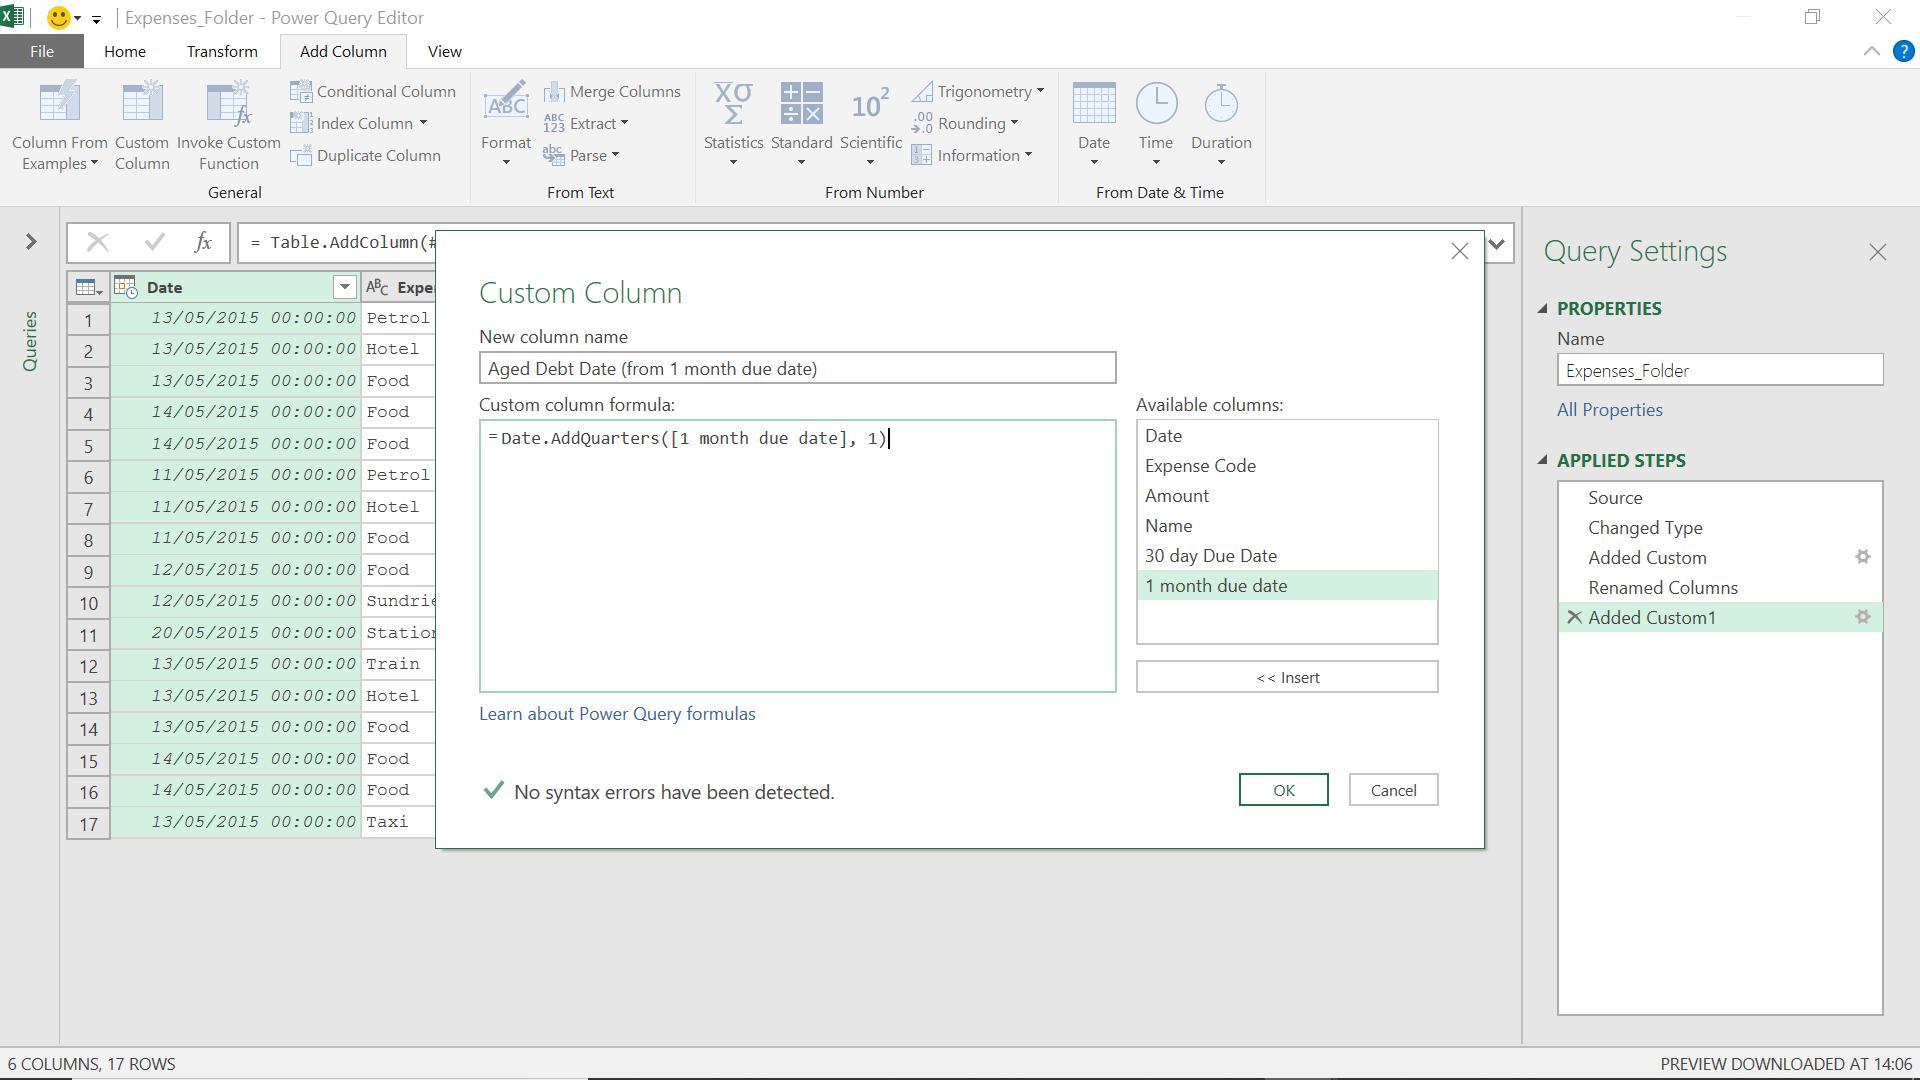
The M functionality I have used is
= Date.AddQuarters([1 month due date], 1)
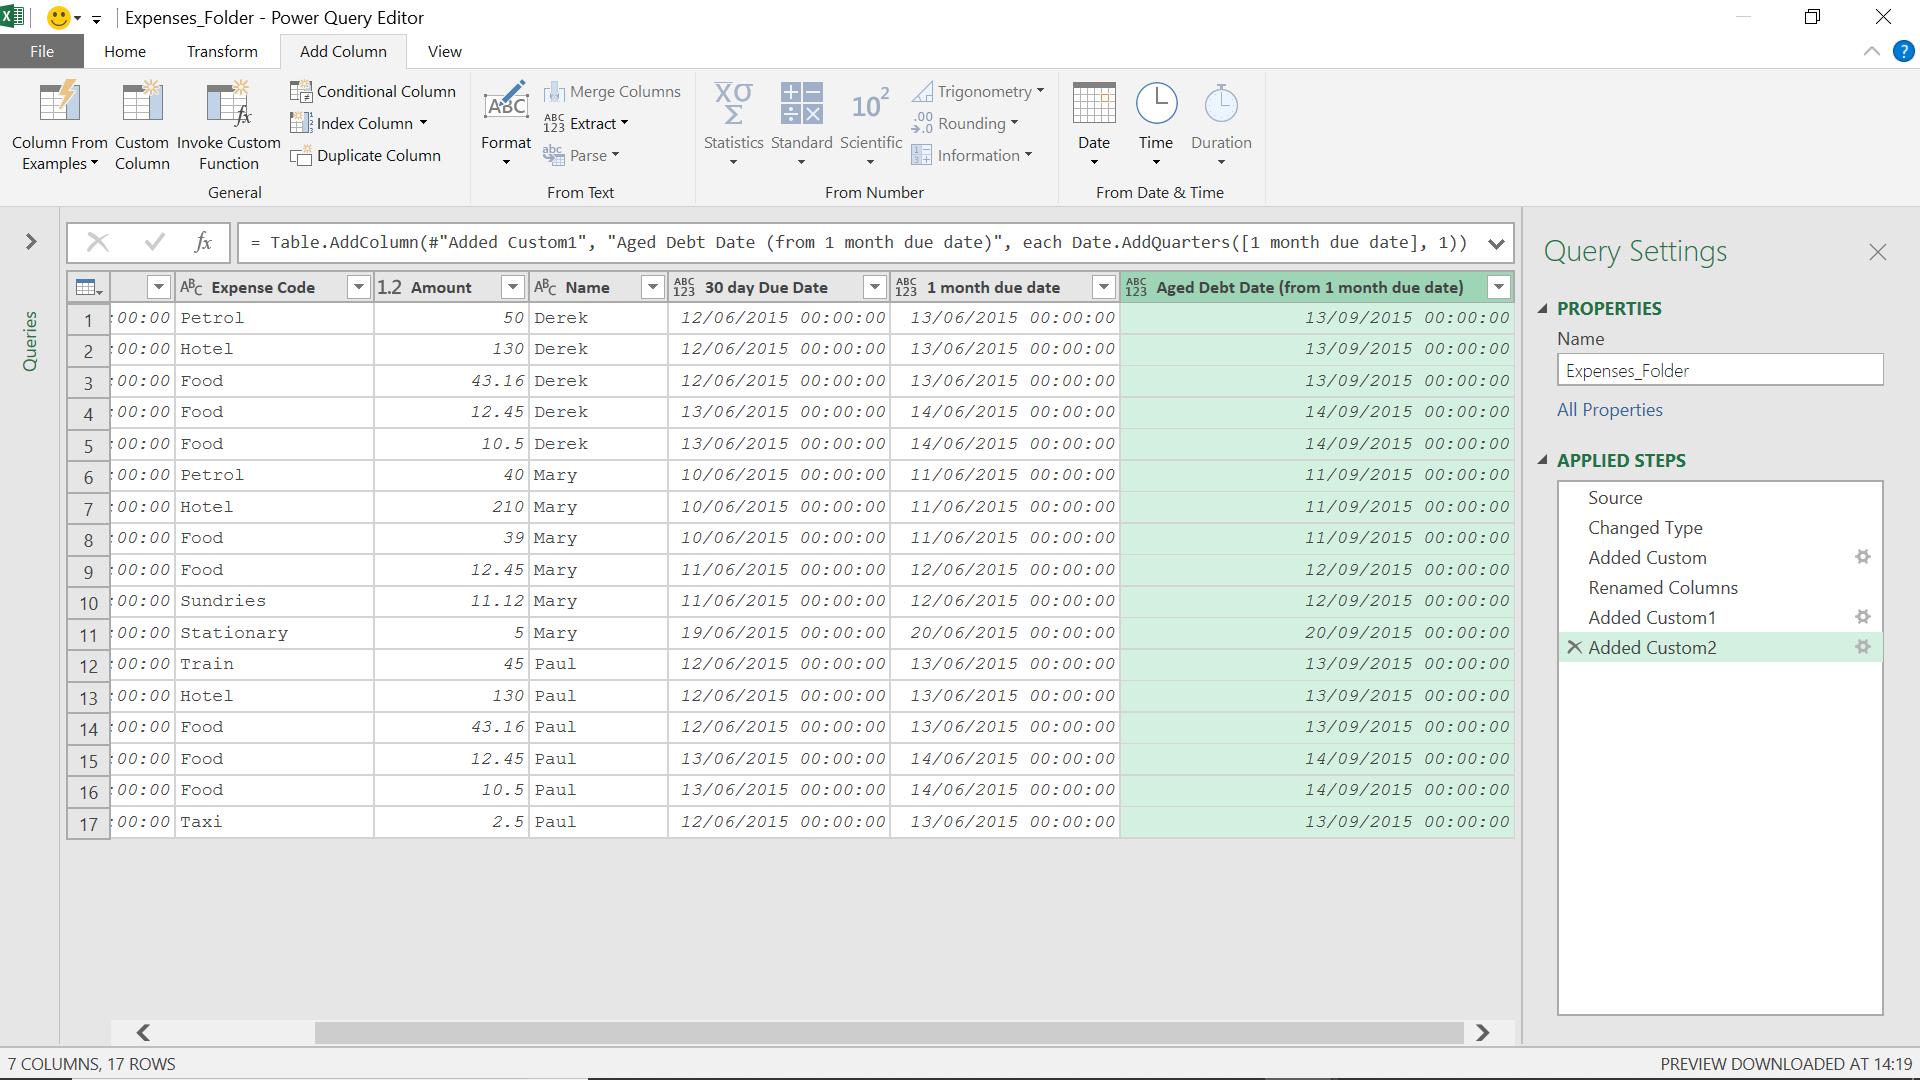
The aged debt date has been calculated correctly.
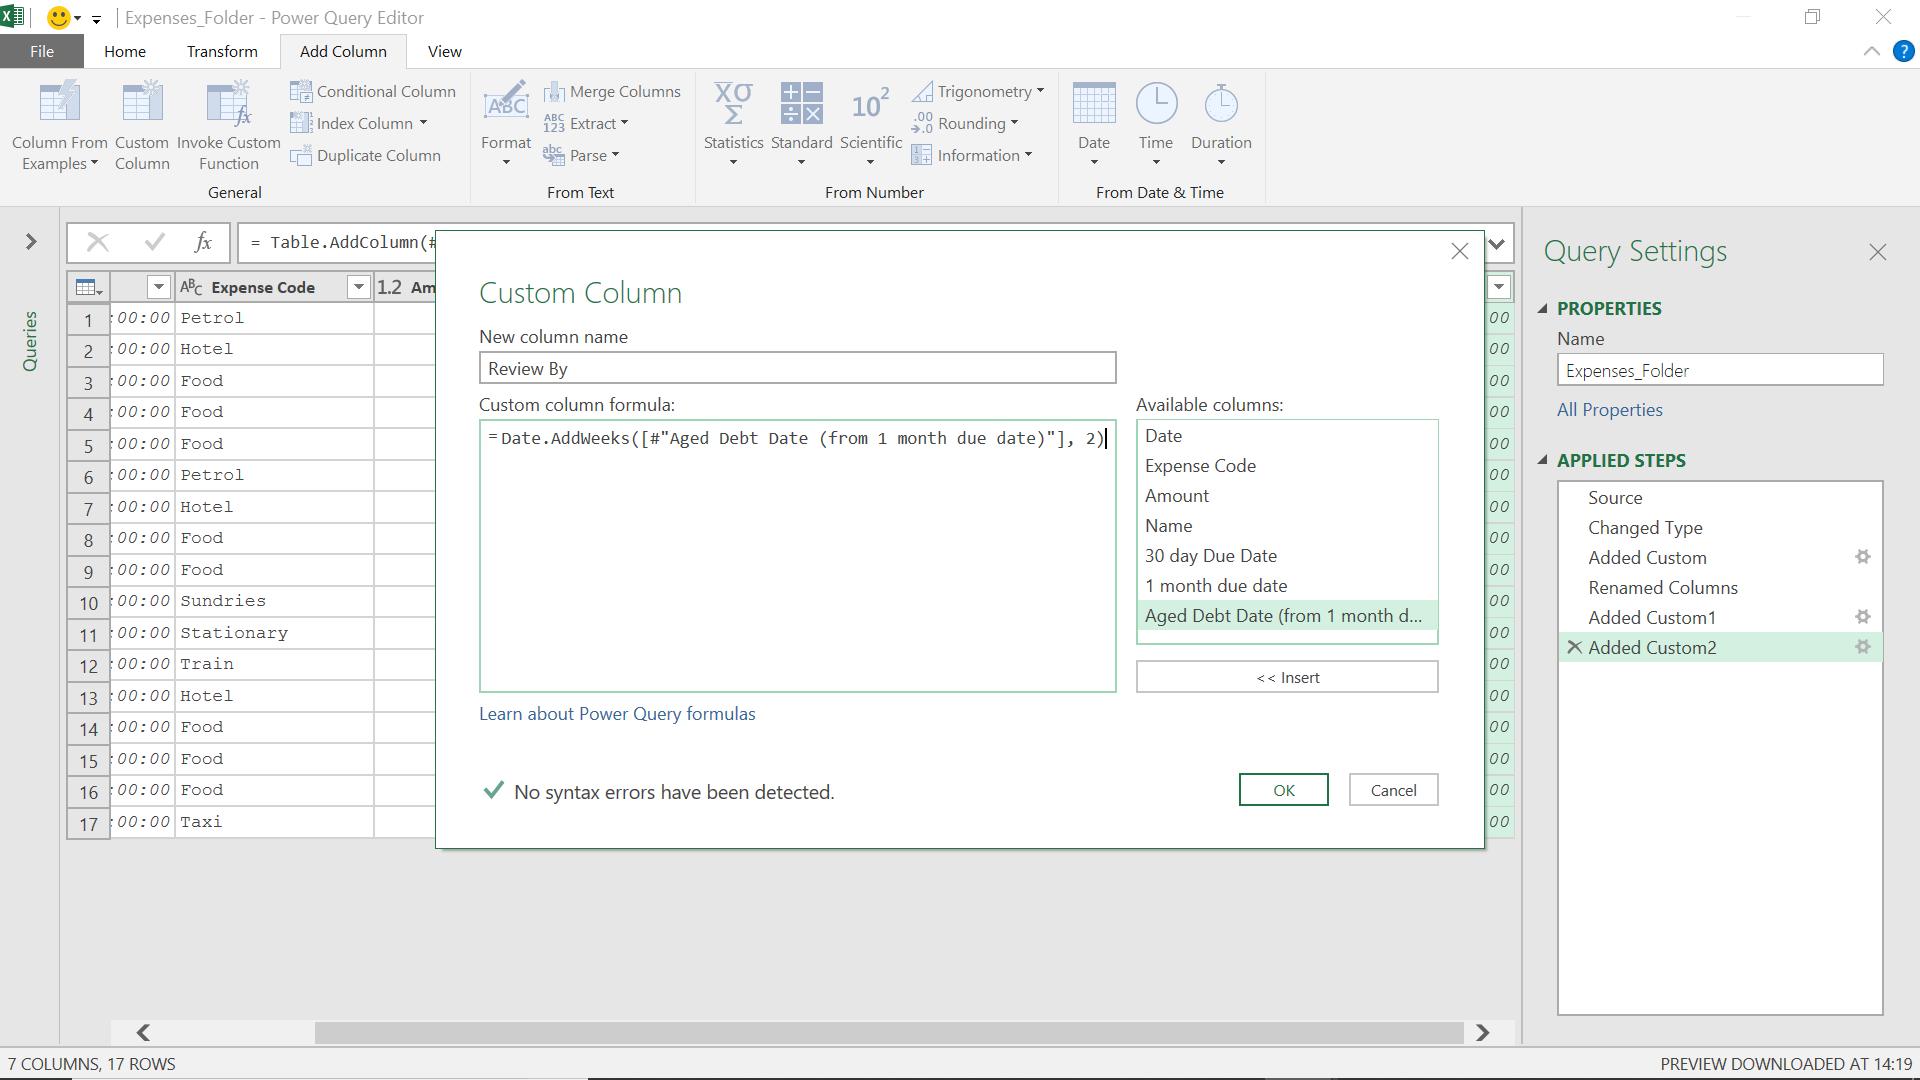
Date.AddWeeks
Date.AddWeeks(datetime, weeks as number)
Returns a Date / DateTime / DateTimeZone value incremented by the number of weeks provided. Each week is defined as a duration of seven days. It also handles incrementing the month and year portions of the value as appropriate.
I can also increment my date by a number of weeks, so I’ll use this functionality to create a date to review the expense payment.
The M functionality I have used is
= Date.AddWeeks([#"Aged Debt Date (from 1 month due date)"], 2)
So, I will review if the payment has been made two (2) weeks after it becomes an aged debt.
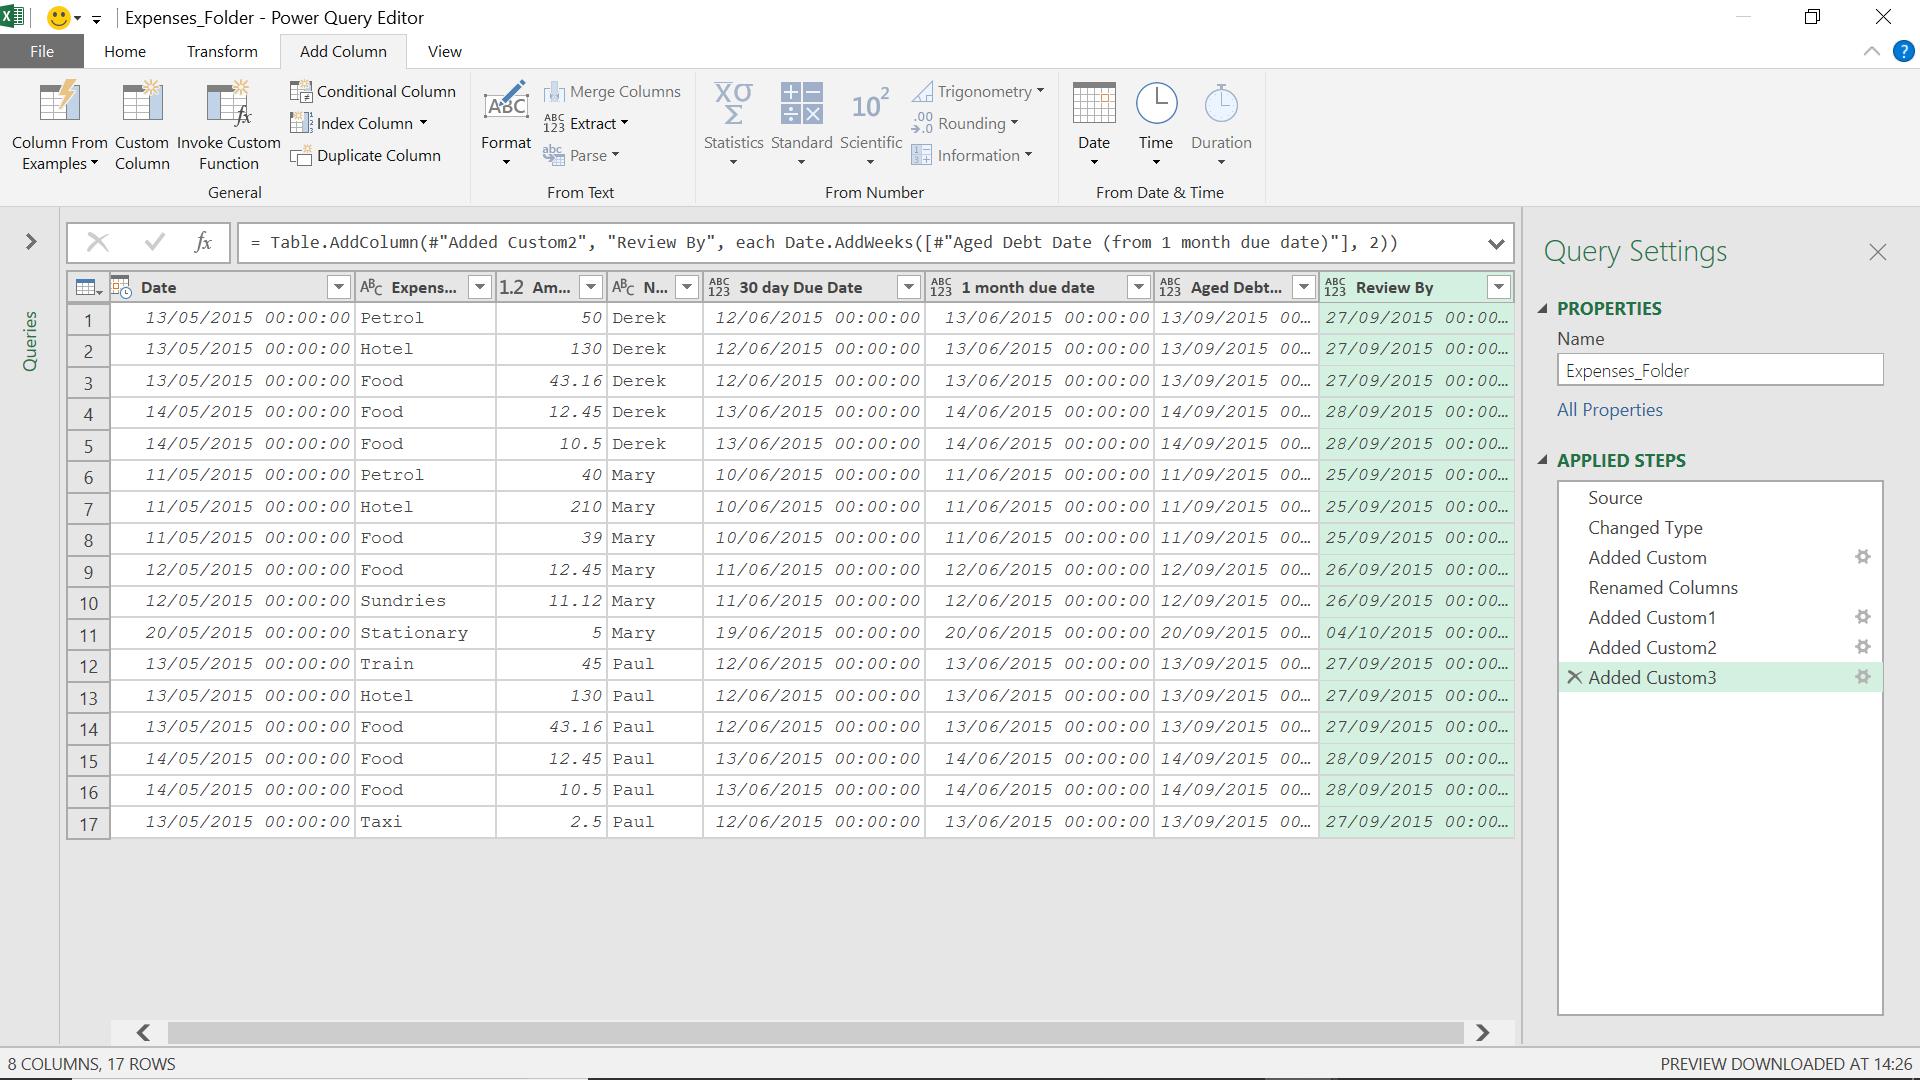
I can now see the review date.
Date.AddYears
Date.AddYears(datetime as datetime, years as number) as datetime
Returns a DateTime value with the year portion incremented by years.
This of course is when I will actually pay the expenses!
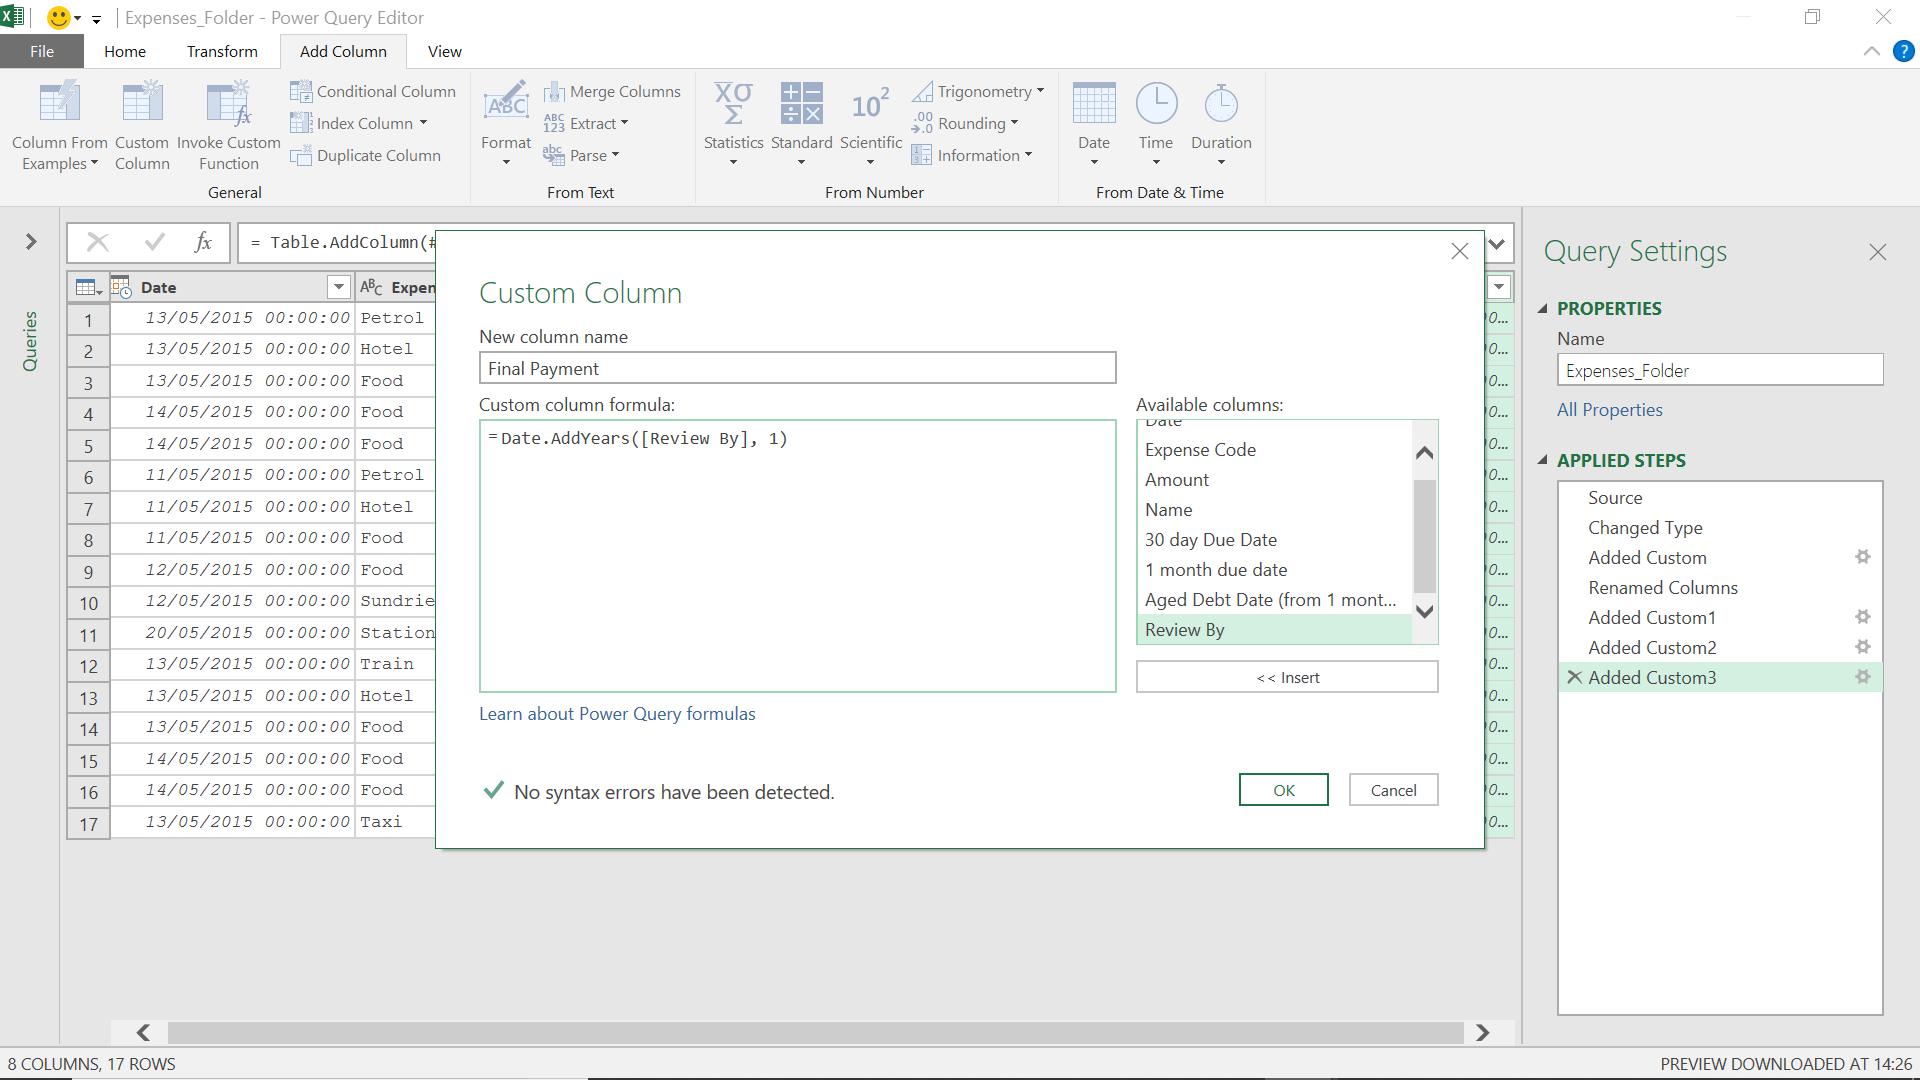
The M functionality I have used is
= Date.AddYears([Review By], 1)
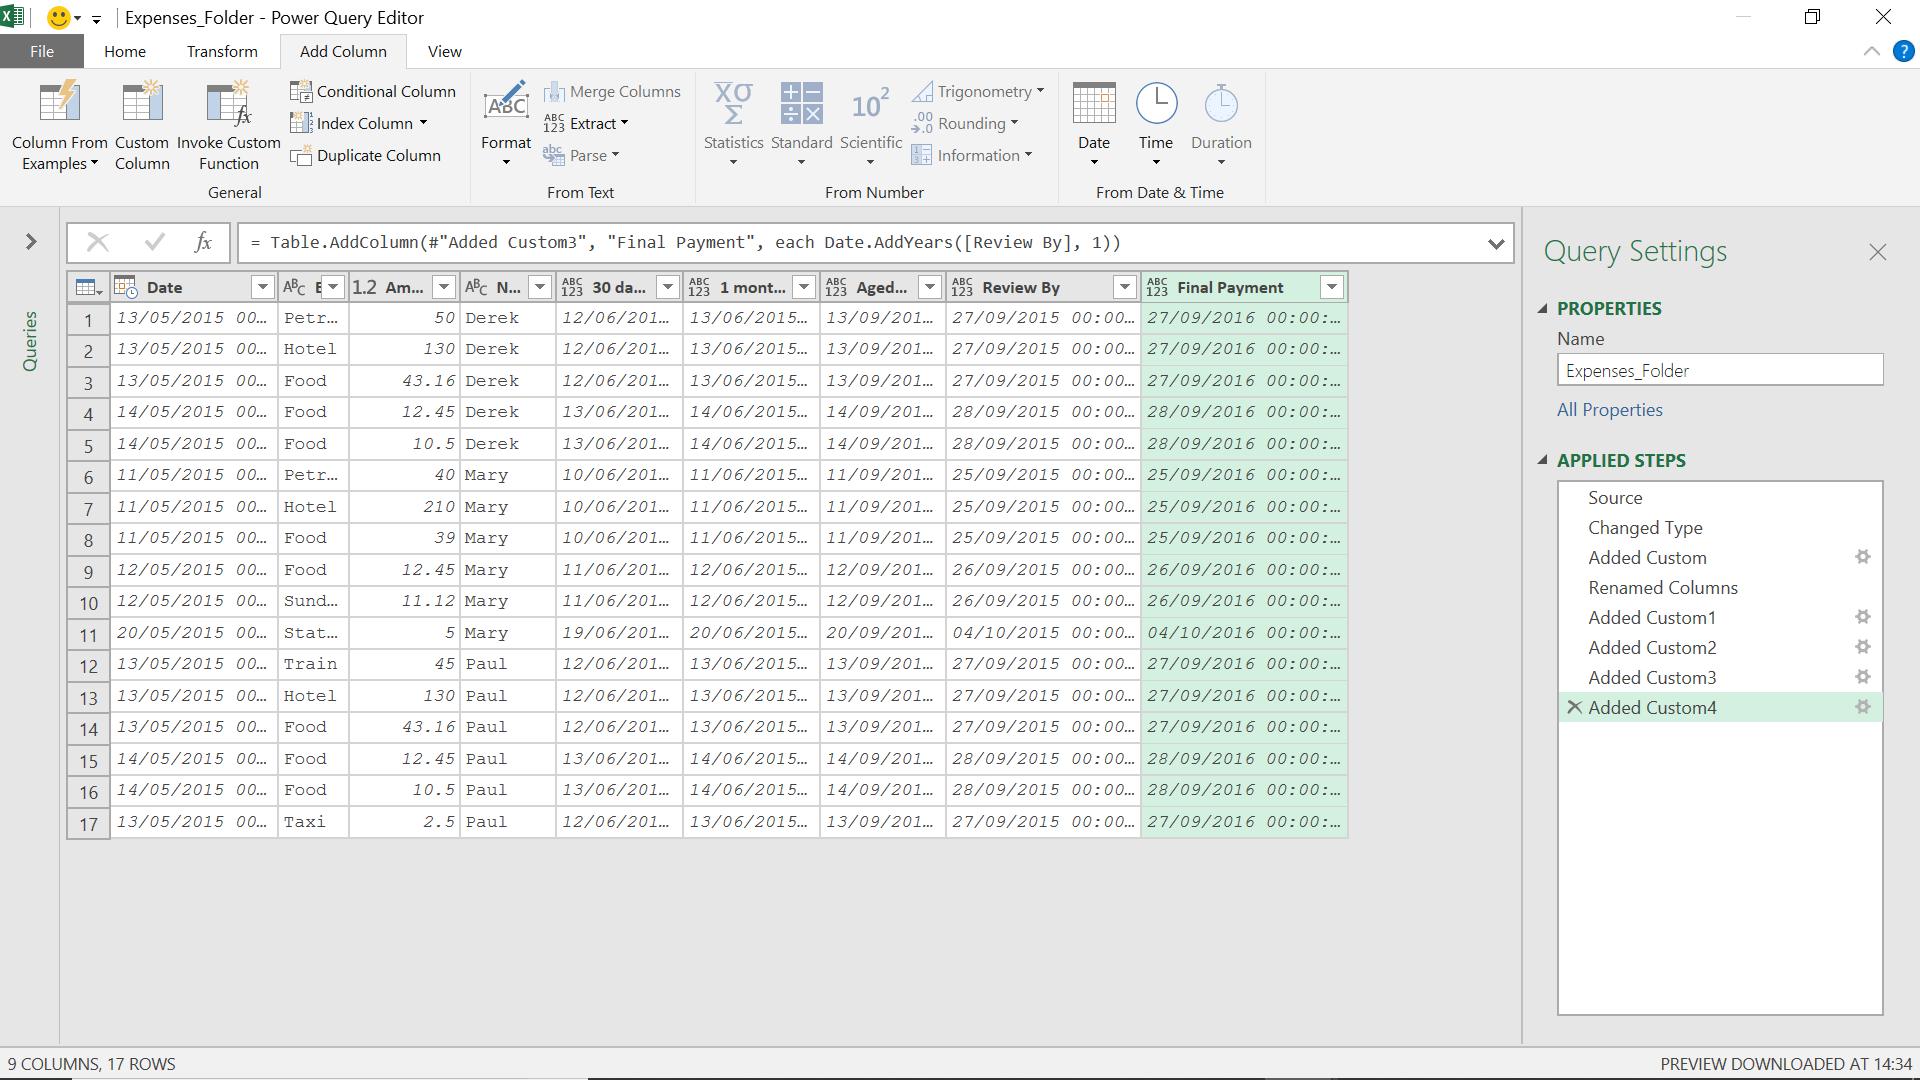
I can now see when the poor salespeople will finally be paid their expenses.
Come back next time for more ways to use Power Query!