
Power Query: Painless Unpivoting
11 January 2017
Welcome our new Power Query blog. Today we unpivot data ready to append it to a query.
Readers of the blogs so far will be following our expenses scenario where a number of CSVs (comma separated values files) containing expenses in a similar format have been extracted, transformed and loaded. Not everyone sticks to the standard format, however, as that would be far too convenient for data analysts!
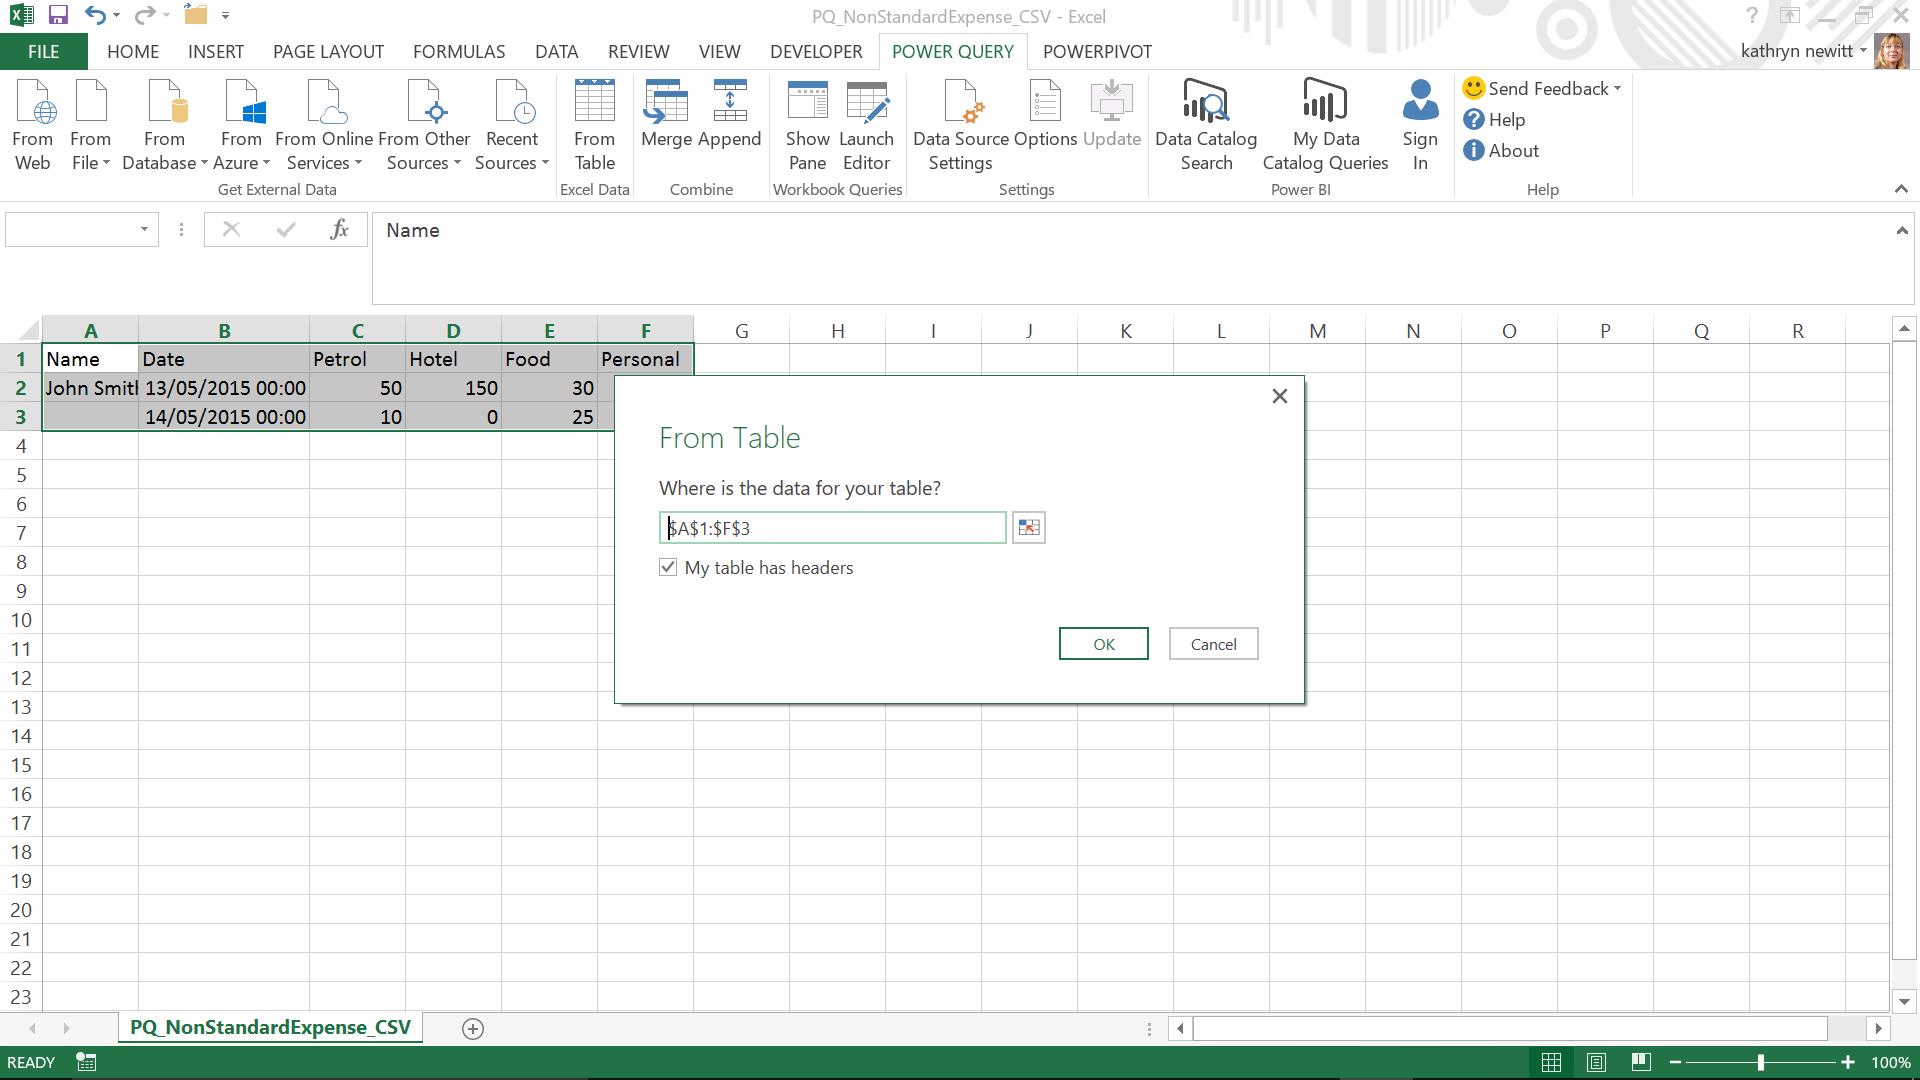
Let’s imagine PQ_NonStandardExpense_CSV has come in, and it is an expense csv which is not in the usual format because John has configured his data ready to create a graph of where his expenses go. Convenient for him, but not so great for appending to the existing expense query:

Luckily, Power Query has a button for this – in order to get this into our required column format we will need to unpivot the data.
The first step is to open the non-standard expense CSV and click somewhere in the table in the Excel workbook.
Choose to create a new Power Query, in this case From Table. A pop-up will appear to confirm the boundaries of the table – adjust this range if required. There is also a check box to indicate whether the table has headers:
Clicking ‘OK’ allows the data to be edited in the ‘Power Query Editor’ window as shown below:
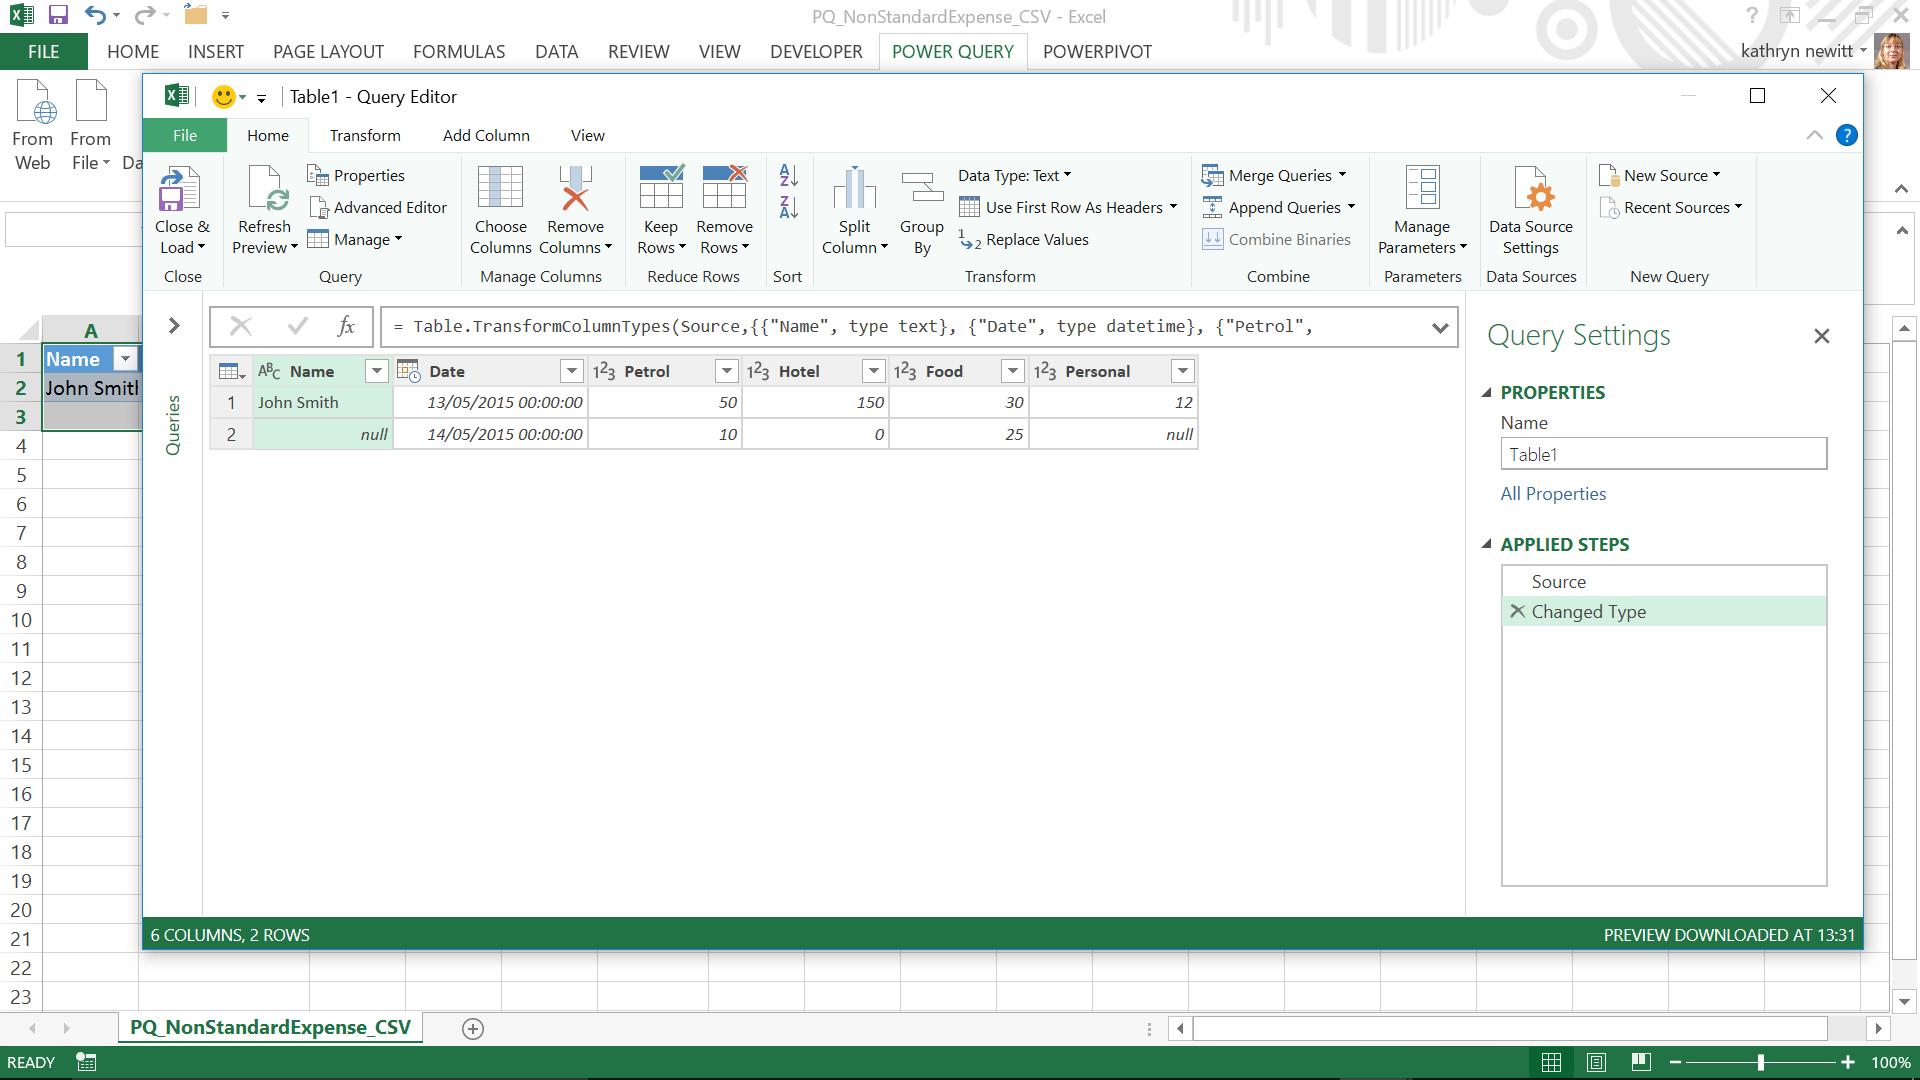
The first step for this example is to remove any unnecessary data – in this case John has added a personal expense column which is not required in the model. Highlight the column and either use the ‘Remove Column’ option on the ‘HOME’ tab, or right-click and choose Remove.
The name can then be filled down by highlighting the Name column and using the ‘Fill Down’ option on the ‘Transform’ tab.
Finally, the unpivot process - select any columns to be ‘unpivoted’ (holding down SHIFT) – in this example this is everything except Name and Date. In the ‘Any Columns’ group on the ‘Transform’ tab there is an option to ‘Unpivot Columns’ – there are two options, either unpivot the selected columns, or everything except the selected columns, which can save time depending on the proportion of columns that need to be unpivoted. The unpivot options are also available by right-clicking any of the highlighted columns:
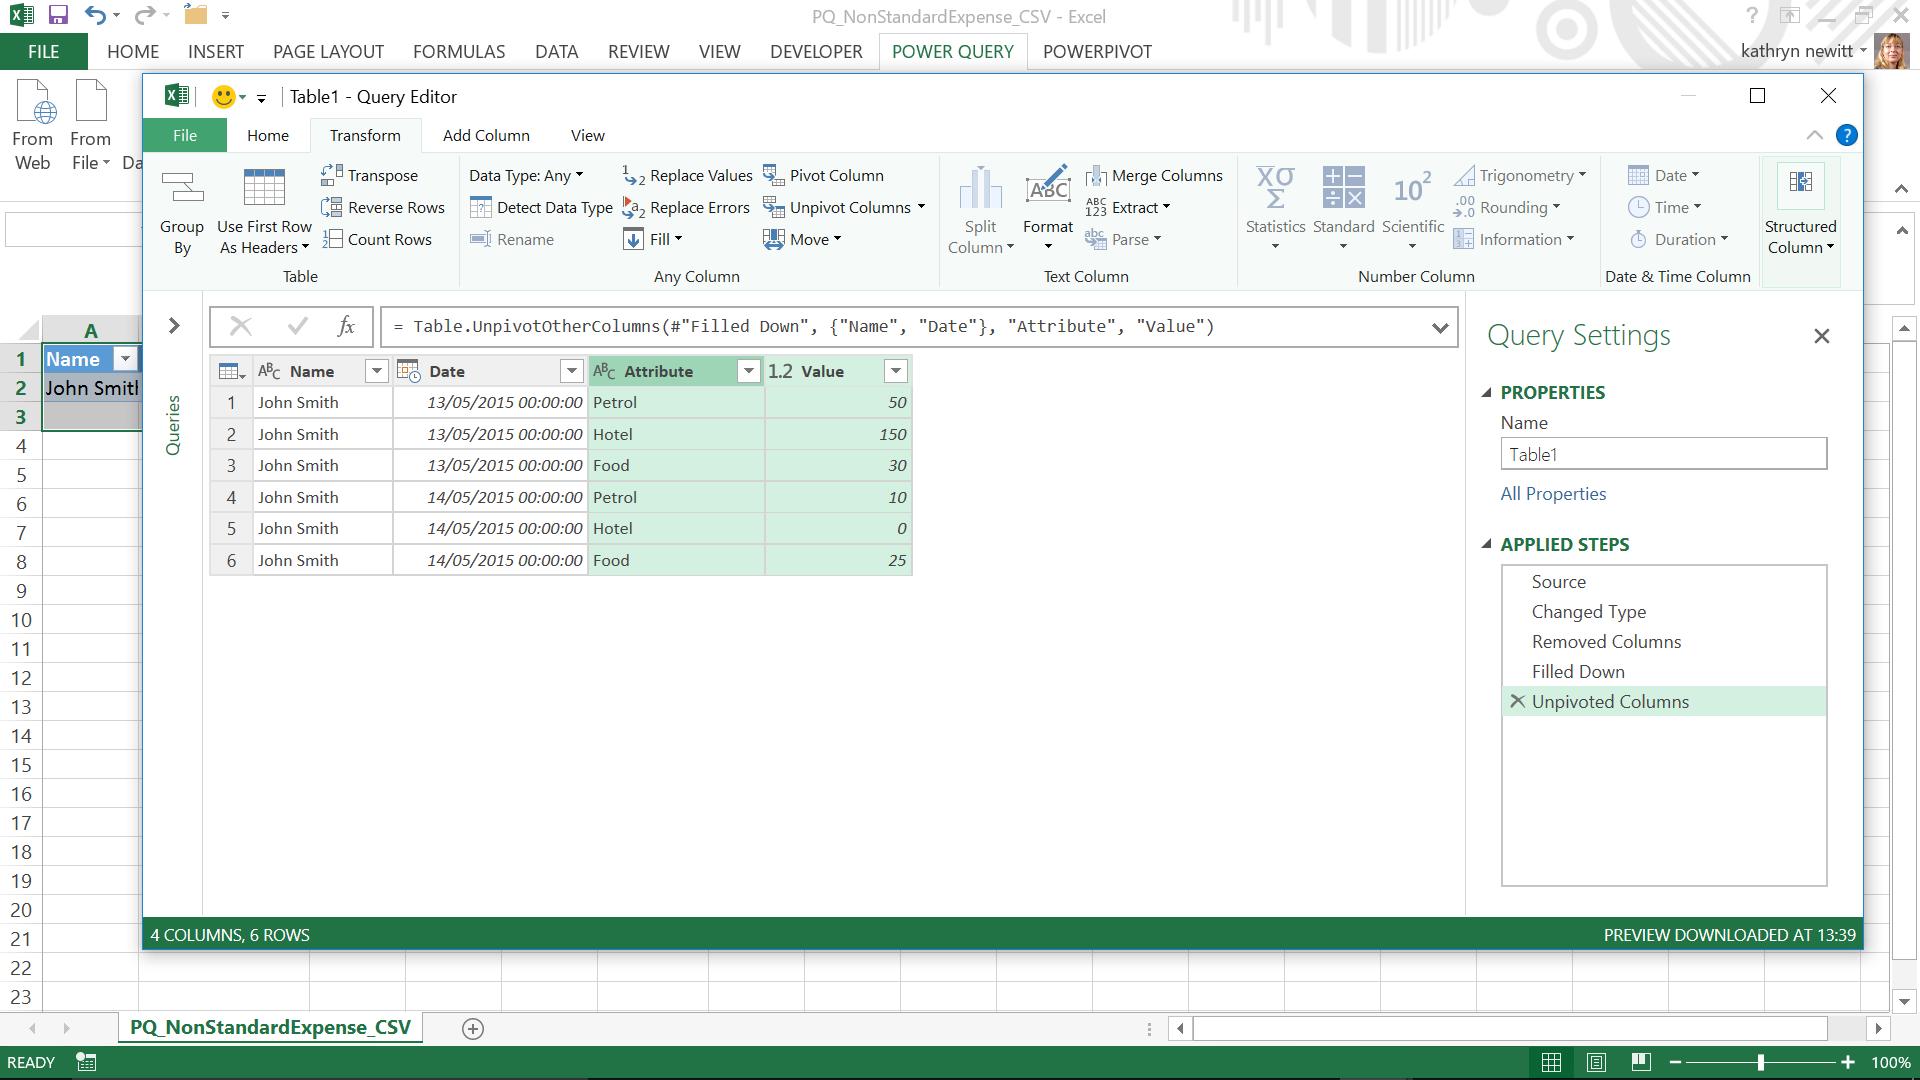
One click and everything is unpivoted as required! The small changes left to do are to transform the unpivoted columns to match the other expenses by renaming the headings and changing the data type on the amount column to currency – these changes can be made using the ‘Any Column’ group on the ‘Transform’ tab or by right-clicking the selected column and selecting the appropriate action. The data is then ready to be uploaded or appended to an existing expenses query – which we have already covered in Power Query - Appending Files.
Want to read more about Power Query? A complete list of all our Power Query blogs can be found here. Come back next time for more ways to use Power Query!