Power Query: It Makes All Types
29 March 2023
Welcome to our Power Query blog. This week, we create a linked type.
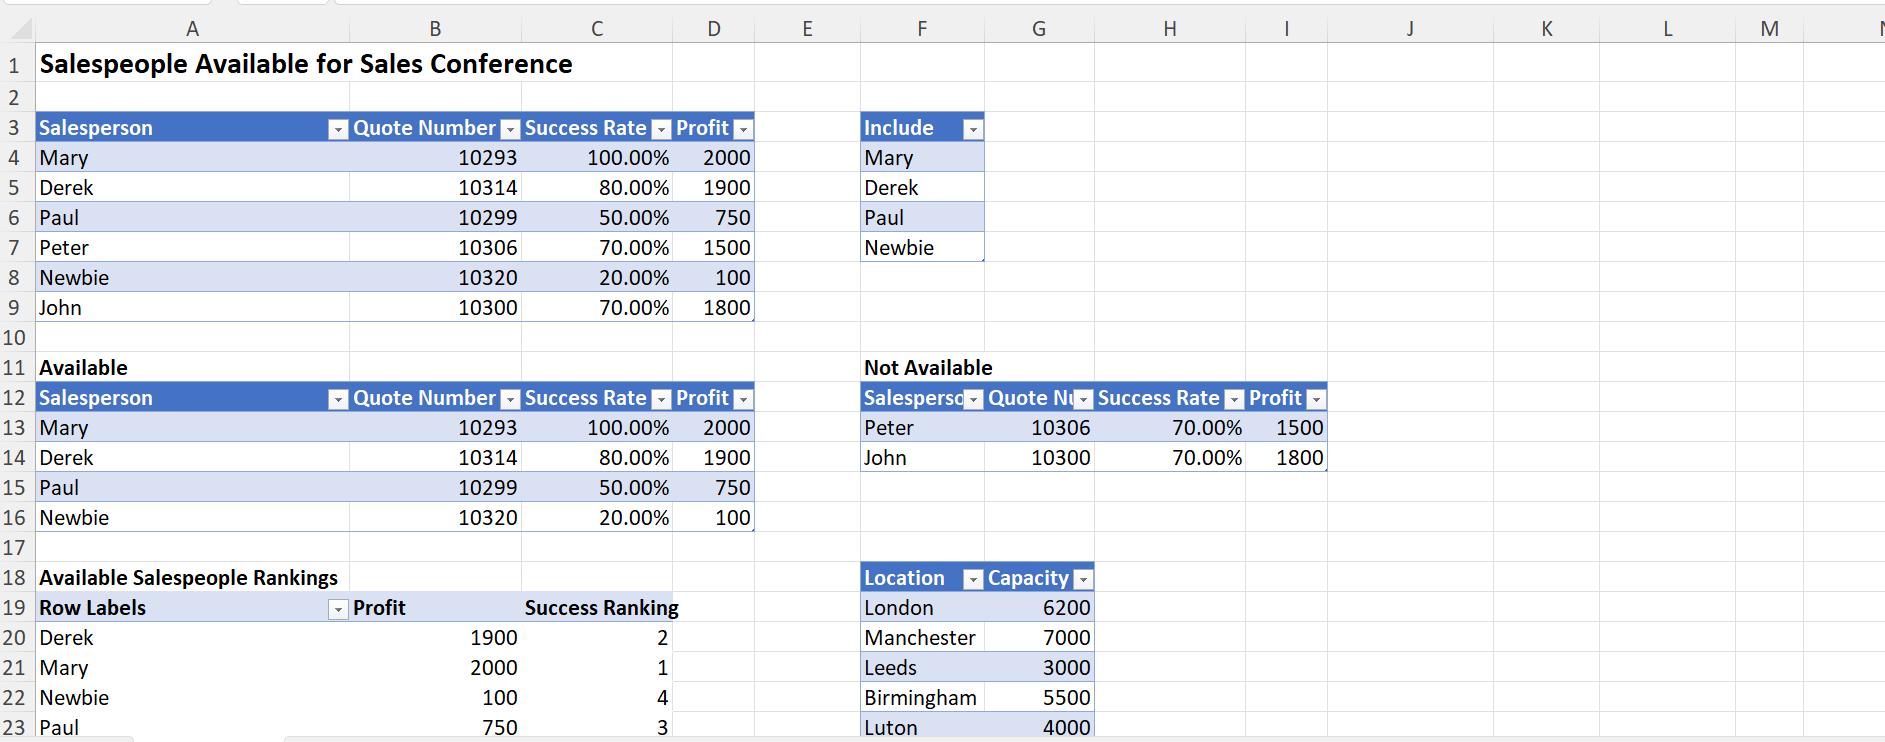
I have been asked to add the tent types to the sheet showing the availability of salespeople for the upcoming conferences:
I start by extracting the data. On the ‘Get & Transform’ section of the Data tab, I use the ‘Get Data’ dropdown:
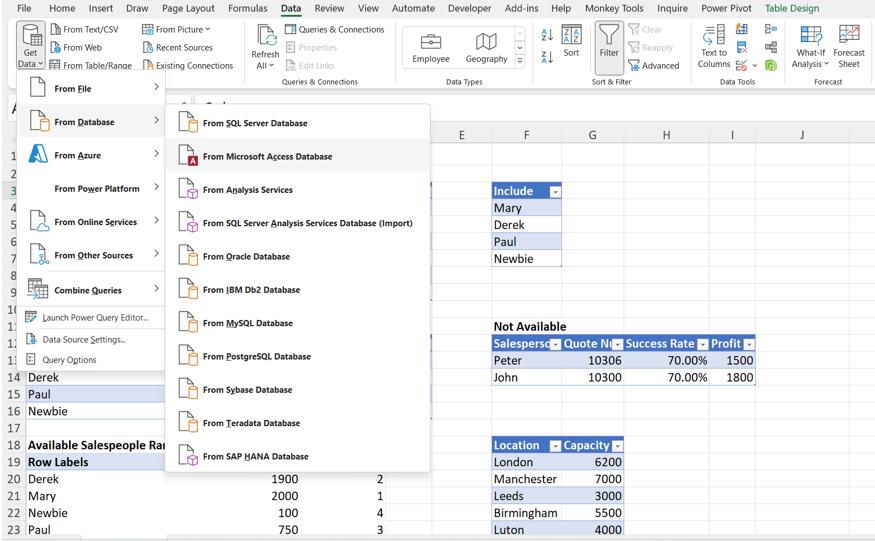
I choose ‘From Microsoft Access Database’ from the ‘From Database’ dropdown. I can then browse to the location of the database and view the tables:
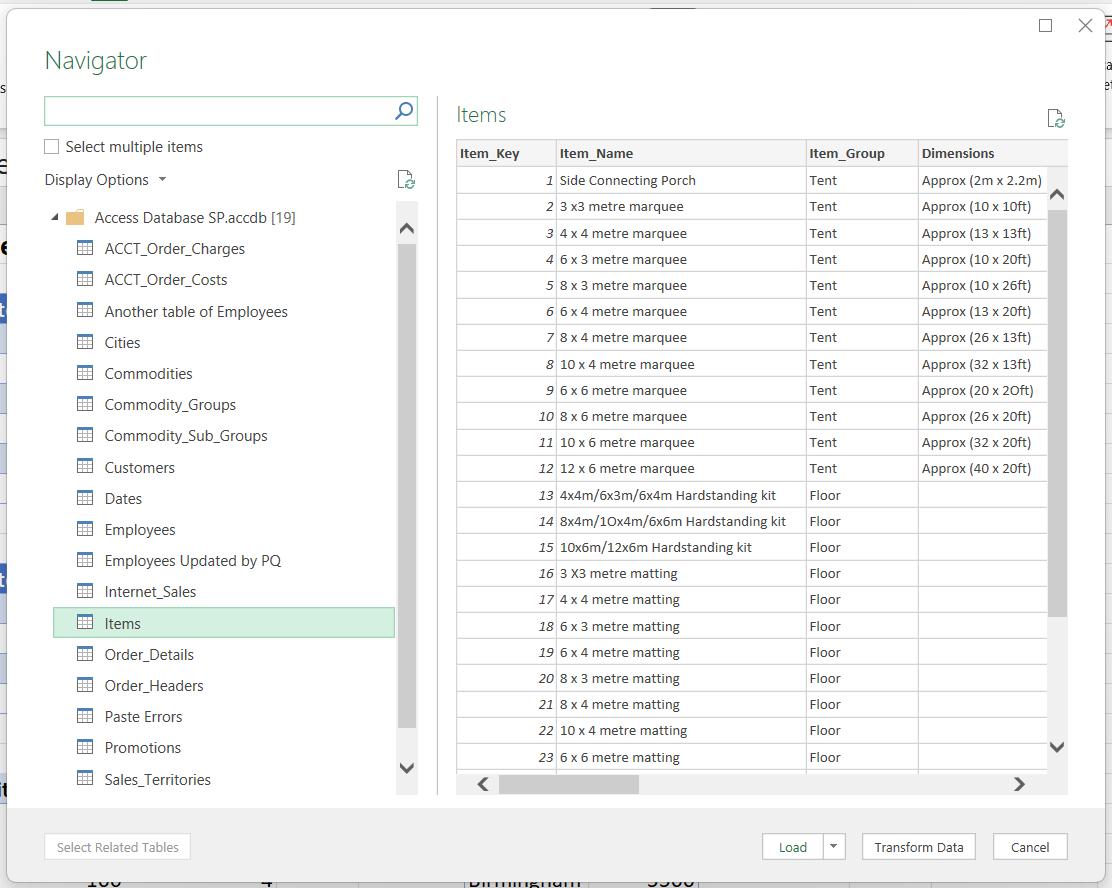
I select the Items table and choose to ‘Transform Data’.
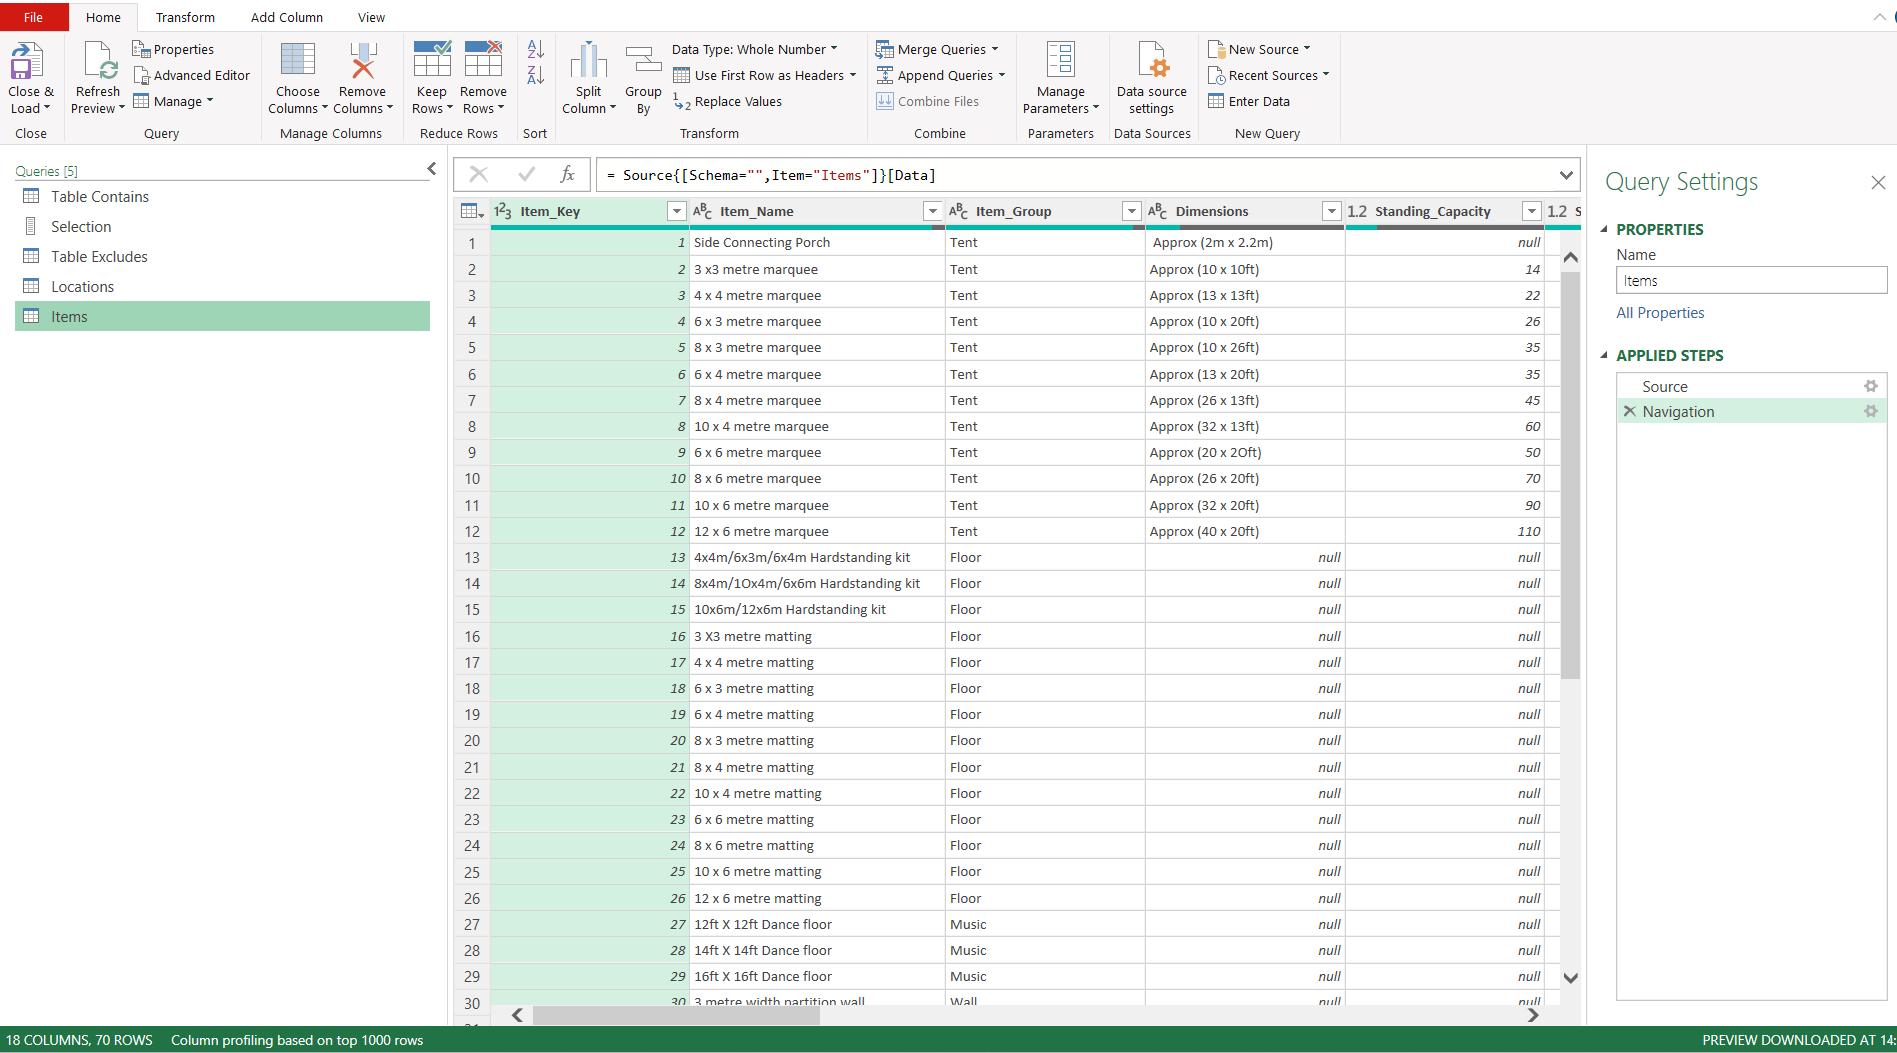
I can see at the bottom-left of the screen that I have 18 columns of data. The manager is adamant that all 18 columns should be available on the sheet. I choose ‘Close & Load To…’ from the ‘Close & Load’ dropdown on the Home tab:
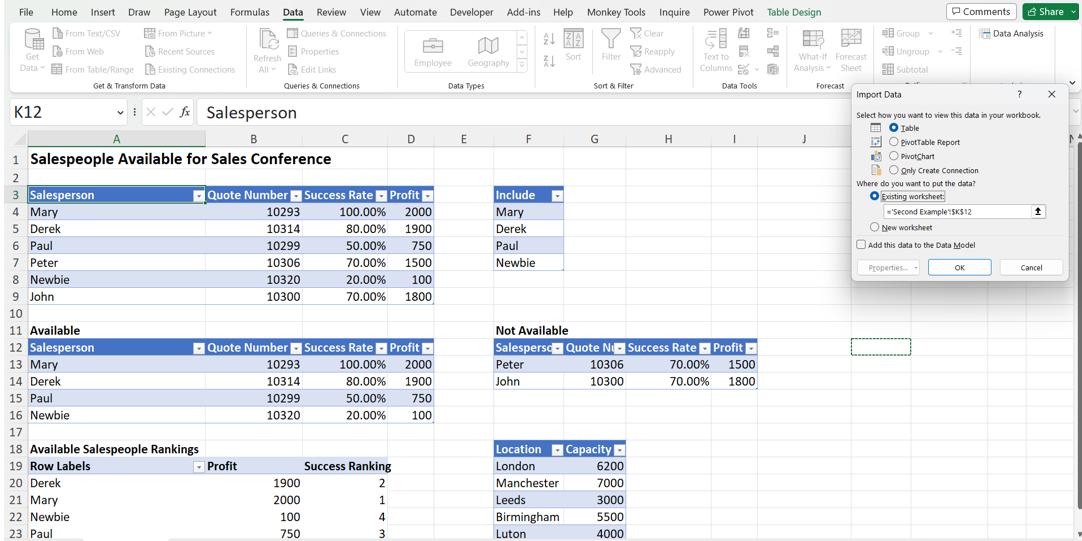
The requirement is for the Table to appear at cell K12, so I choose this location and click OK:
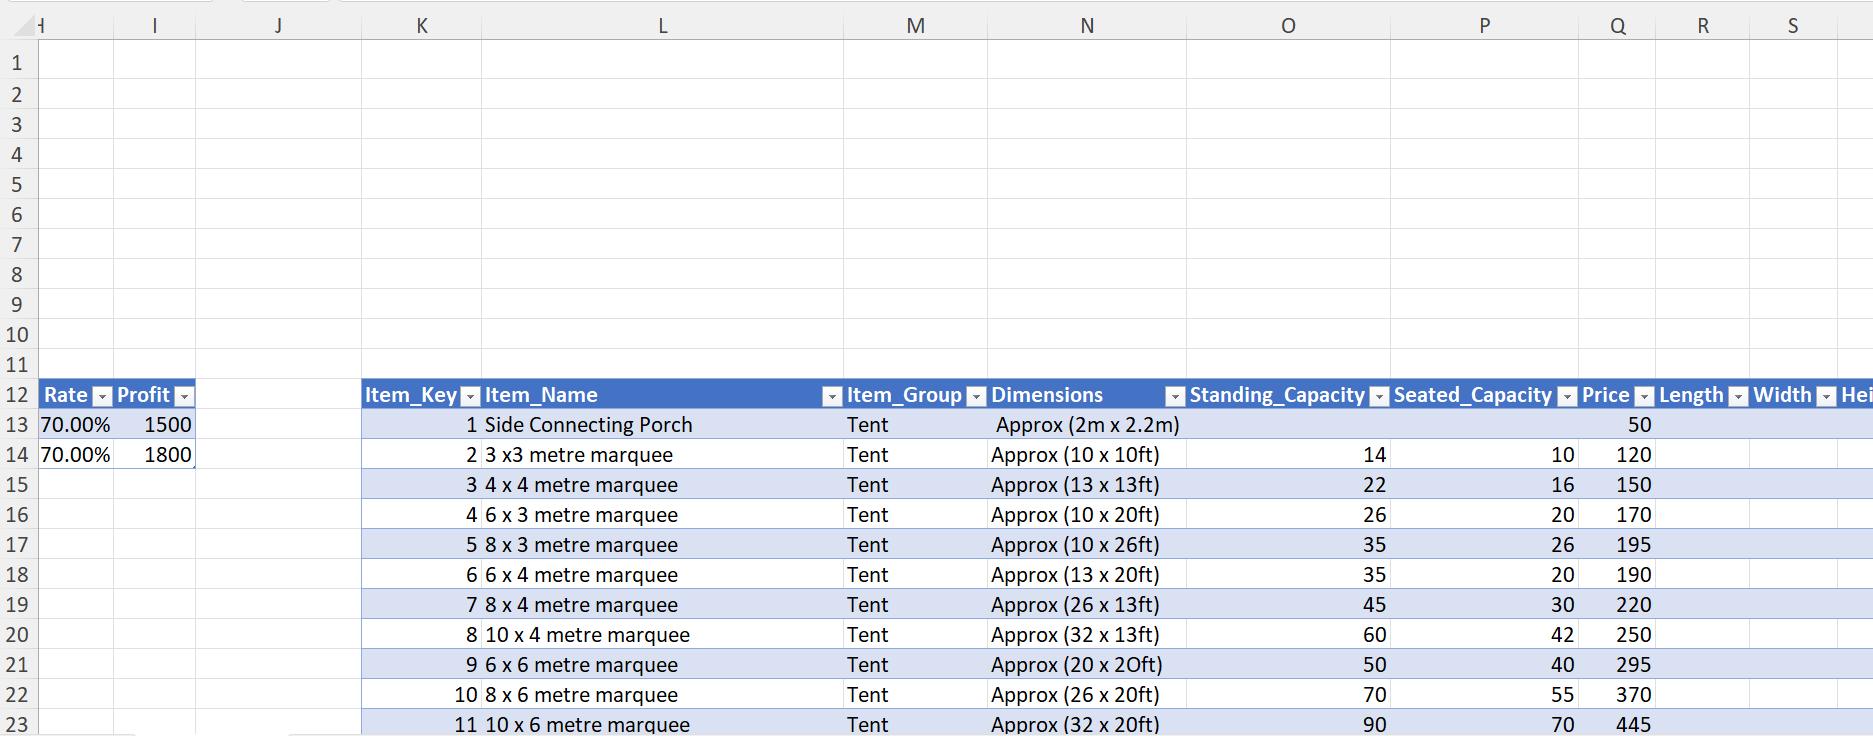
If you’d like to know why my output is a blue table, check out Power Query Tables Don’t Have to be Green!
Most of the data is not visible from the main area where the rest of the Tables are. I need a better way of giving the users access to the data. I go back to the Items query and select all my data by clicking in any column and using CTRL + A:
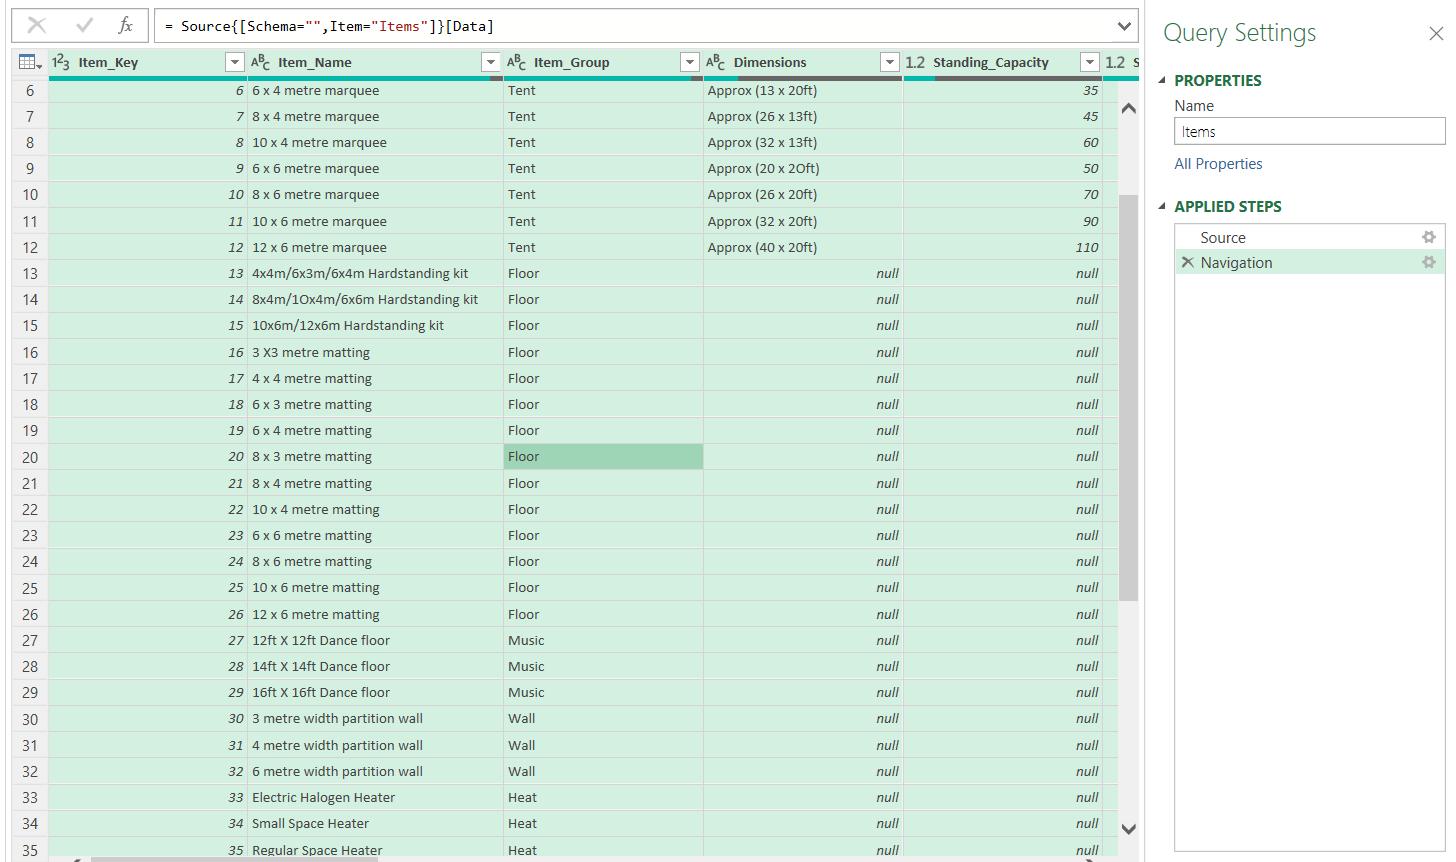
In the Transform tab, I locate the ‘Structured Column’ section, and choose ‘Create Data Type’:

Clicking on this will allow me to create a custom rich (aka linked) data type.
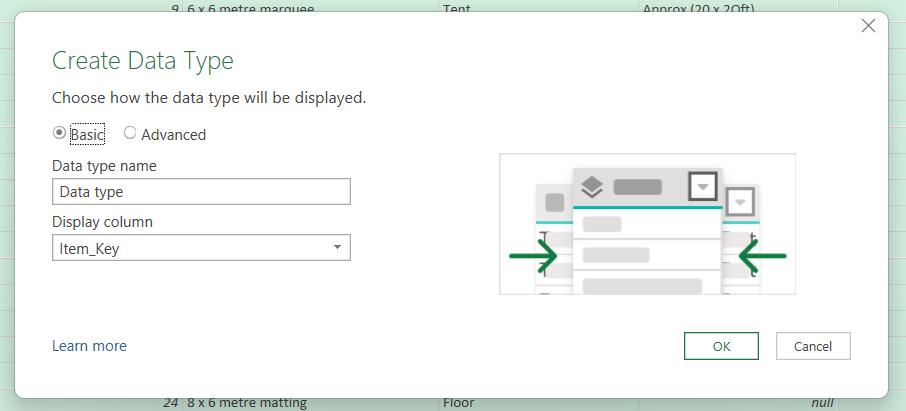
I am prompted to name my data type and indicate the ‘Display column’. This is the column that will be the key to access the other data, and that the users will be most likely to identify the data by.
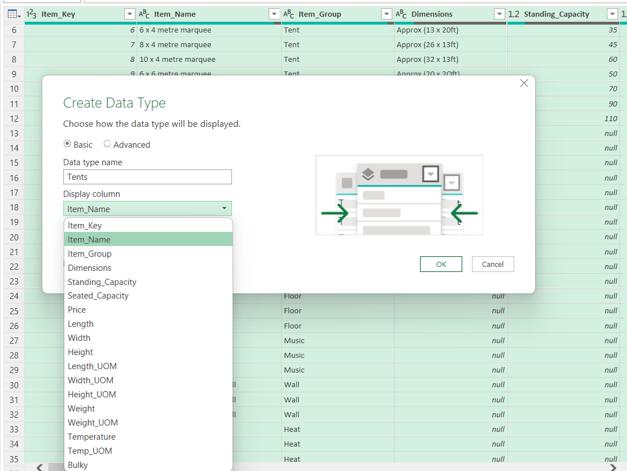
I choose to call my data type ‘Tents’ and choose Item_Name to appear in the sheet and link to the other data.
If I had chosen the Advanced option, then I could select which data to associate with the data type and change the order of the selected data:
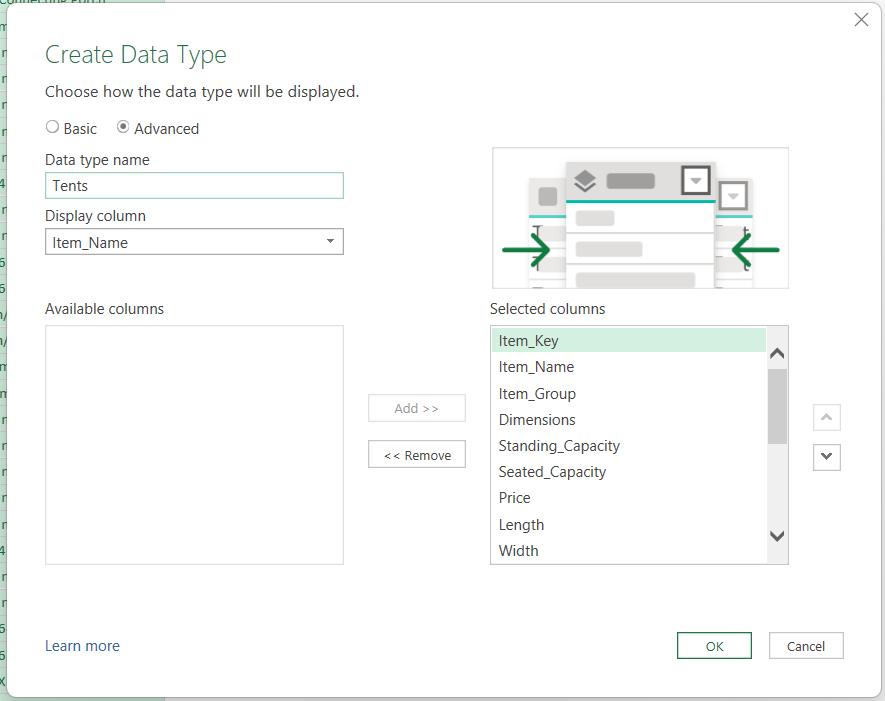
I am happy with the ‘Selected columns’ so I click OK, and the query is converted to a data type:

I can now ‘Close & Load’ to go back to Excel:
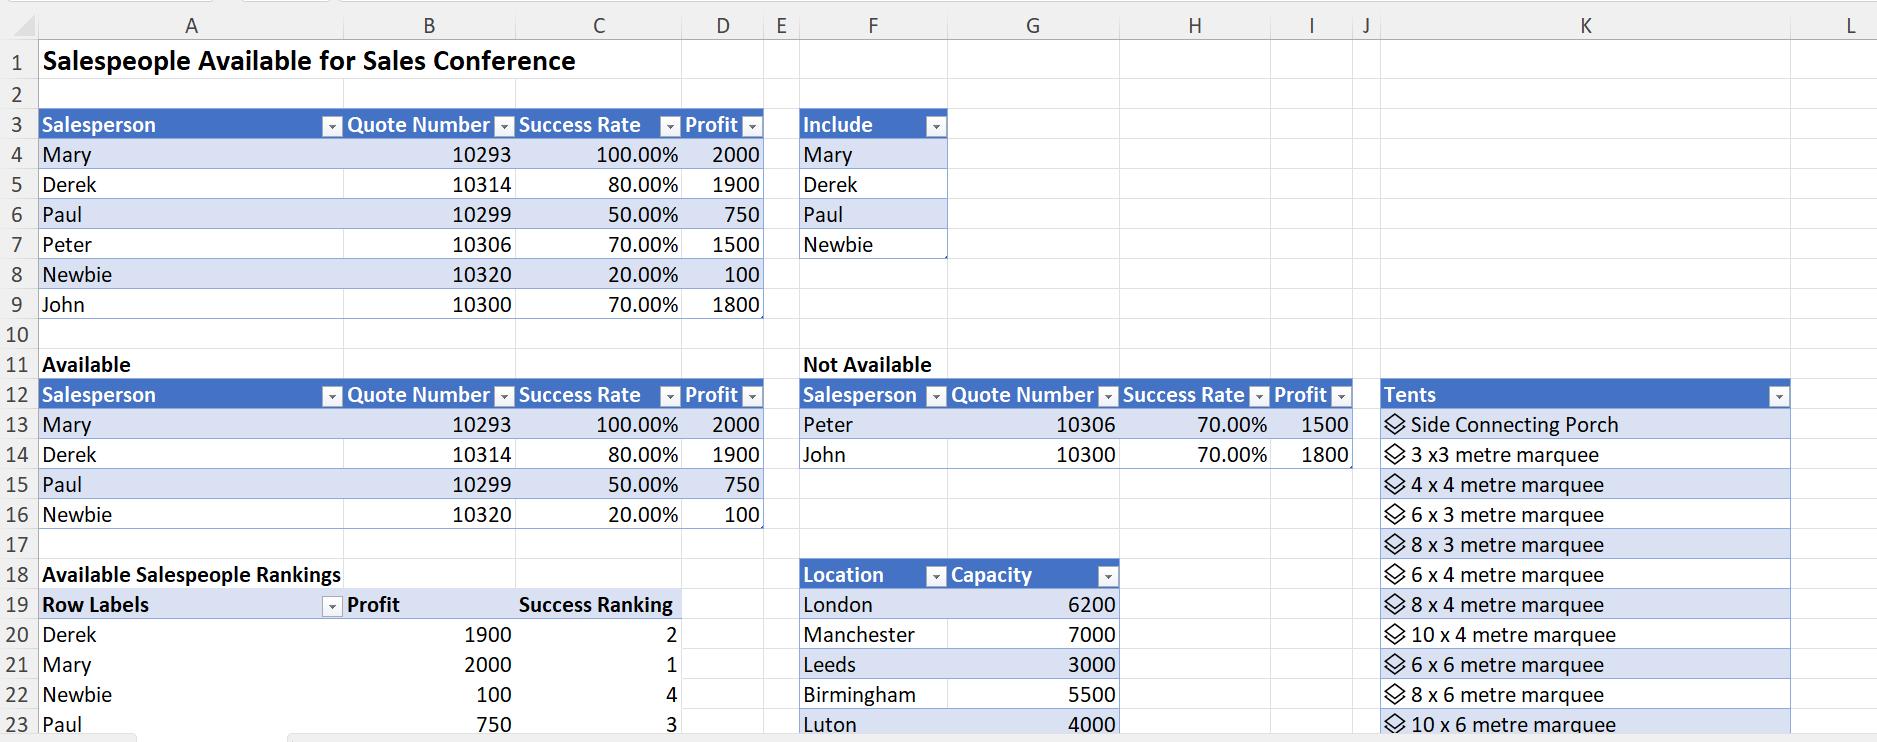
Now the table is one column, it fits in with the other data. The icon next to the tent name tells the user that this is a linked data type. If I click on one of the tent names, I can access the linked menu:
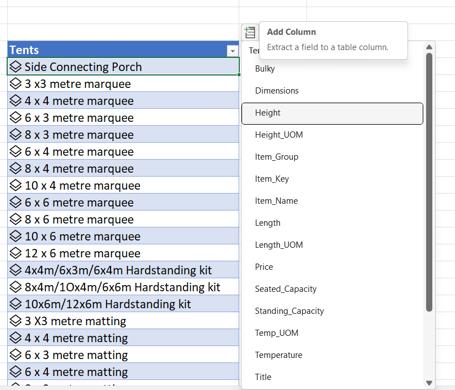
Clicking on one of these options would add a column with that title e.g. ‘Height’, containing the data for all the tent types. In this example however, clicking on the icon in the first column is more useful:
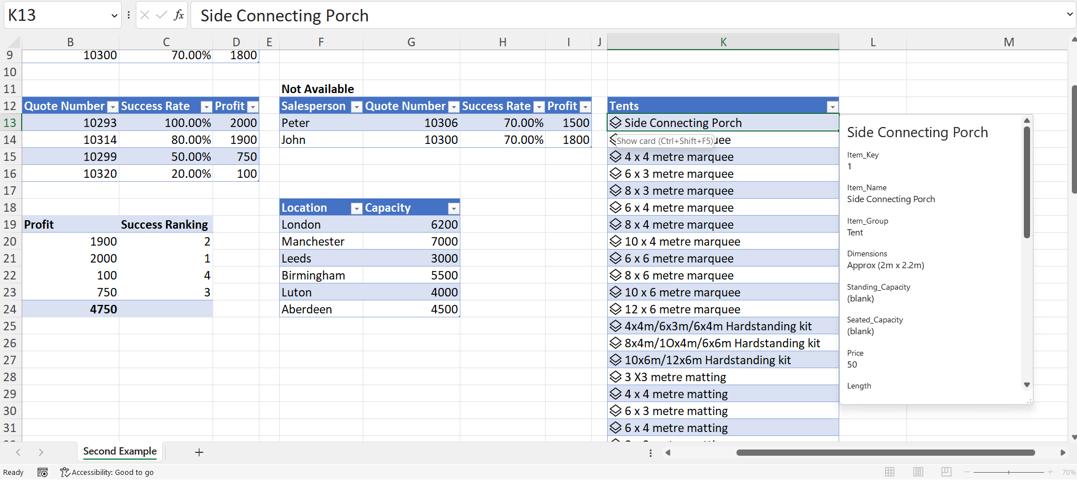
This accesses the card for each title, meaning that all the data is available for viewing if required.
Come back next time for more ways to use Power Query!

