
Power Query: Heading Off – Part 7
27 March 2024
Welcome to our Power Query blog. Today, I refine the solution to an issue that occurs when I load to a Table with no headers.
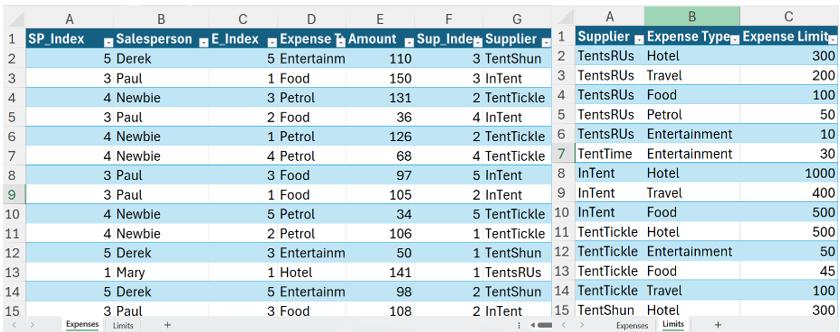
I plan to show a particular issue with Power Query and Tables without headers. However, first I need to create the scenario, and I will show a few methods and tips along the way. I have two Tables of data:
- contains my salespeople’s expenses (Expenses)
- determines the expenses that will be covered by each supplier (Supplier_Limit).
In Part 1, I created two [2] queries, and grouped Expenses.

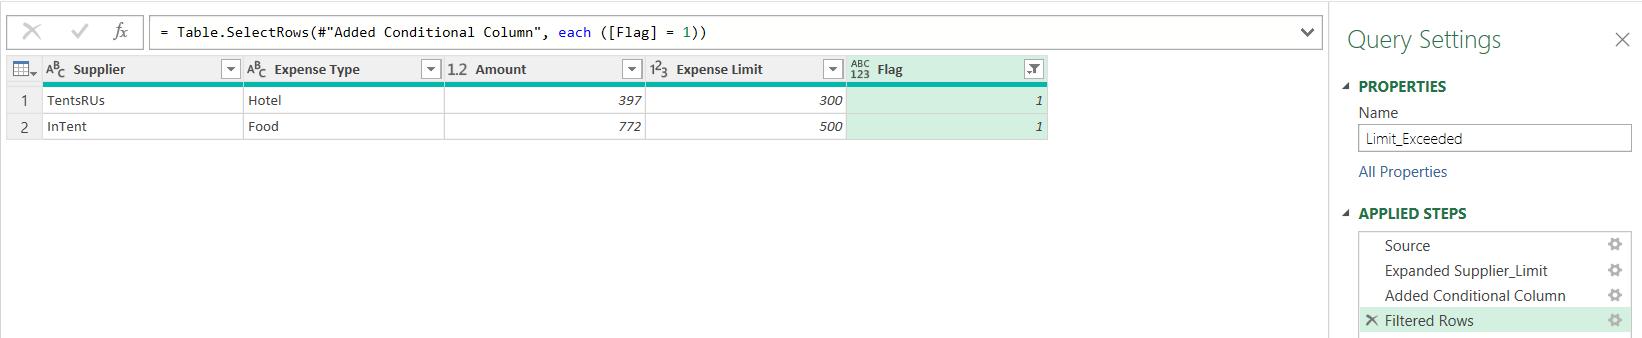
In Part 2, I merged Expenses with the Supplier_Limit query to create Limit_Exceeded, which tells me if any limits have been breached.
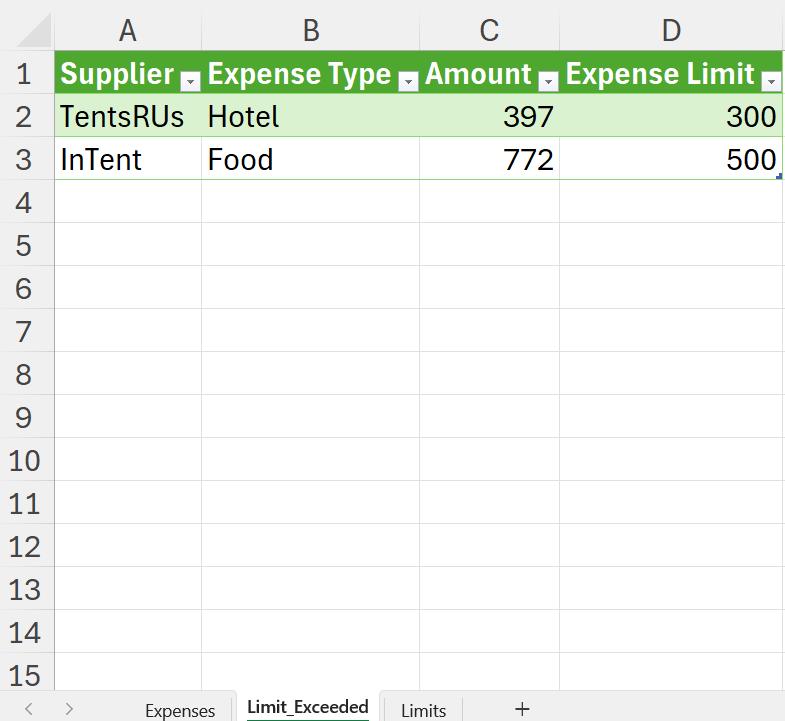
In Part 3,I loaded Limit_Exceeded to a new worksheet.
I removed the header row and changed some of the data in Expenses.

In Part 4, I ran the query for a single salesperson.

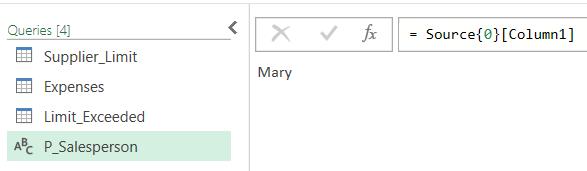
I extracted this cell and created a parameter P_Salesperson:
I used this parameter to limit the data in Expenses:
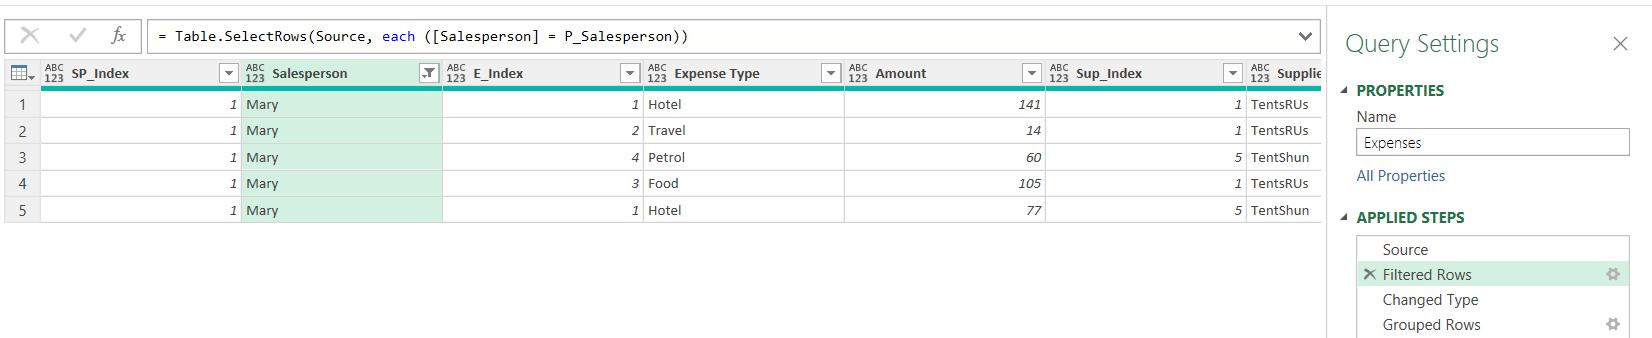
When I refreshed Limit_Exceeded, I checked the results:
The results correctly showed one row of data and no headings. However, things changed in part 5 when I selected a different Salesperson:

When I refreshed Limit_Exceeded, it had moved the data from the previous selection into the header row.
When I deleted the top row from the Excel sheet, things got worse!
Last time, I changed what happens if there is no data returned by Limit_Exceeded. I created a basic query with one [1] blank row and appended it to Limit_Exceeded.
I deleted Column1, and loaded the results to the Excel workbook:
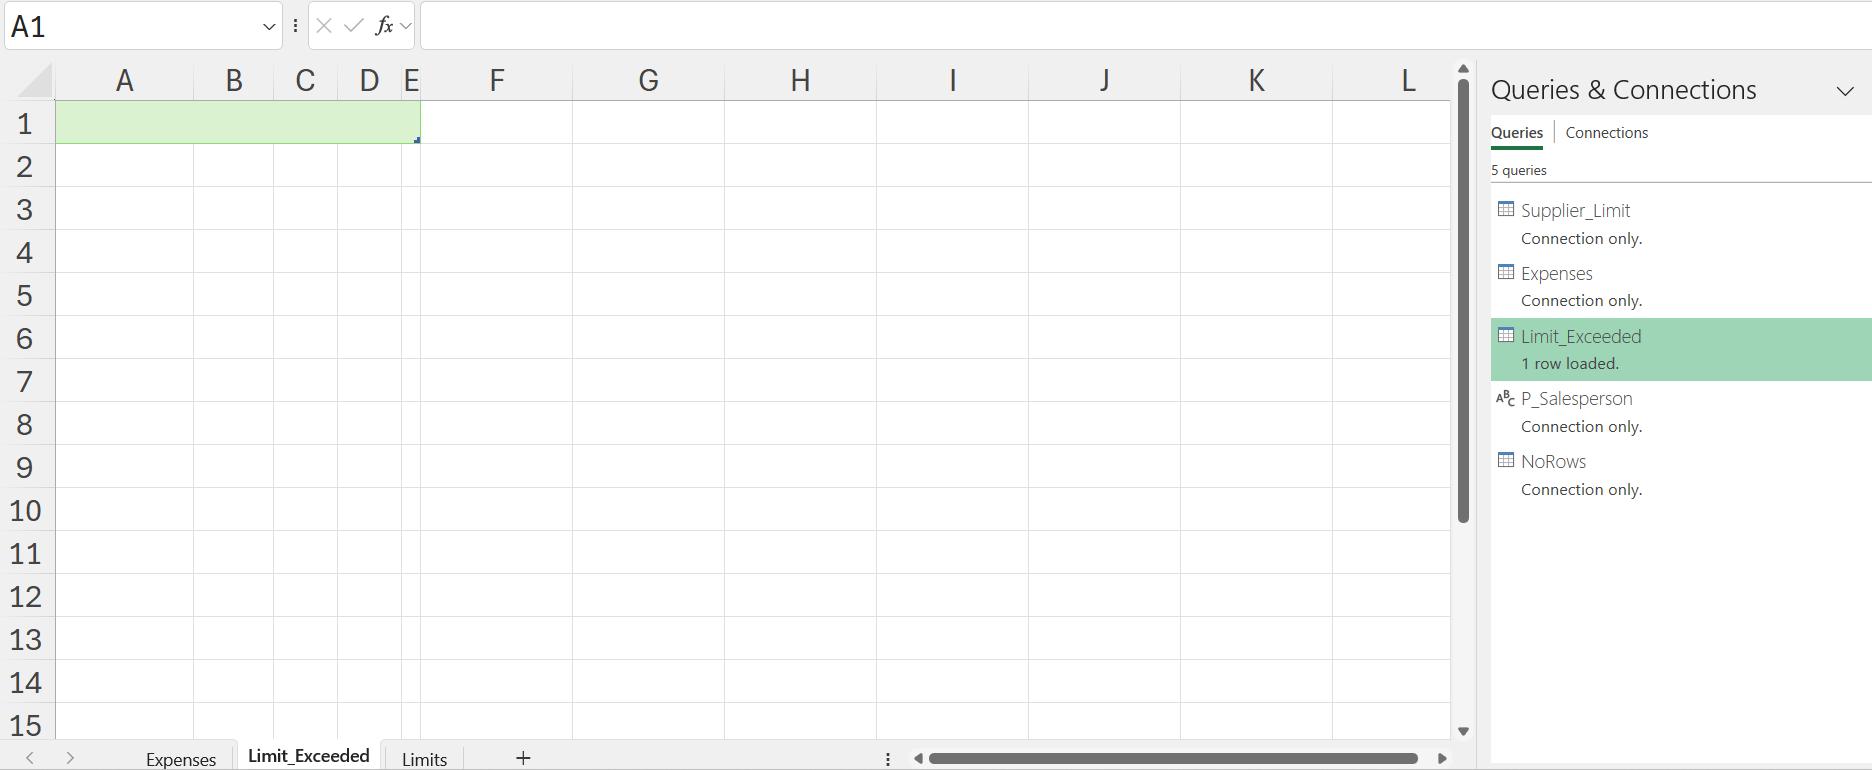
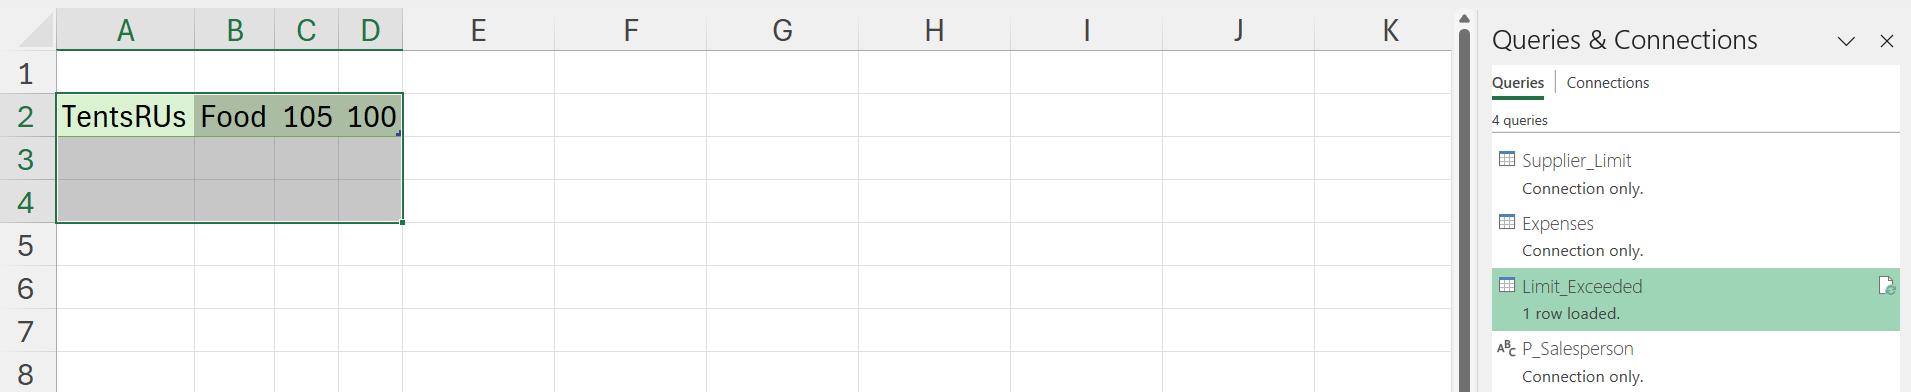
This is looking much better! Clearly, it’s not ideal to have a blank row, but it is better than showing the wrong data. I’ll refine this approach so that I don’t add a blank row if I have data. First, let’s see what happens if I change the selected Salesperson back to ‘Mary’, and refresh Limit_Exceeded:
As expected, I get two rows, as indicated by the values in the ‘Queries & Connections’ pane.
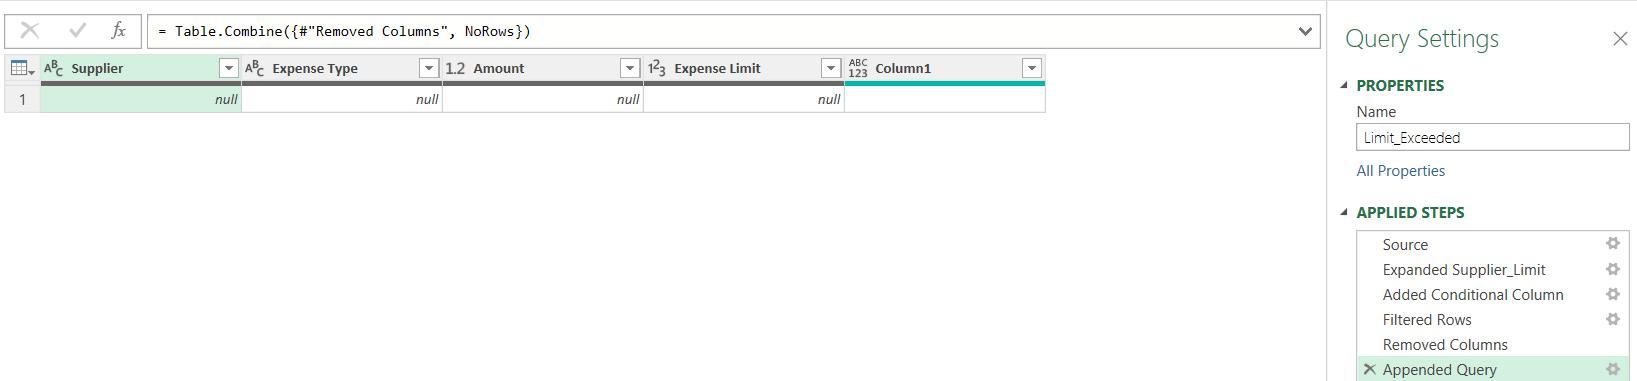
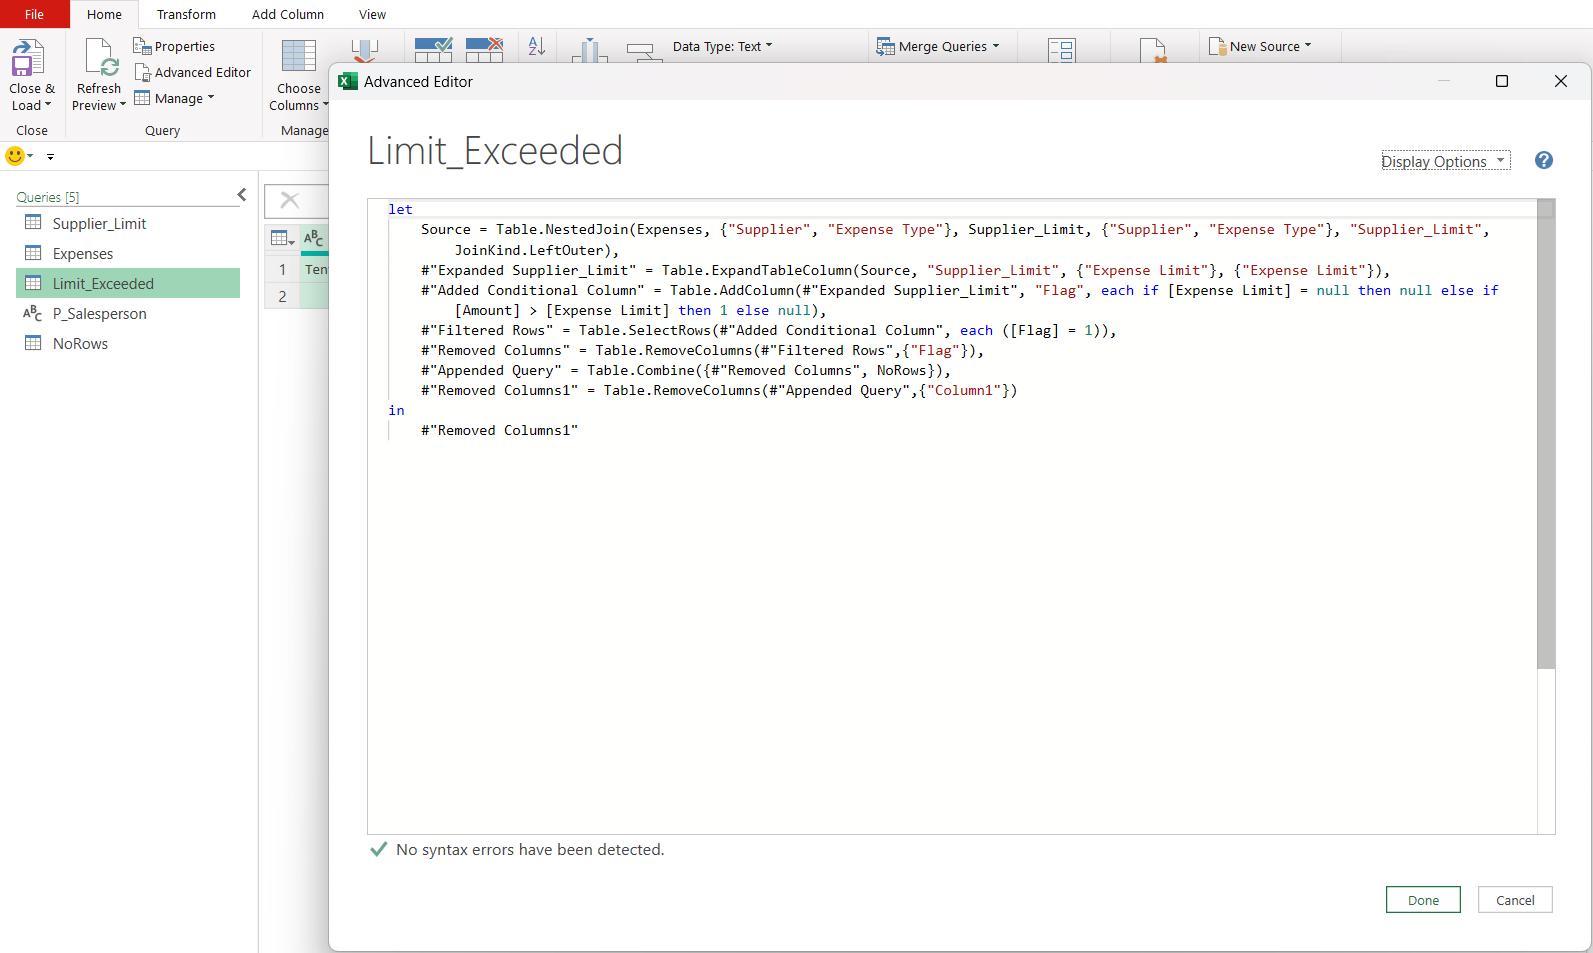
Back in my query, I look at the M code in the ‘Advanced Editor’, which I may access from the Home tab:
The last two steps pertain to the actions needed when the query doesn’t return any rows for step ‘Removed Columns’. Let’s look at that section:
#"Removed Columns" = Table.RemoveColumns(#"Filtered Rows",{"Flag"}),
#"Appended Query" = Table.Combine({#"Removed Columns", NoRows}),
#"Removed Columns1" = Table.RemoveColumns(#"Appended Query",{"Column1"})
in
#"Removed Columns1"
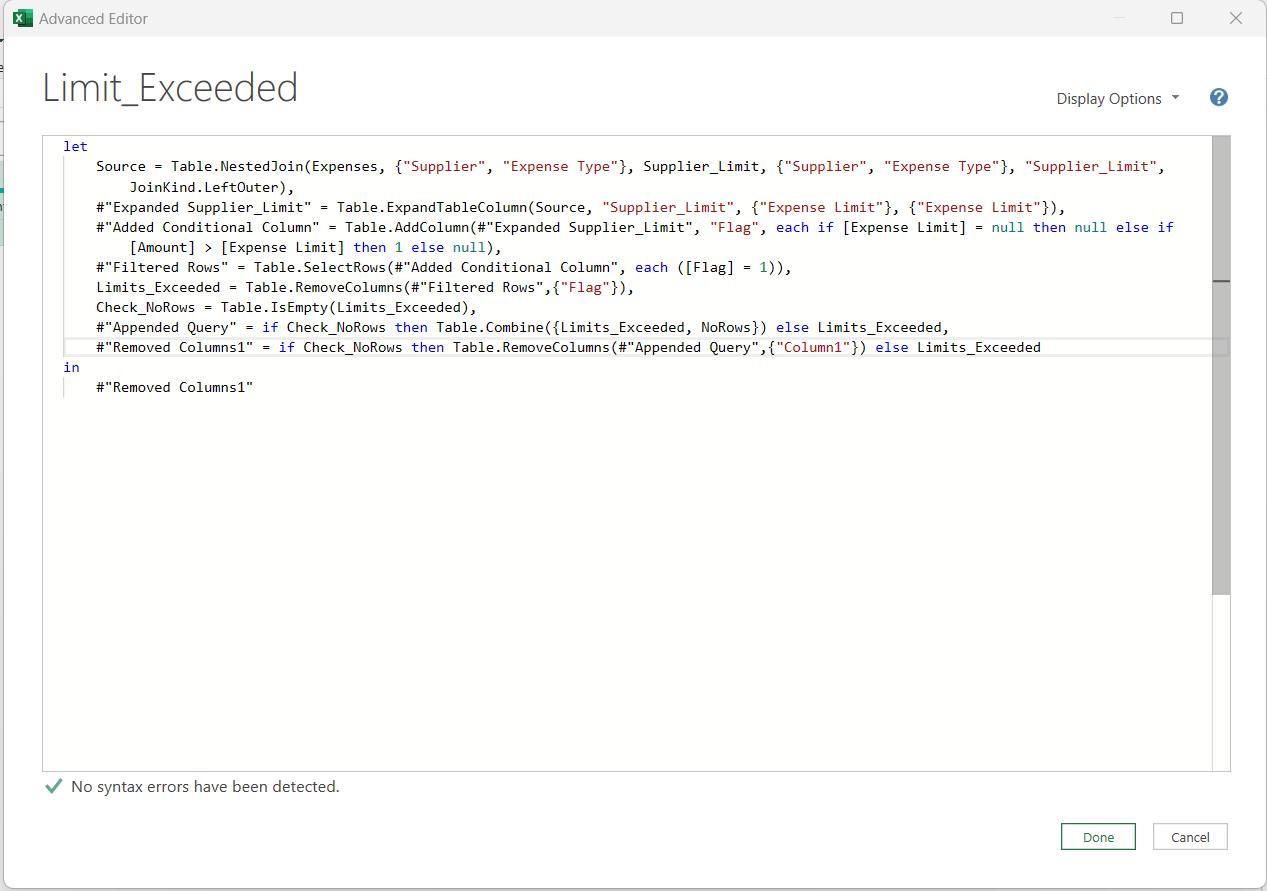
To make things clearer, I am going to rename step ‘Removed Columns’ to ‘Limits_Exceeded’.
Limits_Exceeded = Table.RemoveColumns(#"Filtered Rows",{"Flag"}),
Next, I determine whether there are any rows returned by step ‘Limits_Exceeded’. I am going to use the M function Table.IsEmpty(). This returns ‘TRUE’ or ‘FALSE’ for the query interrogated:
Table.IsEmpty(table as table) as logical
I will use this function to construct a condition for appending an empty row:
Check_NoRows = Table.IsEmpty(Limits_Exceeded),
I can include this to determine what the final two steps do. If there are rows, then I make them equal to Limited_Exceeded, which means that no changes are made:
Limits_Exceeded = Table.RemoveColumns(#"Filtered Rows",{"Flag"}),
Check_NoRows = Table.IsEmpty(Limits_Exceeded),
#"Appended Query" = if Check_NoRows then Table.Combine({Limits_Exceeded, NoRows}) else Limits_Exceeded,
#"Removed Columns1" = if Check_NoRows then Table.RemoveColumns(#"Appended Query",{"Column1"}) else Limits_Exceeded
in
#"Removed Columns1"
This gives me the complete query:

I click Done, and check if this has the desired effect:
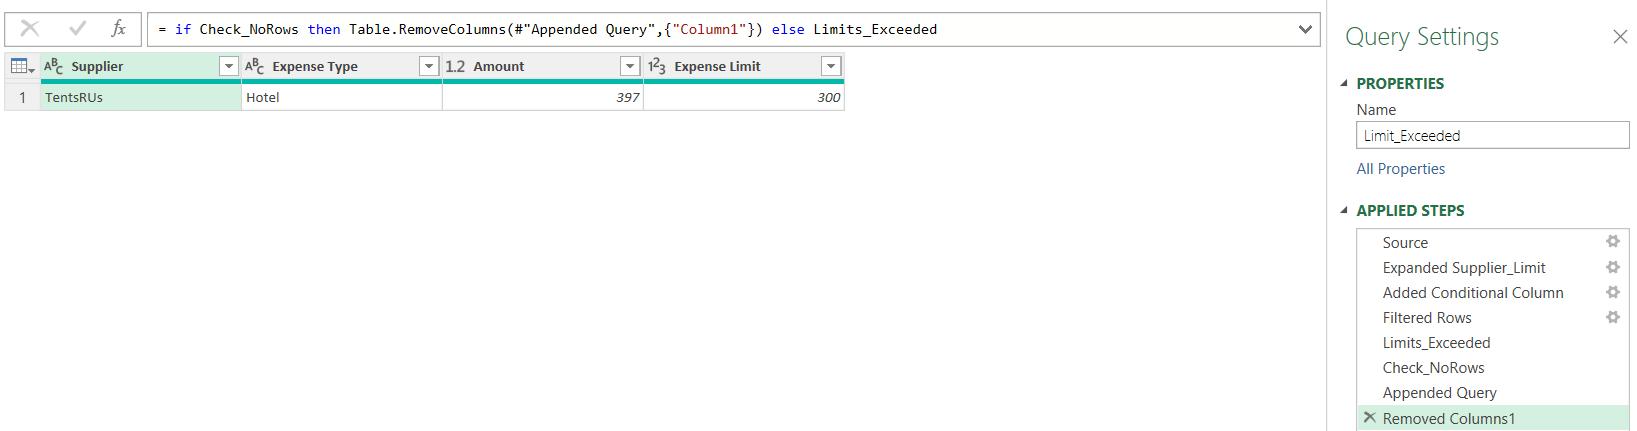
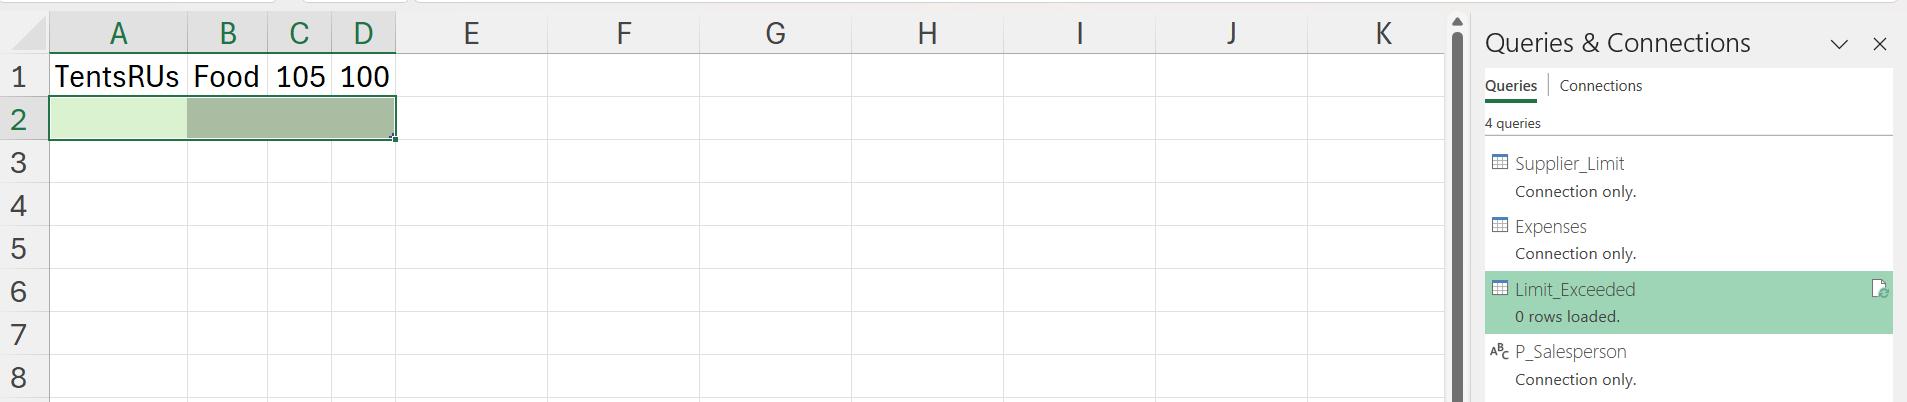
This looks fine so far; I load the query to the Excel workbook:
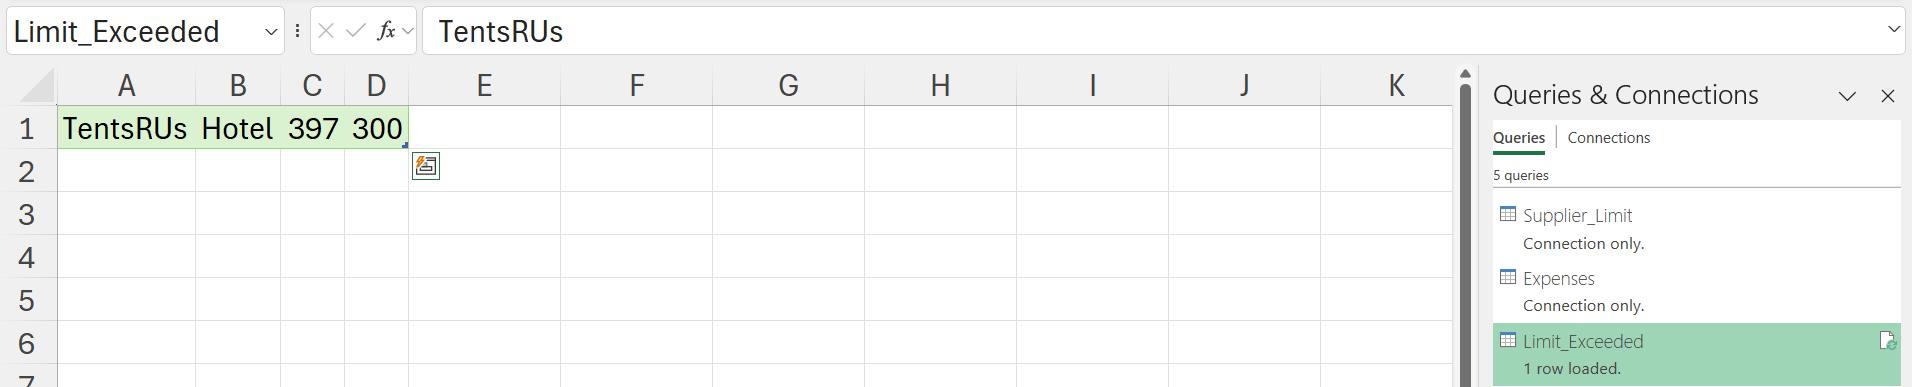
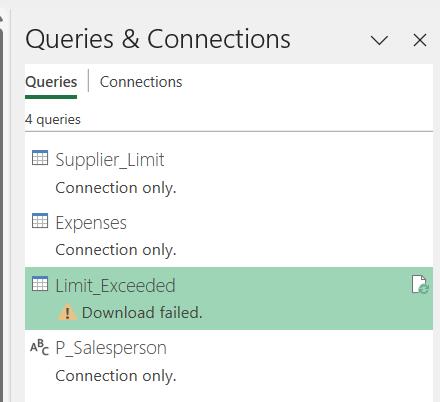
One row has been loaded. I change the Salesperson back to ‘Newbie’ and refresh the query:
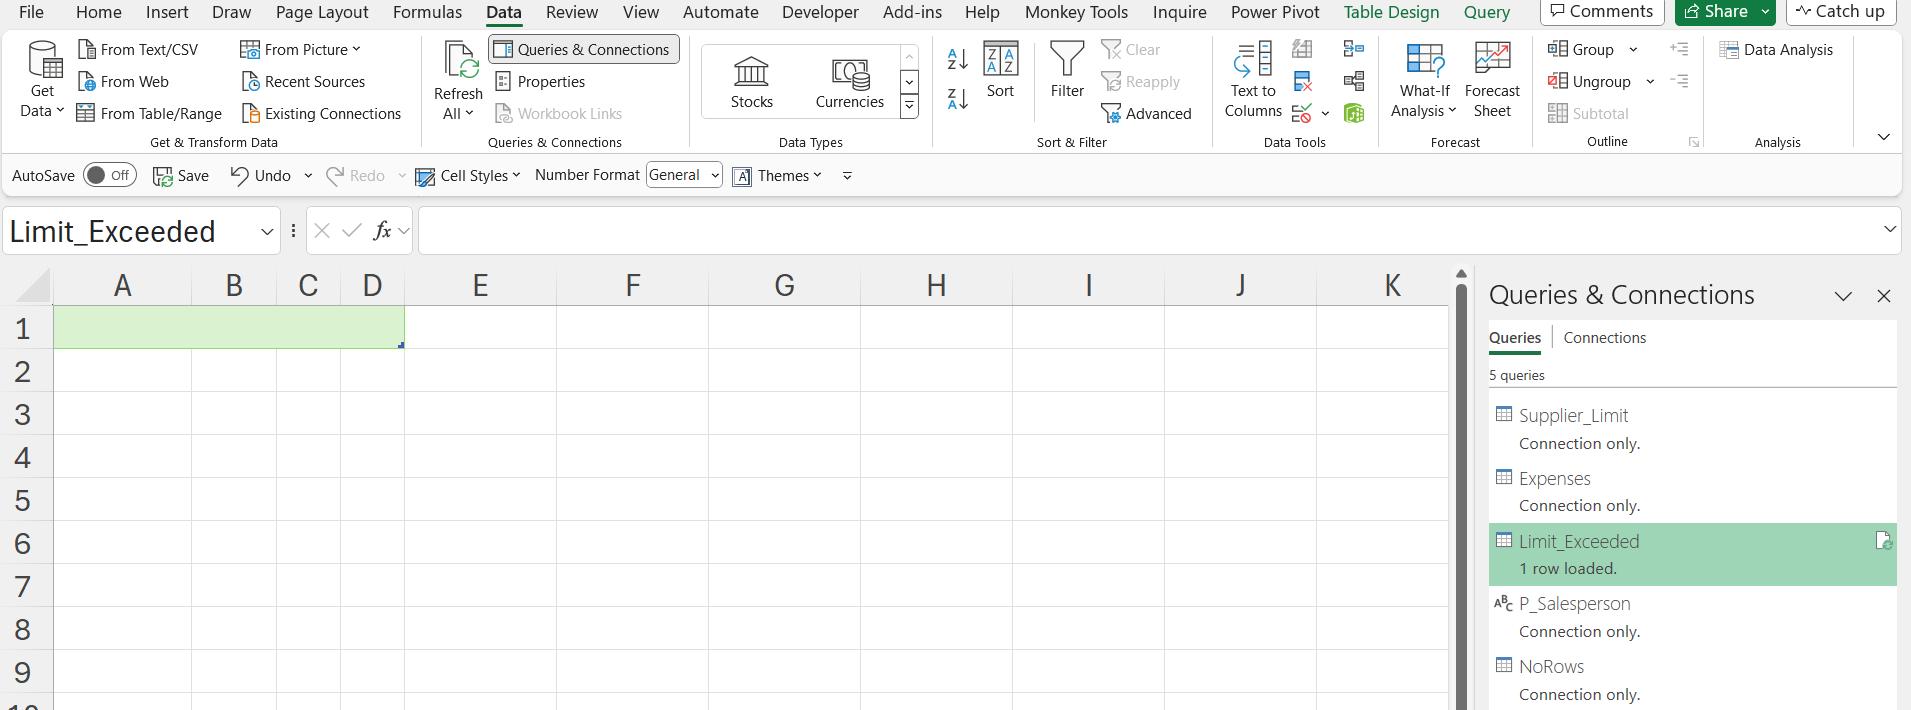
I have one blank row loaded, so this works as I intended. Next time, I’ll look at an alternative way to include a blank row when needed.
Come back next time for more ways to use Power Query!