
Power BI Blog: Row-Level Security (RLS) – Part 3
17 November 2022
Welcome back to this week’s edition of the Power BI blog series. This week, we conclude our series on row-level security (RLS) in Power BI by looking at dynamic RLS.
One of the key features that distinguishes Power BI from other Business Intelligence (BI) solutions is its ability to provide row-level security (RLS), which is protection based upon each row of a data table. Instead of creating a report for each of the access profiles, you can create a single report linked to different access profiles.
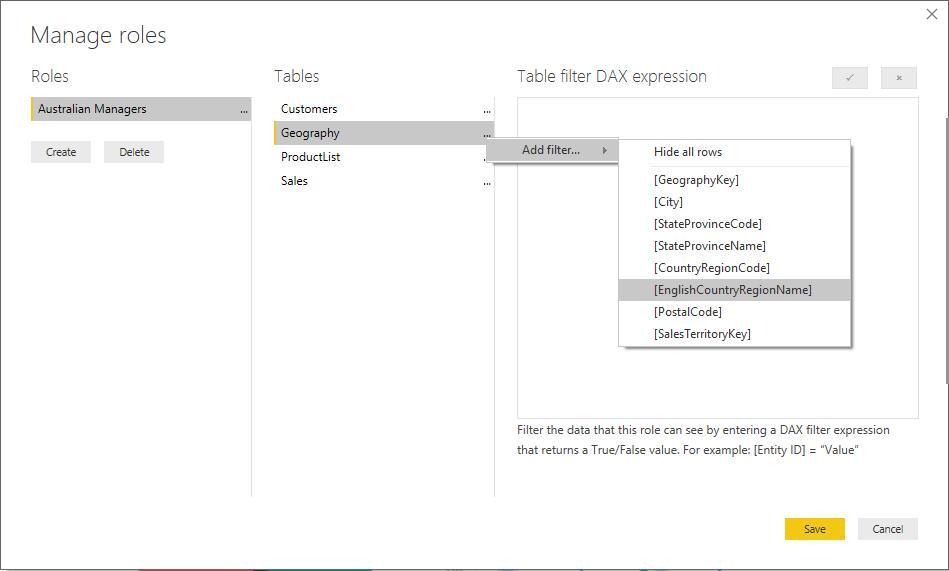
We began our series on RLS by looking at how to set up static RLS in Power BI Desktop, by creating roles:
We checked the role worked as expected using the ‘View as’ facility in the Security section of the Modeling (sic)tab.

There is no security in the PBIX file; you can see the entire dataset. There is no way that you can have any sort of security with Power BI Desktop files and roles may only be created or modified inside Power BI Desktop.
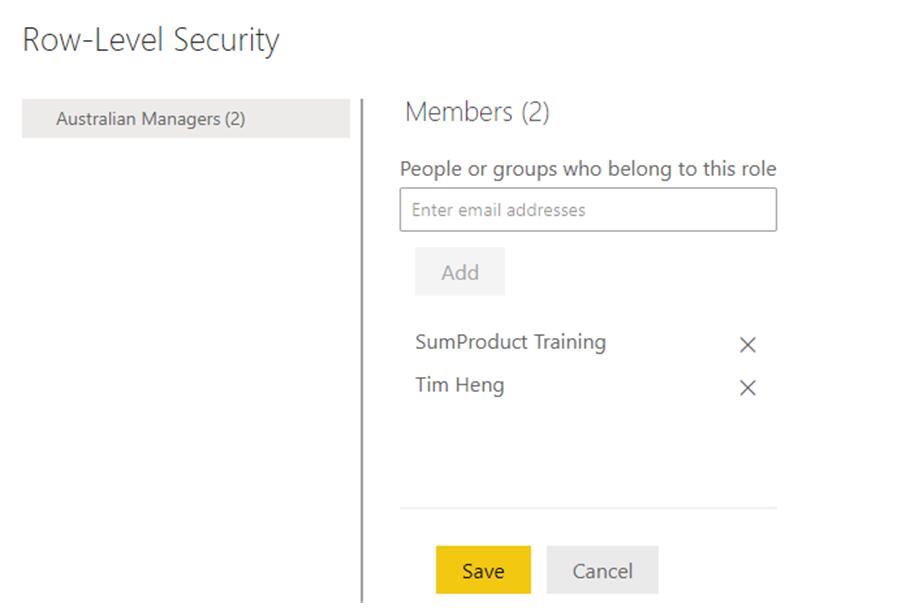
Last week, we continued by looking at the impact in Power BI Service where we assigned roles:
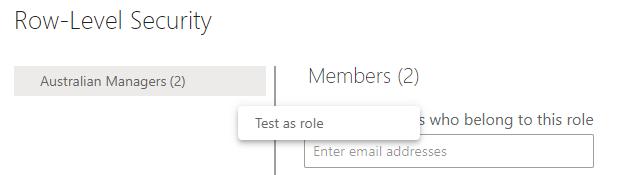
We also checked the impact of the role, by using ‘Test as role’.
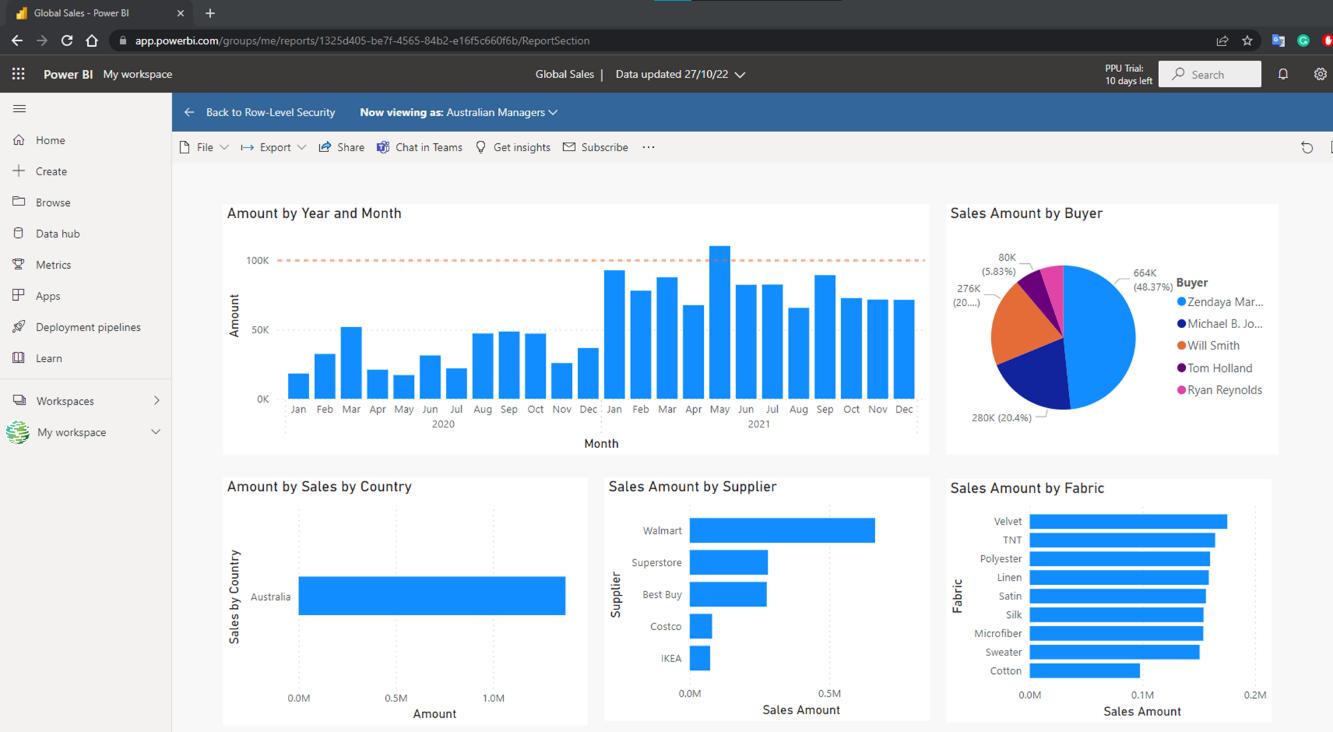
This gave us the same view as a member of that role:
This time, we move onto dynamic RLS in Power BI Desktop and Power BI Service.
Defining Roles and Rules in Power BI Desktop – Dynamic
To control row-level security dynamically, you must include a table in your Power BI Desktop report model that lists email addresses and the field data or the rule they can see / access.
As an example, let's create a table containing the emails and permissions that each Commercial Manager has access to. On the Home tab, select 'Enter data', then enter the e-mail address and the countries that each user may view data for.
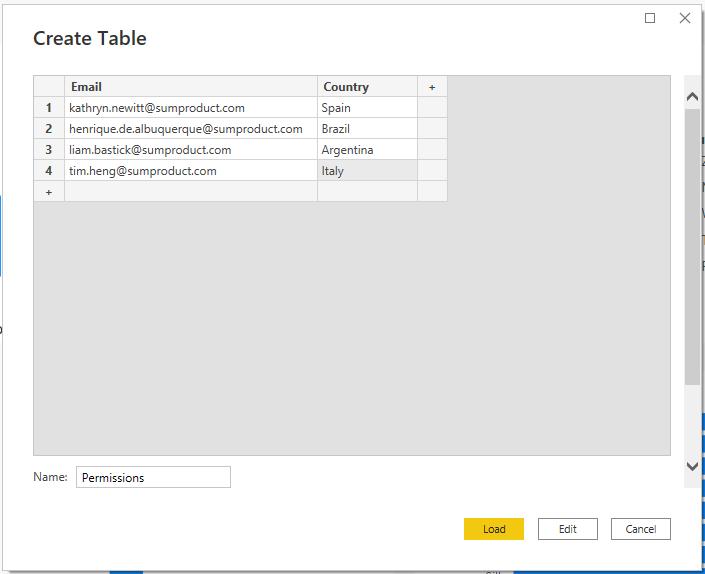
After clicking the Load button, to load this table, go to the Model view and ensure that this new table has a relationship to the table containing the data to which the function will be applied.
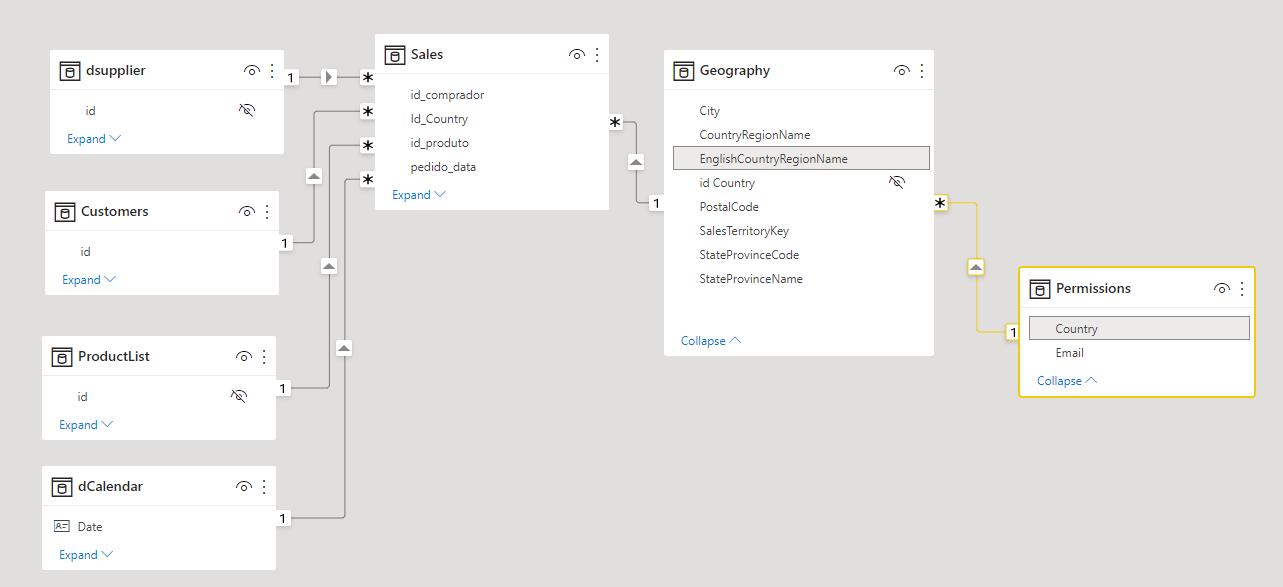
As seen in the graphic above, Country in the Permissions table is related to EnglishCountryRegionName within the Geography table. With this in place, we can navigate to the Modeling tab, and in the Security group click on ‘Manage roles’.

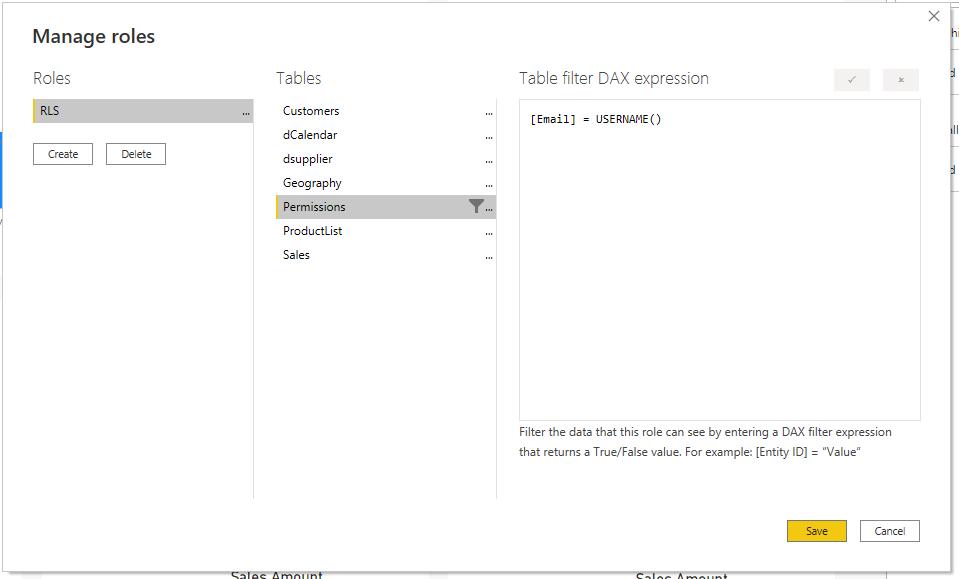
This will display the same ‘Manage roles’ dialogue box as before. Once we have named the role, as we have already defined users’ email address and their appropriate permissions, we can build the rule by clicking on the Create button, then choosing the Permissions table from the list of tables, and adding a filter to [Email] ensuring that it is equal to USERNAME() in the ‘Table filter DAX expression’ box.
[Email] = USERNAME()
Validating Roles within Power BI Desktop – Dynamic
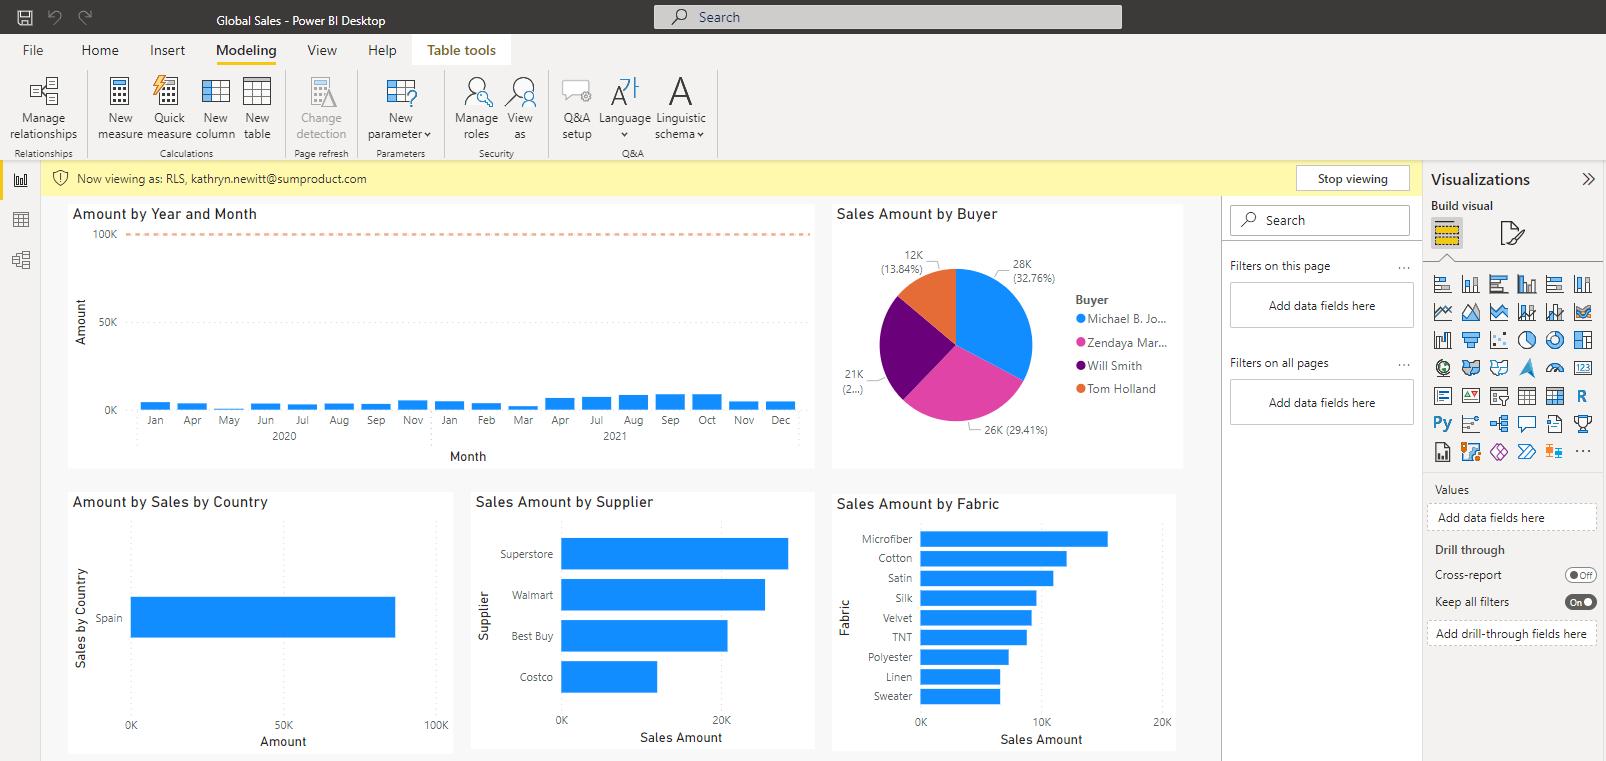
With this new role in place, we can check that it is displaying as expected by navigating to the Modeling tab and clicking on ‘View as’. Selecting our new RLS role and entering an e-mail address that was defined earlier will filter our data to what that user would see.
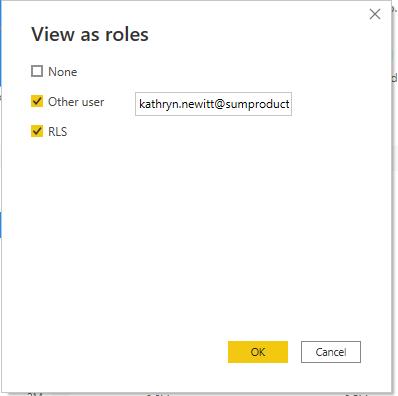
In this example, Kathryn has access only to information relating to Spain, viz.
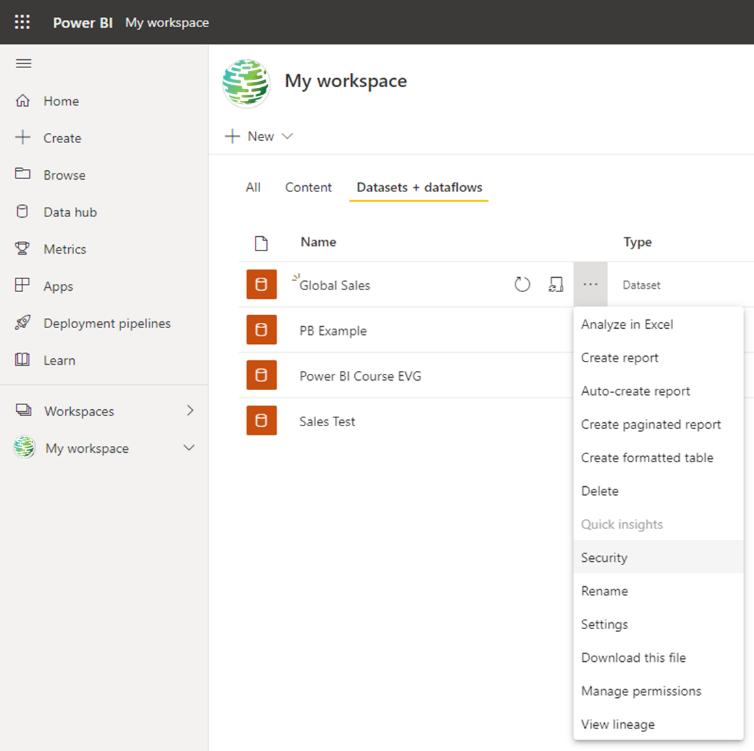
Manage Your Model’s Security – Dynamic
After publishing this report, we can use the Power BI Service to share it with the members. Under the workspace where your report was saved in the Power BI service, go to ‘Datasets + dataflows’, click on the ellipses (‘…’) and select Security:
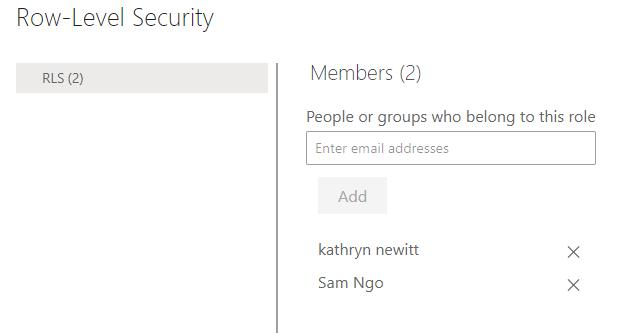
With only one defined role, which is already linked to the user’s e-mail address, you simply need to add users to the role using the e-mail address as we described last week. Control over who has access to the data is in the auxiliary table that we generated in the previous stage.
Check back next week for more Power BI tips and tricks!