
Power BI Blog: New Page and Bookmark Navigators
9 December 2021
Welcome back to this week’s edition of the Power BI blog series. This week, we look at two new built-in navigators.
Previously, setting up a custom Page or Bookmark navigation experience in your report could be pretty time consuming because it required creators to setup each individual button for every Page or Bookmark and duplicate each button if they wanted to show a selected state. In the latest Power BI updates, two new built-in navigators have been added to allow creators to quickly build Page and Bookmark navigation experiences with just a few clicks.
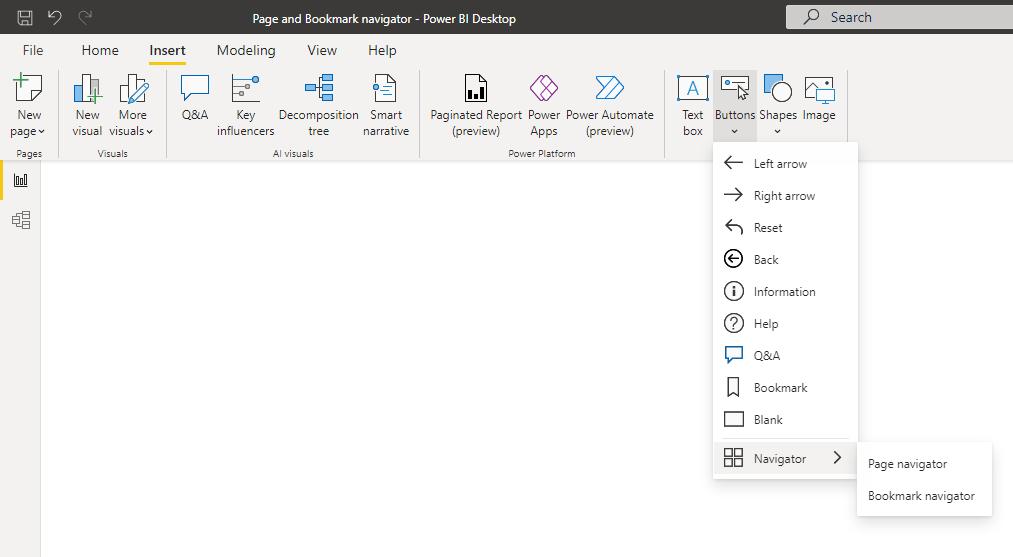
These new navigators should save creators hours of effort building and managing their page or bookmark navigation experiences. You can find this new capability in Power BI Desktop within the Insert tab -> Buttons -> Navigator:
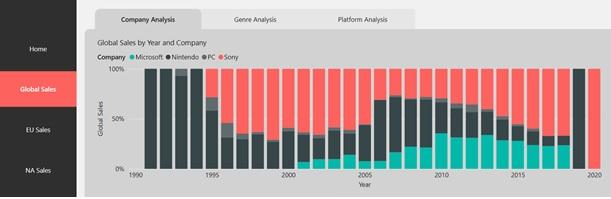
Page Navigator
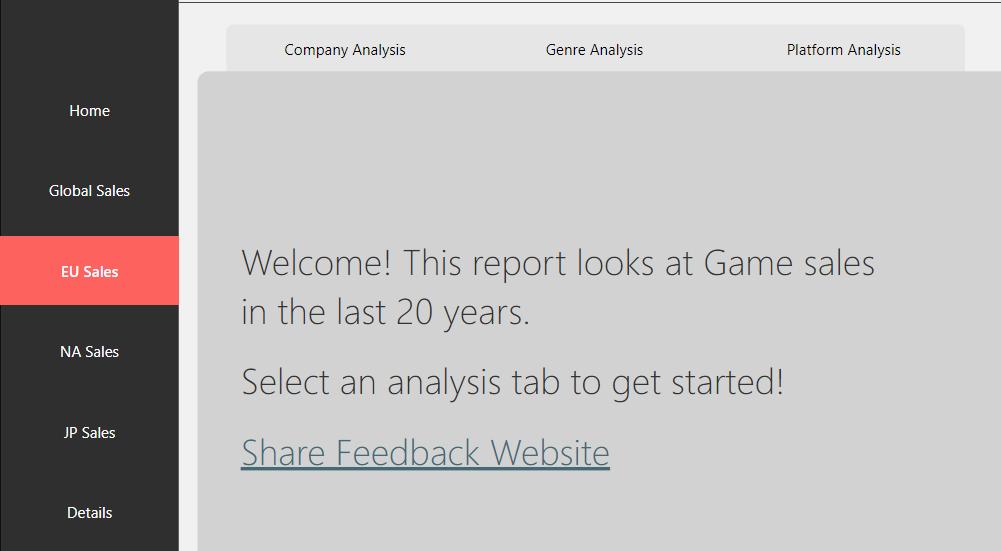
When you select the Page navigator option, a Page navigator will be created for you automatically:
The Page navigator is automatically synchronised with your report Pages, meaning:
- titles of the buttons match the Page display names
- ordering of the buttons match the order of your report Pages
- the selected button is the current Page
- as you add or remove Pages in your report, the navigator will automatically update
- as you rename Pages, the titles of the buttons will automatically update.
If you want further customisation of which Pages to show or hide in the Page navigator, you can go to the Format navigator pane -> Pages tab:
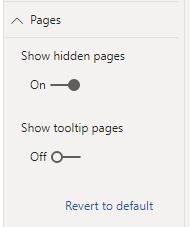
You have the option to ‘Show / hide hidden pages’ or ‘Show / hide tooltip pages’.
You should note that if you’re testing out the Page navigator in Desktop or Edit mode of the Service, you’ll need to CTRL + Click to navigate to the desired page.
Bookmark Navigator
Before you create the Bookmark navigator, you need to make sure you already have Bookmarks created. Additionally, you should create separate Bookmark groups if you plan on creating different Bookmark navigators within the same report.
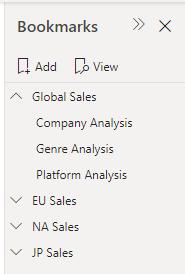
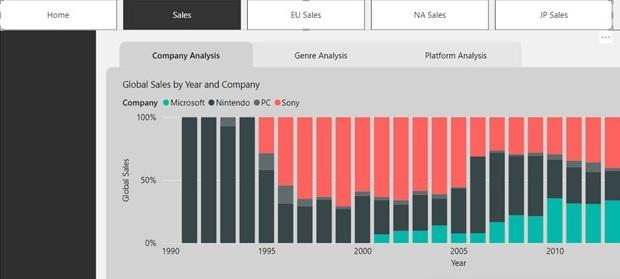
Once you’ve created your Bookmarks and select the Bookmark navigator option, a Bookmark navigator will be created automatically for you:
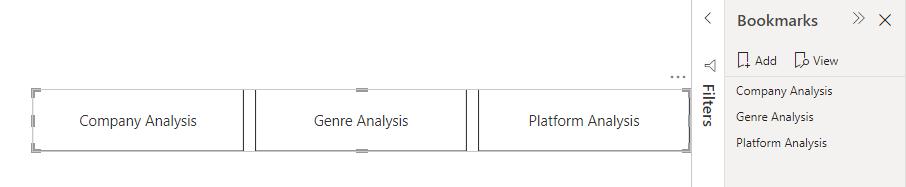
Similar to the Page navigator the Bookmark navigator will synchronise automatically with your report Bookmarks, meaning:
- titles of the buttons match the Bookmark display names
- ordering of the buttons match the order of your report Bookmarks
- the selected button is the last selected Bookmark
- as you add or remove Bookmarks in your report, the navigator will automatically update
- as you rename Bookmarks, the titles of the buttons will automatically update.
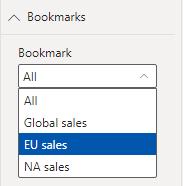
If you require further customisation of which Bookmarks to show or hide in the Bookmark navigator, you can go to the Format navigator pane -> Bookmarks tab:
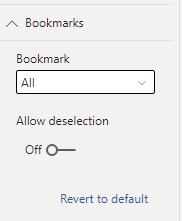
By default, All Bookmarks will be shown in the Bookmark navigator. However, you can create and select a specific Bookmark group to only show the Bookmarks within that group.
You also have the option to Allow deselection, meaning users may unselect the selected button in the Bookmark navigator. This option is useful for building a toggle-like experience or allowing for an unselected default state. To set up either of these types of experiences, you’ll need to first Bookmark the desired unselected state. Here’s an example of an unselected state:
Once you have the unselected state Bookmarked, you’ll need to turn on Allow deselection and select the Bookmark that you want to Launch on deselection:
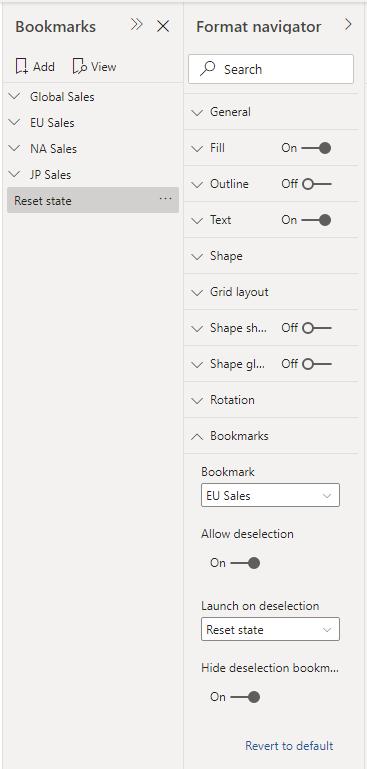
If the Bookmark that you’re using for deselection is within the Bookmark navigator already, you can choose to Hide the deselection Bookmark within the navigator if you don’t want to show it:
Formatting Options
Just like other buttons in Power BI, there are numerous formatting options for the navigators including:
- Fill
- Text
- Outline
- Shape
- Shape shadow
- Shape glow
- Rotation.
The navigators also include two additional formatting options:
- Grid layout
- Selected state.
Grid layout
Grid layout tab includes options to change the Orientation of the navigator:
- Horizontal
- Vertical
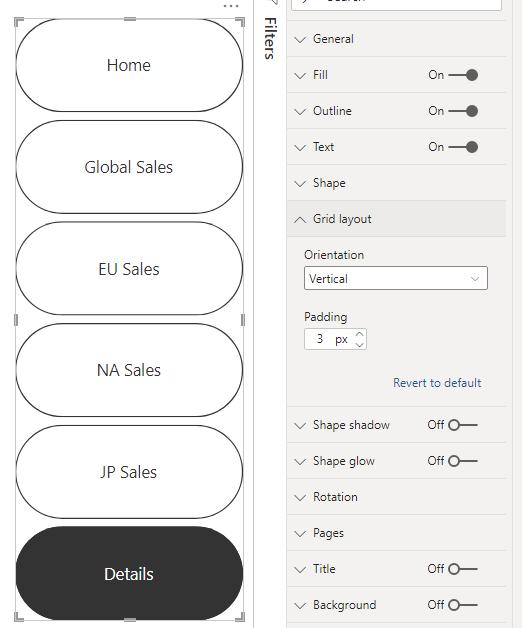
It also includes the option to change the Padding between buttons in the navigator.
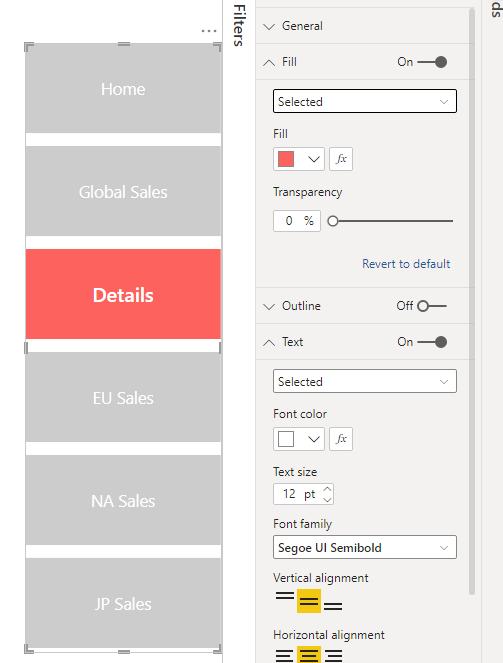
Selected State
The navigators have the option to customise the ‘Selected state’ of the button. You can use this option to help the Selected state of the button stand out from the default state. In this example, the Fill and Text formatting have both been customised for the Selected state:
Check back next week for more Power BI tips and tricks!