
Power BI Blog: Access-ible Returns Part 1
29 July 2021
Welcome back to this week’s edition of the Power BI blog series. This week, we revisit our Access-ible series of Blogs.
Avid readers of this blog series will remember we left the 2016-17 Access database from the IPEDS Survey site loaded and ready to use. These were the database tables downloaded:
Having promised to transform these tables into something more readable, we have left you hanging long enough!
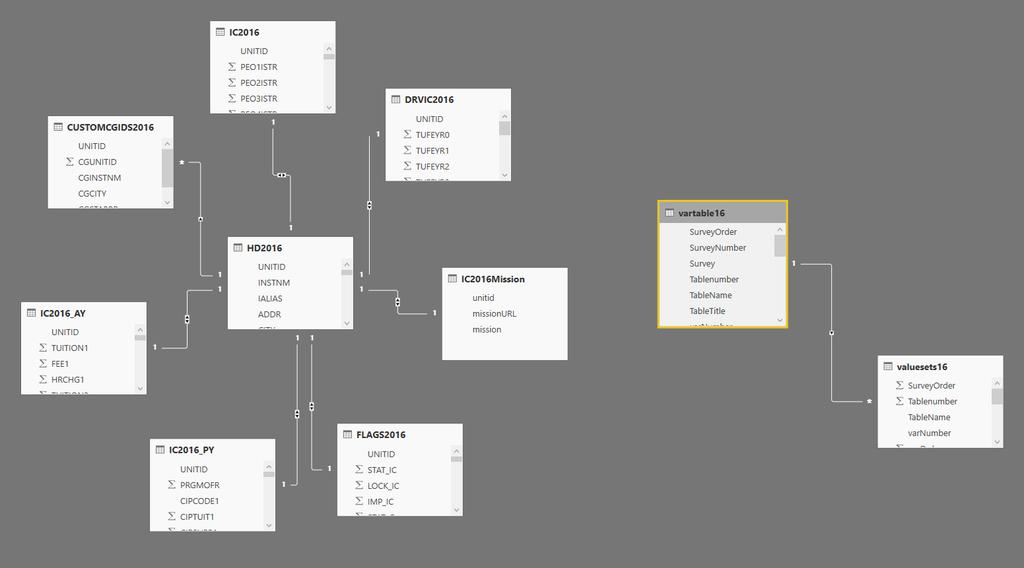
We can see from the previous image that Power BI has detected relationships between the tables we have uploaded. We will be using vartable16 and valuesets16 to map some of the column names. The rest of the tables are arranged into a star schema with HD2016 at the epicentre.
We can rename these tables to more descriptive and accurate titles by using the Power Query engine. From the ‘Transform Data’ tab, we can view the first table in the Power Query Editor.

This shows the data in the table currently called CUSTOMCGIDS2016. We are going to go back a step and look at the Source step.

We can see where the current table name is located in the Source. We are going to rename this before opening the table. We delete the current Navigation step, as we will be recreating a similar step later.
In table vartable16, there is a TableName column.

We can view the data on this table that pertains to CUSTOMCGIDS2016 by filtering on TableName. We are doing this to demonstrate the data available. This will create a Filter step which we will delete once we have finished viewing the data.
When we click on the icon next to the column name, there is a warning at the bottom of the dialog which we need to pay attention to.

The message is ‘List may be incomplete’. In this case, we can see the table name we are looking for, but it’s usually a good idea to use ‘Load more’ to make sure we can see the available values. The next step is to untick ‘Select All’ and to only tick the TableName we are looking for, CUSTOMCGIDS2016.

This will show us the data for CUSTOMCGIDS2016, so we can see which column we need to extract to get a more useful table name.
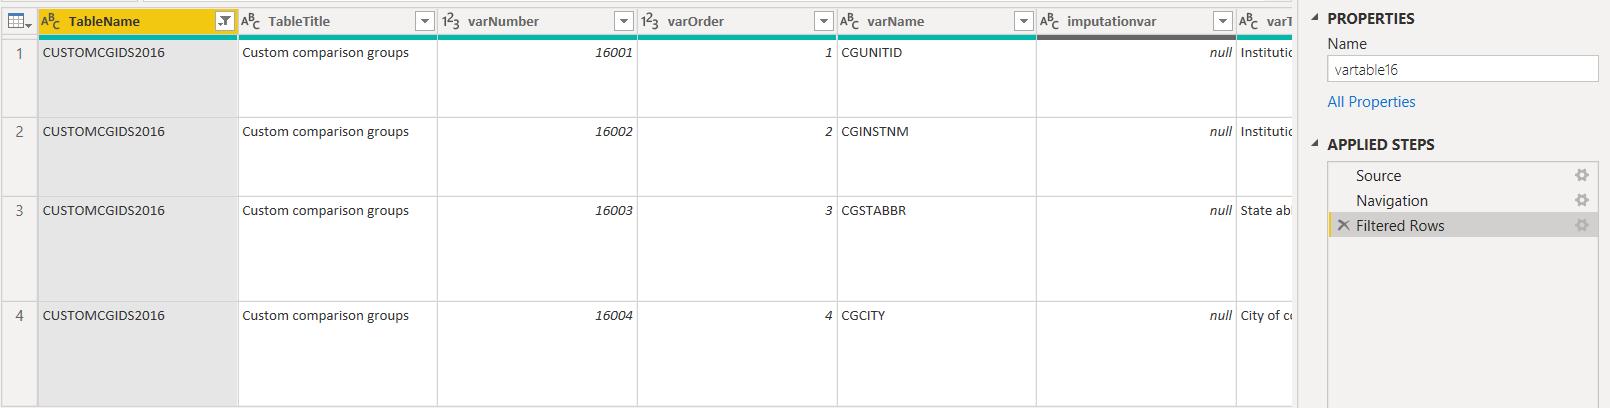
We can see that TableTitle contains a more useful table name, and that varName contains the current name of the columns on CUSTOMCGIDS2016. This will be useful later.
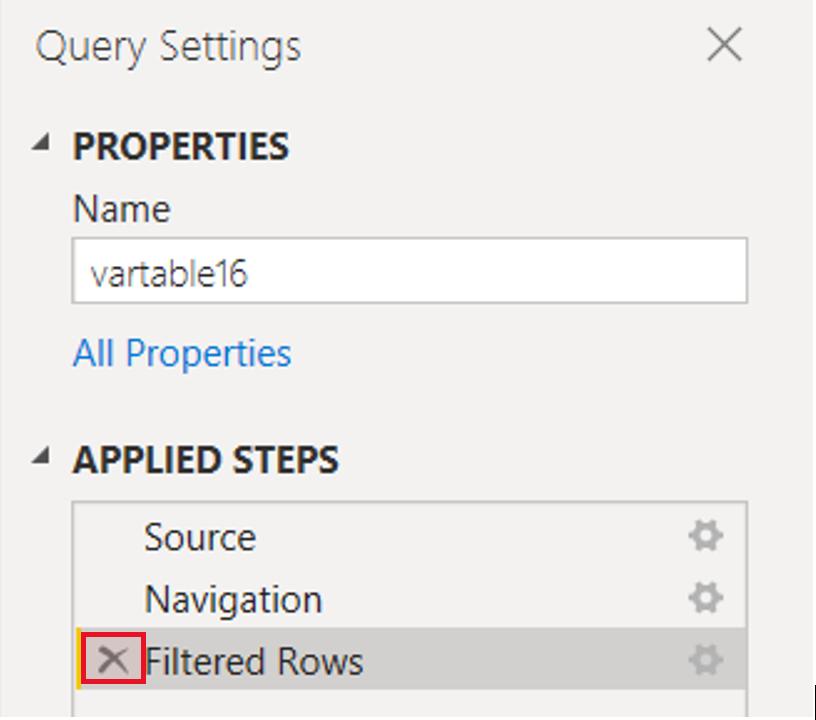
We delete the ‘Filtered Rows’ step using the cross icon and return to CUSTOMCGIDS2016.
We are going to extract data from vartable16 and add it to CUSTOMCGIDS2016.
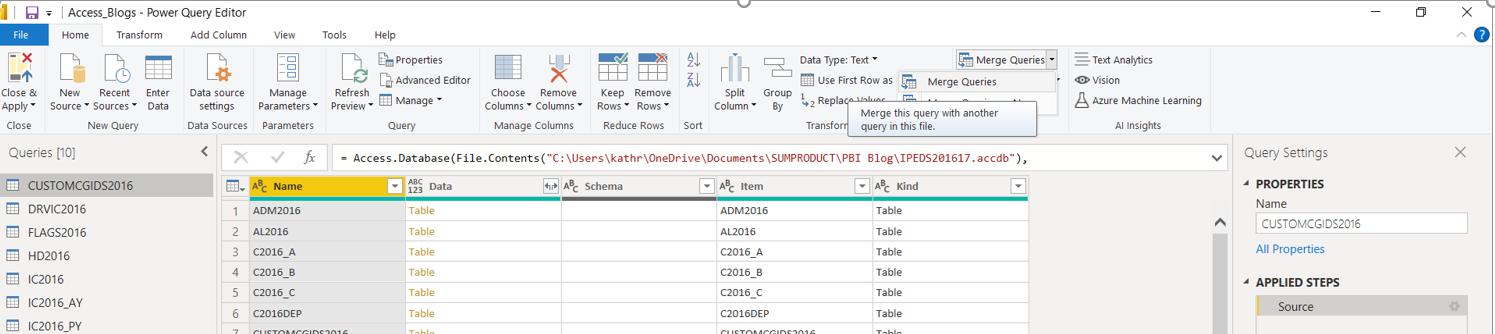
We can ‘Merge Queries’ from the Home tab, and we will be merging within the current query (another word for table). We will need to link Item from the current query to TableName on vartable16.
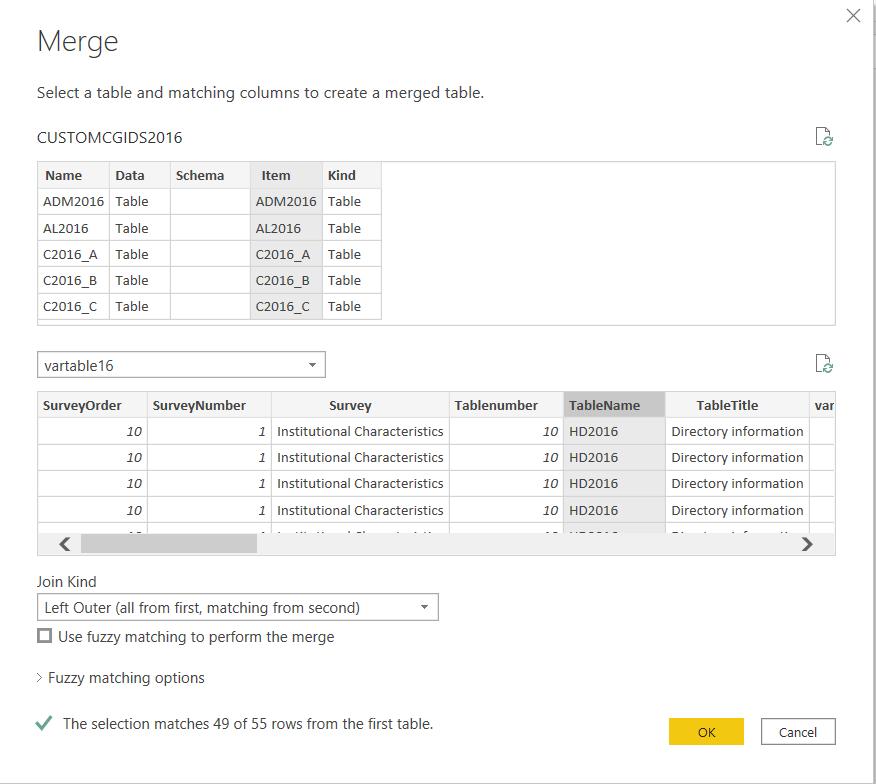
We are using a ‘Left Outer’ join to link as many table names as possible on the current query to their full titles. Not all tables will have a link as the Source step includes all the tables in the data sample; for example, vartable16 will not have an entry in its own rows.
When we click ‘OK’ we create a new column vartable16, which contains a table for each row.

We can expand this table by clicking on the icon to the right of the column title.

Thanks to our analysis of the vartable16 table earlier. We know that the only column we currently need is TableTitle. We can also uncheck the ‘Use original column name as prefix’ to keep TableTitle as the column title.

We have the data we need, but from our analysis of vartable16, we know that there will be one row for every column on every table name. We could rectify this by selecting all columns and the using ‘Remove Rows’ from the column tab.
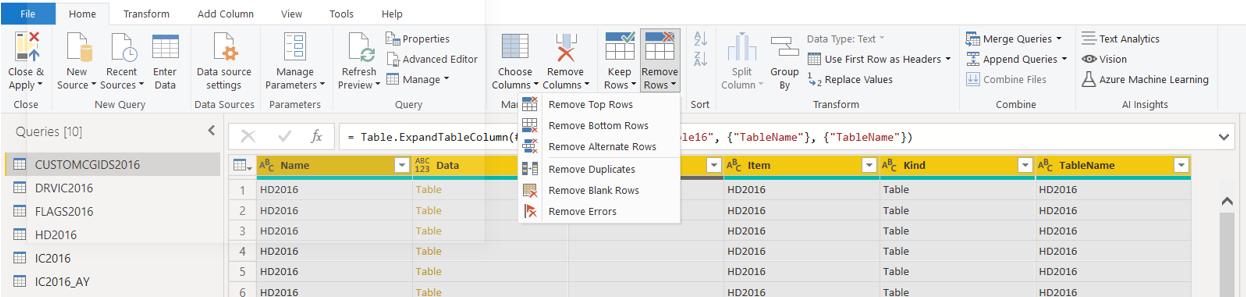
We can choose ‘Remove Duplicates’, which in principle would leave us with just the data we need. STOP: this will be a very slow process (to stop the processing, delete the Removed Duplicates step), and this is deliberate because there is a point to be made here. If we are dealing with a large dataset, it is essential to remove duplicates closer to the source than this. We need to create another version of vartable16 which only has a row for each table. We will look at this, and how to apply the changes made to CUSTOMCGIDS2016 to the other tables next time…
Check back next week for more Power BI tips and tricks!