
Power Pivot Principles: Introducing Slicers
24 July 2018
Welcome back to our Power Pivot blog. Today, we consider slicers in PivotTables created using Power Pivot.
We have touched on slicers briefly in the ALLSELECTED blog, slicers display buttons representing the values in a field that we can select to filter the PivotTable data. This field does not need to be in the PivotTable explicitly.
Below is an example of a slicer used:

We can use multiple slicers on the same PivotTable. For instance, we can insert the SalesTerritoryKey slicer:
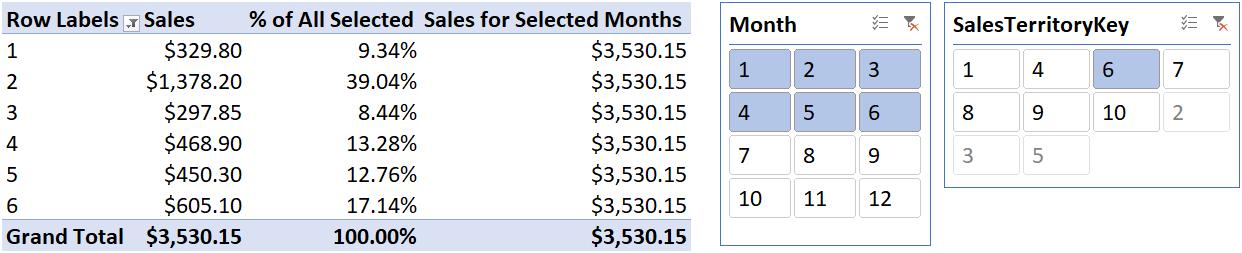
The PivotTable will update to display sales values from January to June, and from the Territory key of 6.
Of course, we can do all of this with ordinary PivotTables. The difference with Power Pivot is that we can insert slicers for fields contained in the different tables that are linked together in the data set.
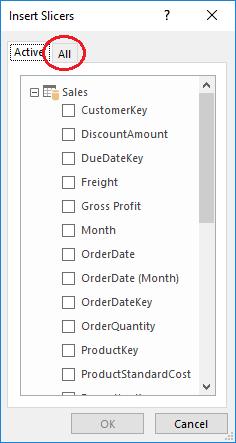
Notice the ‘All’ tab on the ‘Insert Slicers’ dialog box?
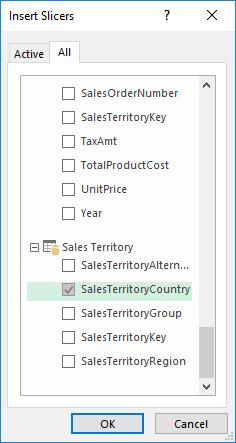
Let’s try adding a slicer for the country:
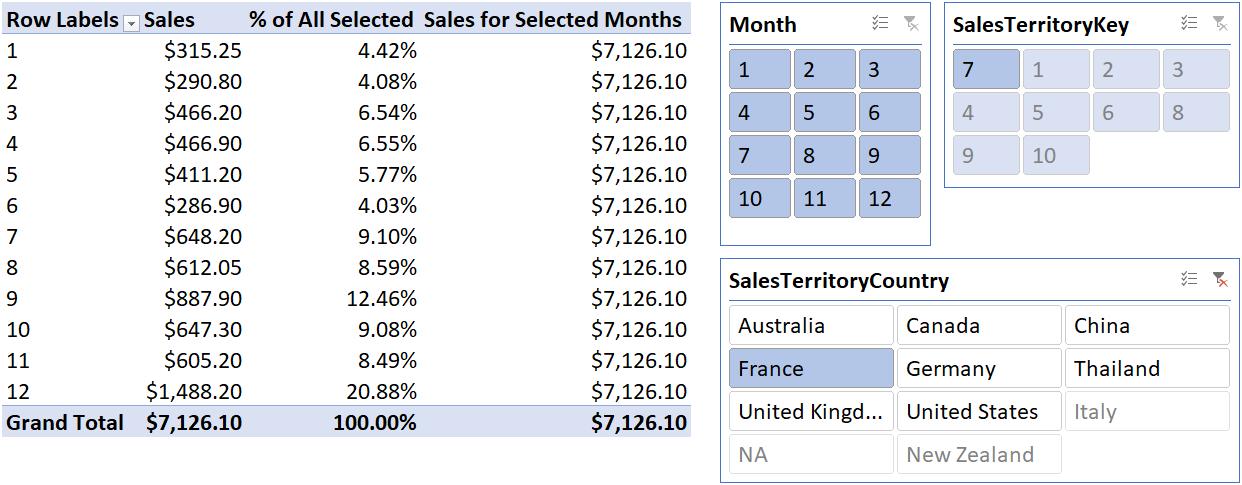
The PivotTable will update to the selections made on any of the slicers. We can add as many slicers as we want from any of the other tables in the data set, as long as those tables have proper relationships established! Isn’t that neat?
Stay tuned for our next post on Power Pivot in the Blog section. In the meantime, please remember we have training in Power Pivot which you can find out more about here. If you wish to catch up on past articles in the meantime, you can find all of our Past Power Pivot blogs here.