
Power Query: in Terms of Conditional Columns.
2 August 2017
Welcome to our Power Query blog. Today I take a closer look at conditional columns.
In Knowing Your Type is the Key, I used a conditional column to separate data based on the datatype. Conditional columns allow me to create some quite complex logical statements. The step created when I add a conditional column provides an opportunity to demonstrate how to tidy up the M code (the language that Power Query is written in) behind an individual step, in order to make it easier to read and understand.
I return to the query that I used in last week’s blog, How Long Do We Have?, and look at some of the logic that I can choose when creating a conditional column. In the query editor, in the ‘Add Column’ tab, I opt to add a ‘Conditional Column’:
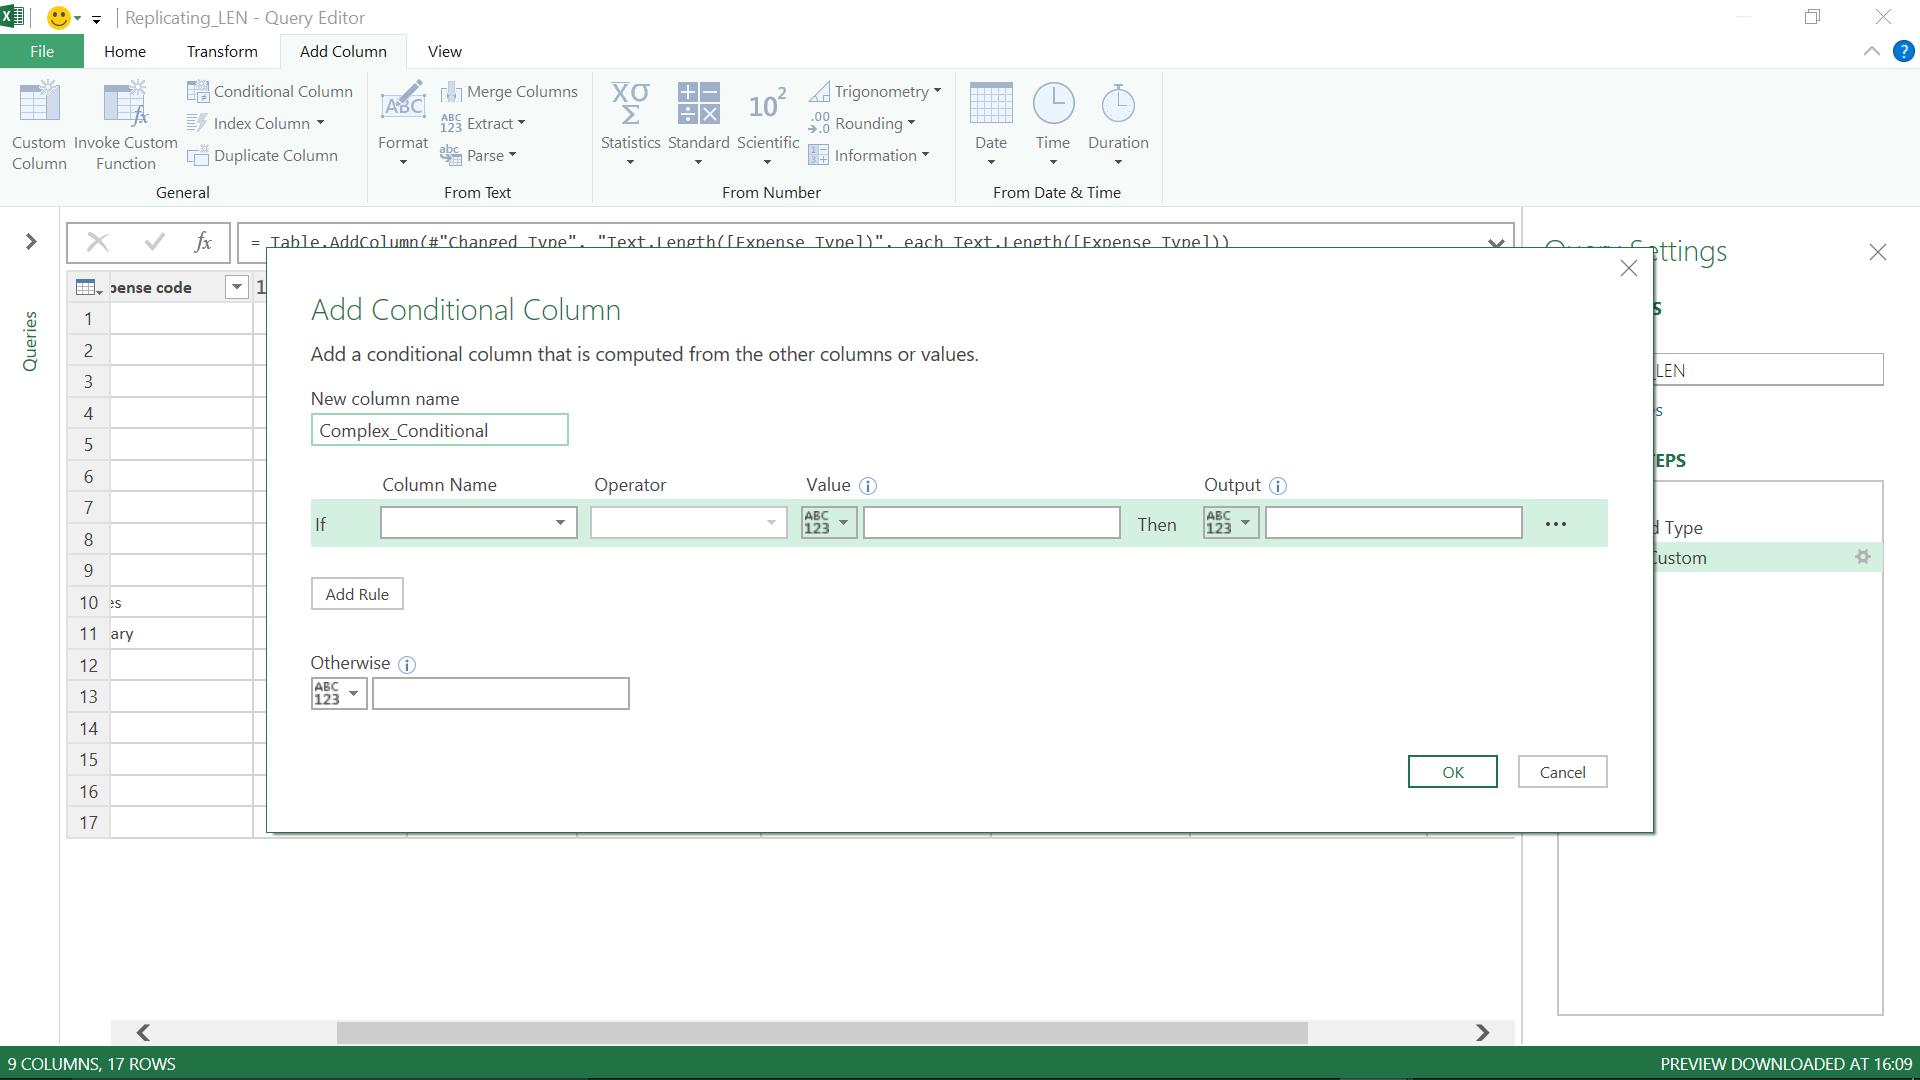
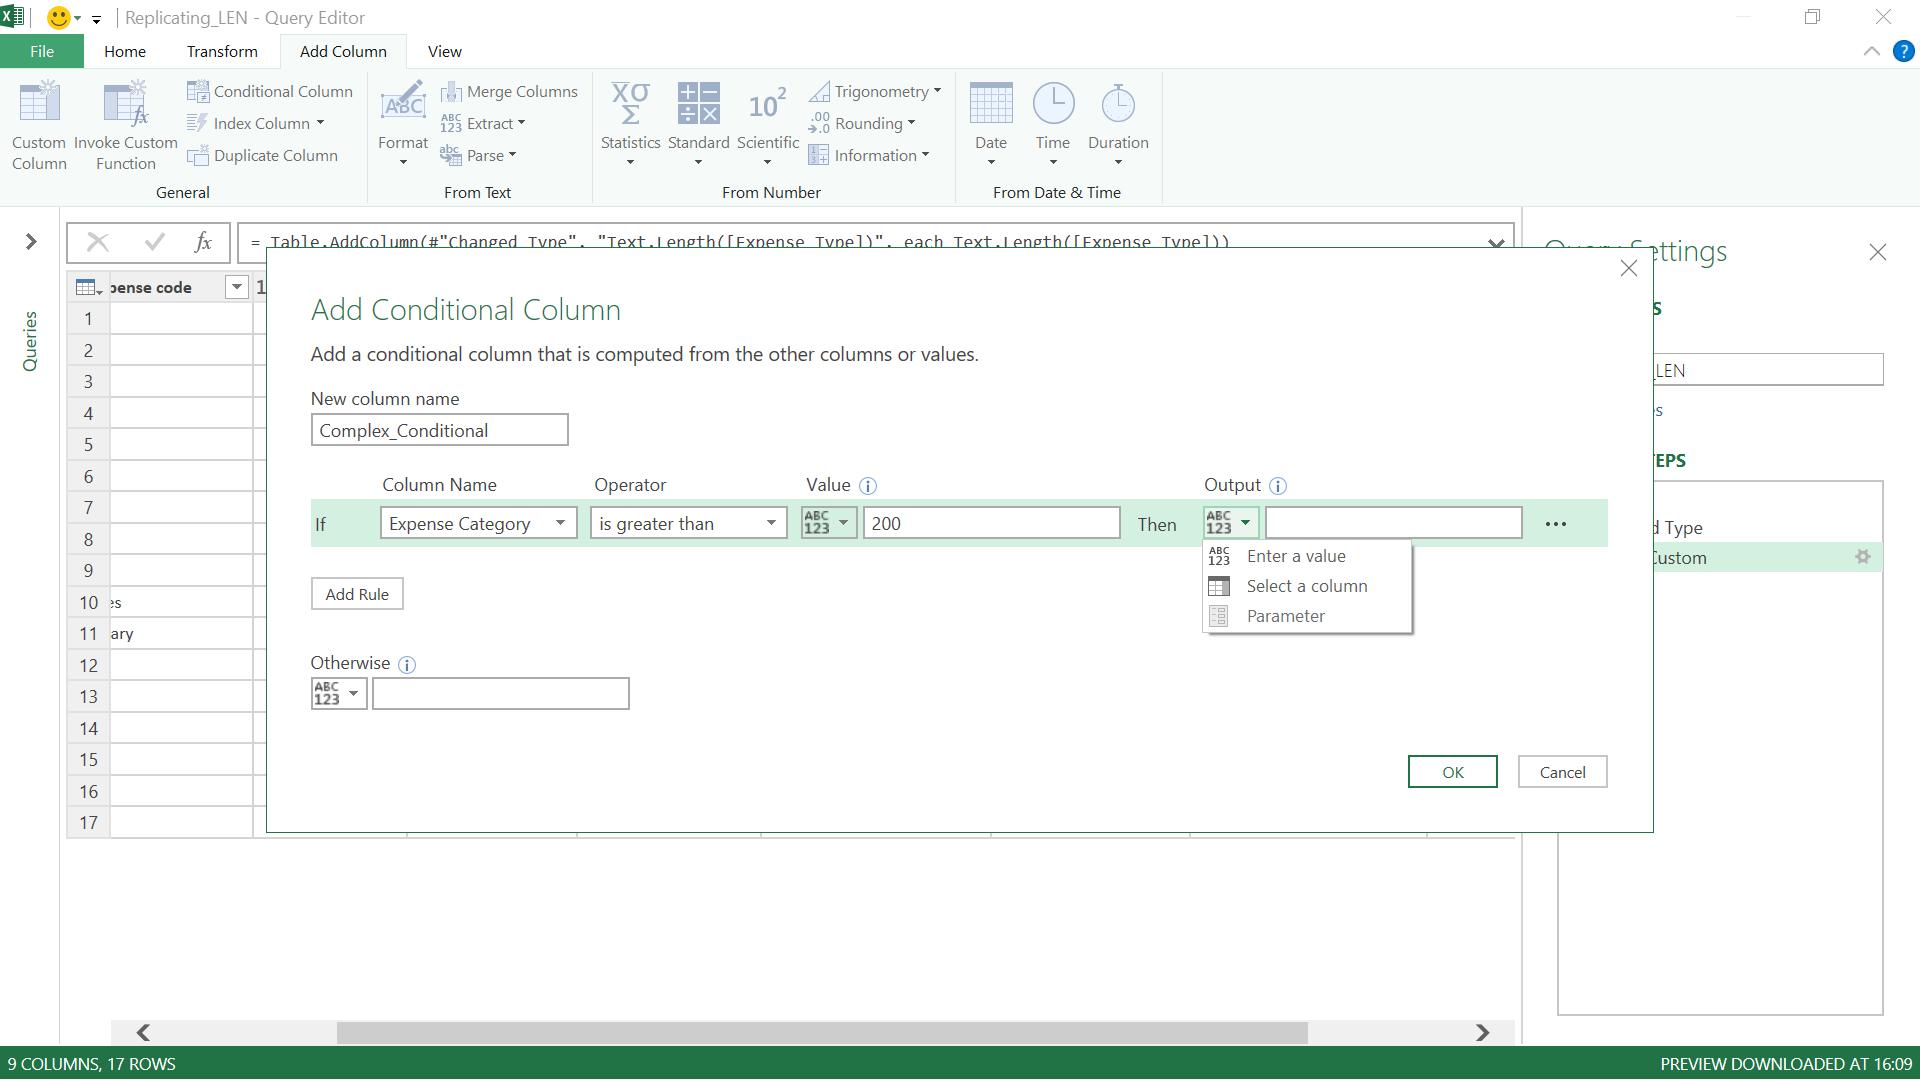
The first value I can enter is the ‘New column name’, which I have decided will be called Complex_Conditional. I am then given the opportunity to fill in the values in an ‘If’ statement.
I first need to specify the column name that my statement will be based on. I have a drop-down to help me so that I can pick any of the columns in my query.
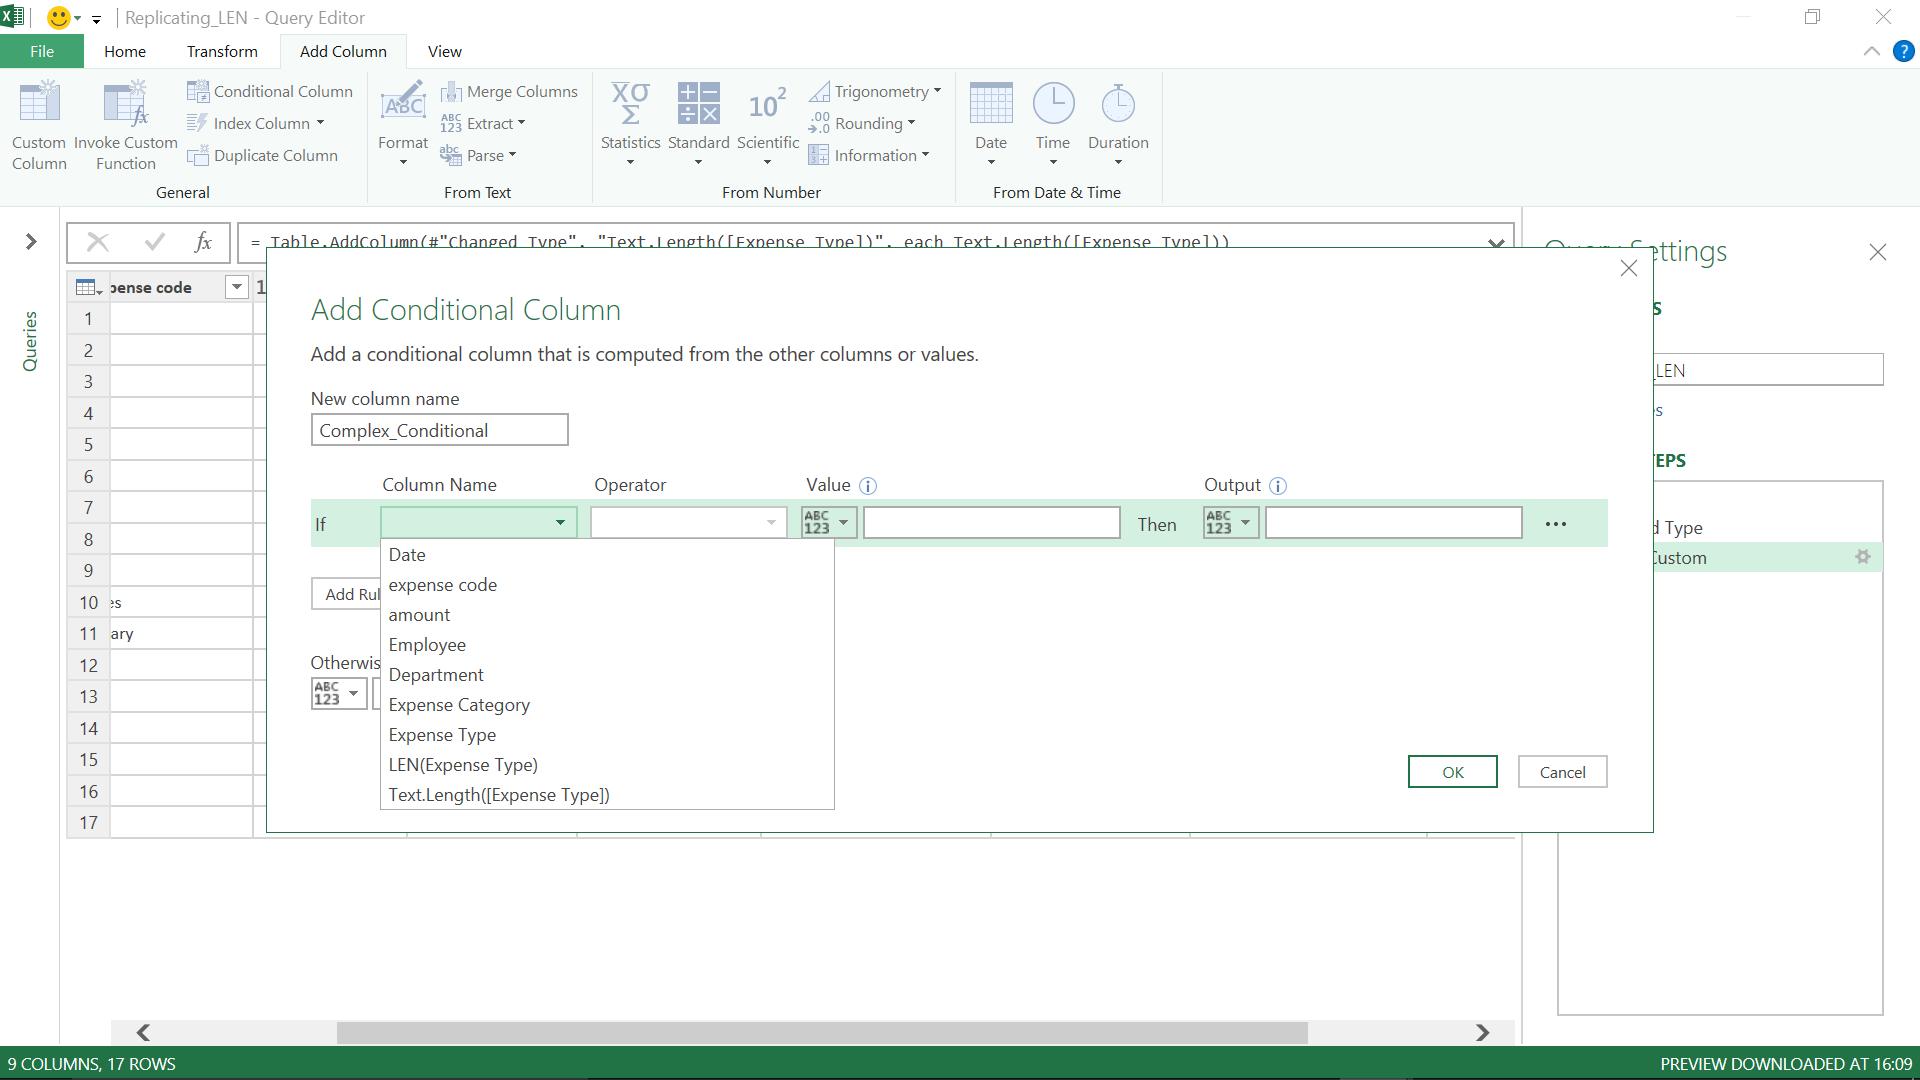
I decide to begin with Expense Category. The next entry I am prompted for is the ‘Operator’ and again I have a dropdown to help me:
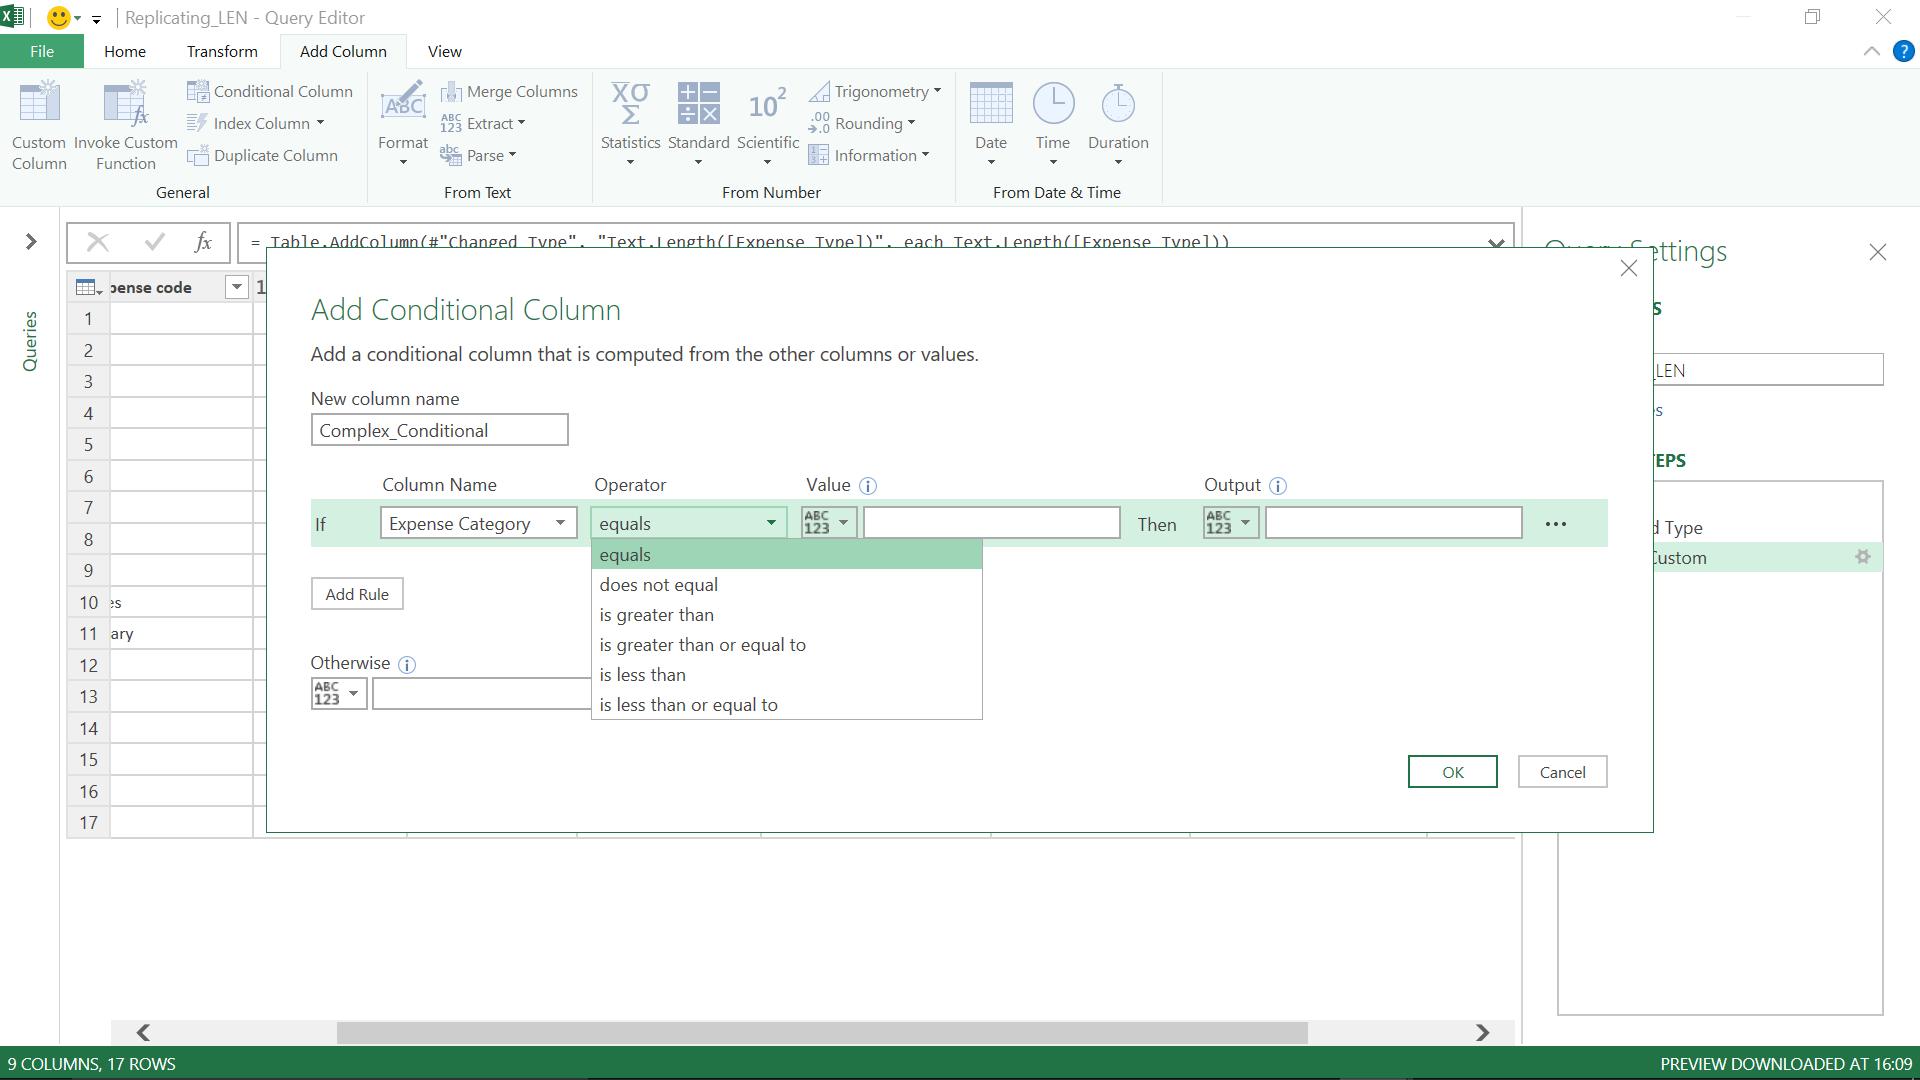
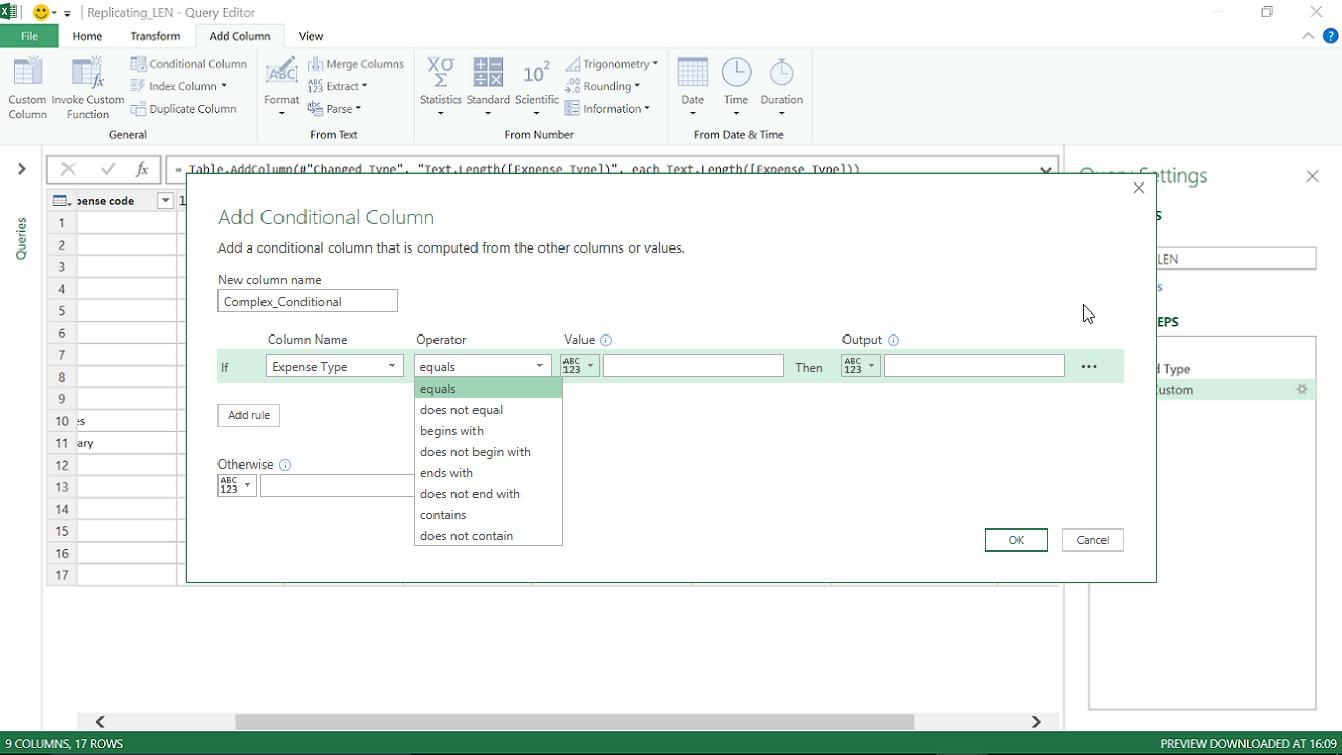
This dropdown is clever. It knows that Expense Category is datatype number, and so it has only given me options that apply to numbers. If I were to use Expense Type instead, I would be operating on a text field, so the options would be different, as shown below:
Going back to use Expense Category, I choose ‘is greater than’ and move to the next value which is ‘Value’ (the value which Expense Category needs to be greater than), and there is a dropdown next to the data type icon:
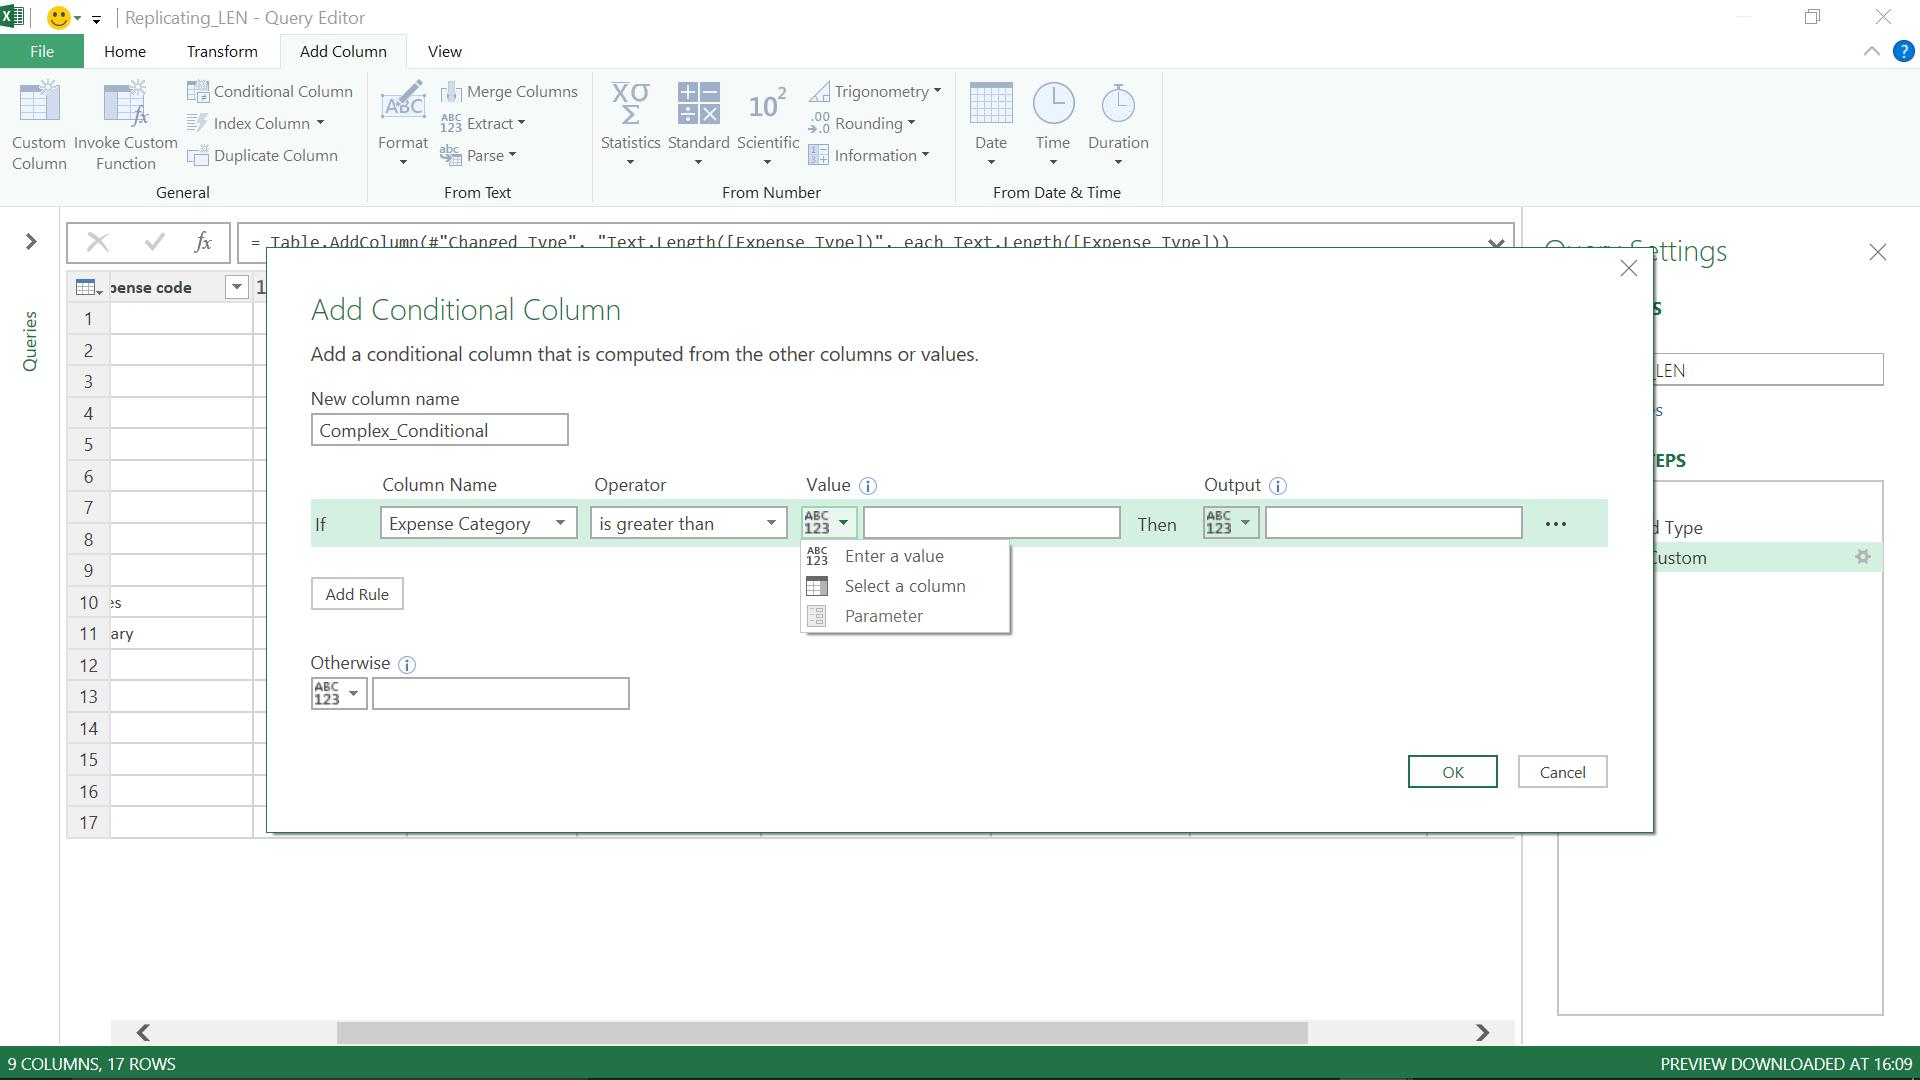
Therefore, I can either ‘Enter a value’, ‘Select a column’ or there is a third option ‘Parameter’. Enter a value’ is simple enough. I just pick a numerical value to compare my column with. If I choose to ‘Select a column’, a dropdown icon appears next to the value, but it is not quite as clever this time, as all my query columns appear, along with a little warning icon that tells me to ‘Enter a number value’ if I click on it. Just for fun, I pick a column that I know is text…
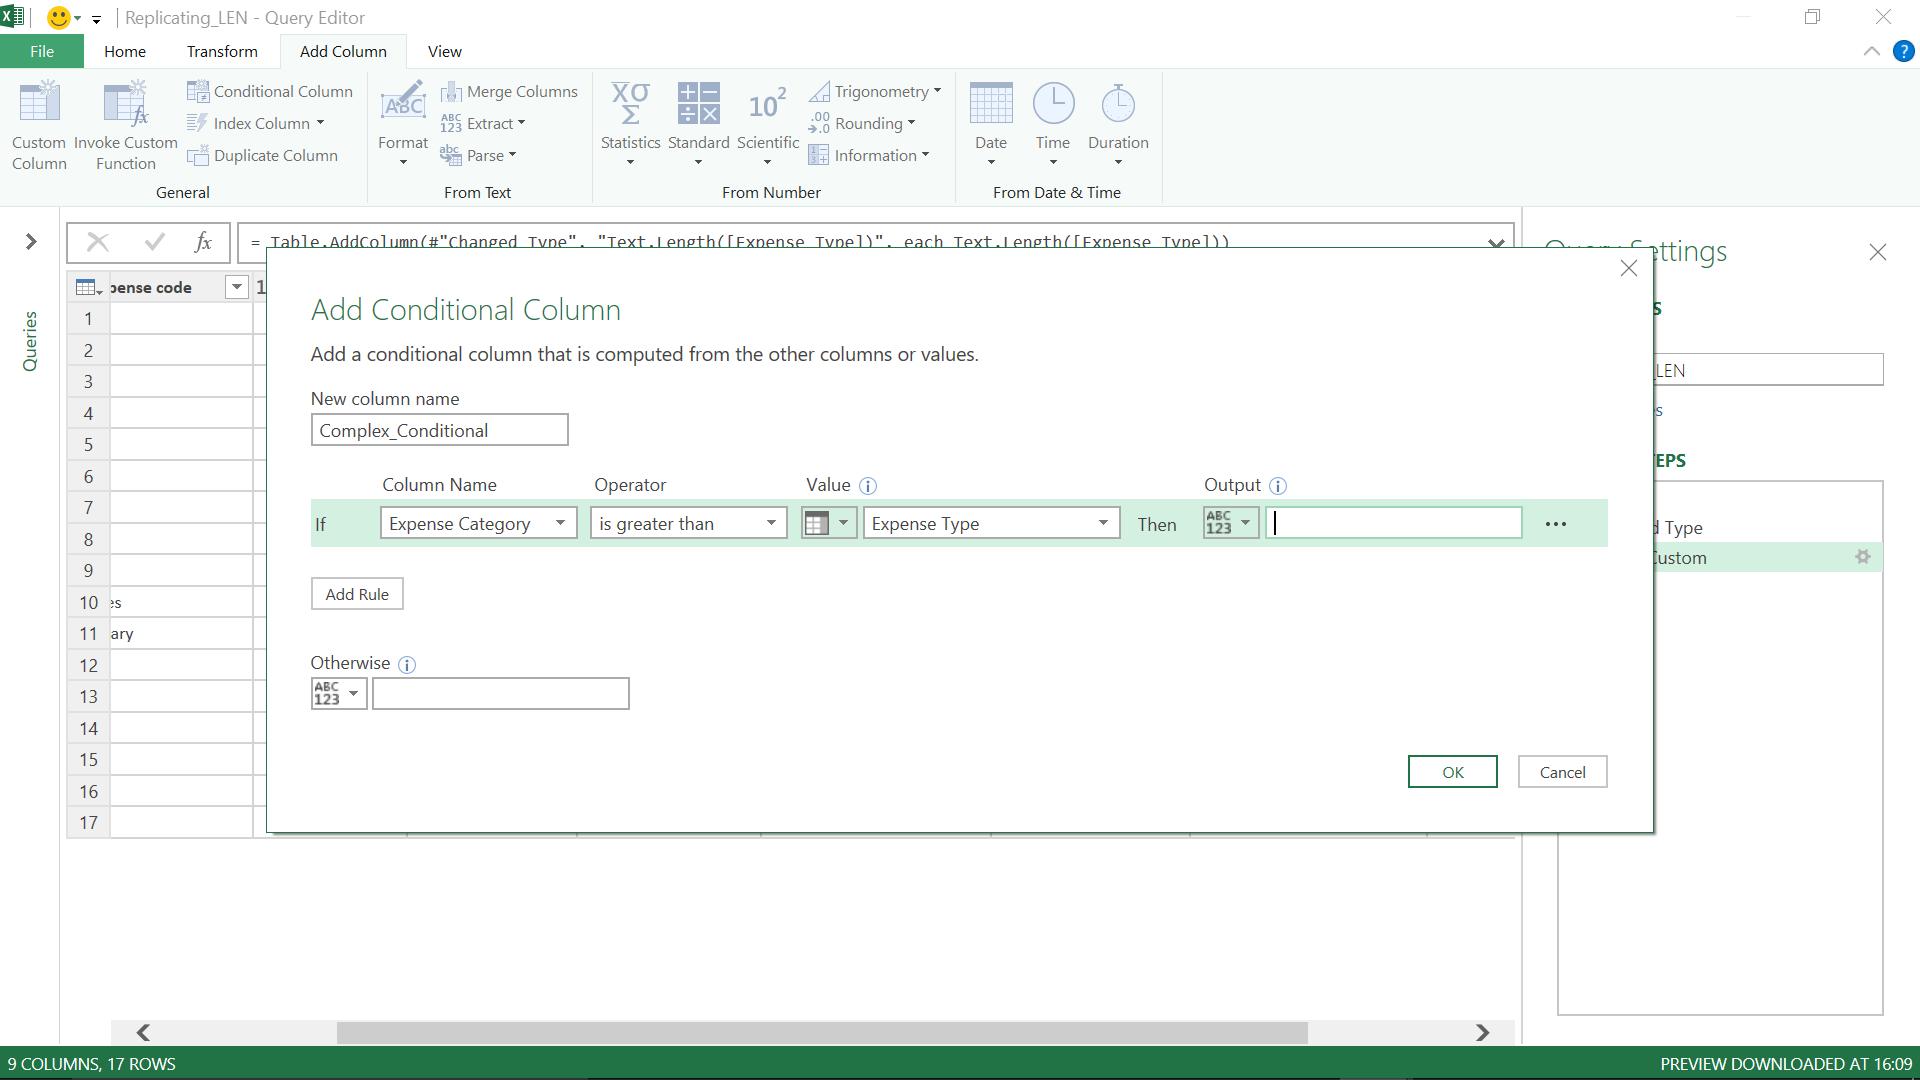
Unfortunately, Power Query will let me ignore the warning and continue, and it is not until I click ‘OK’ that it fails to execute my conditional statement:
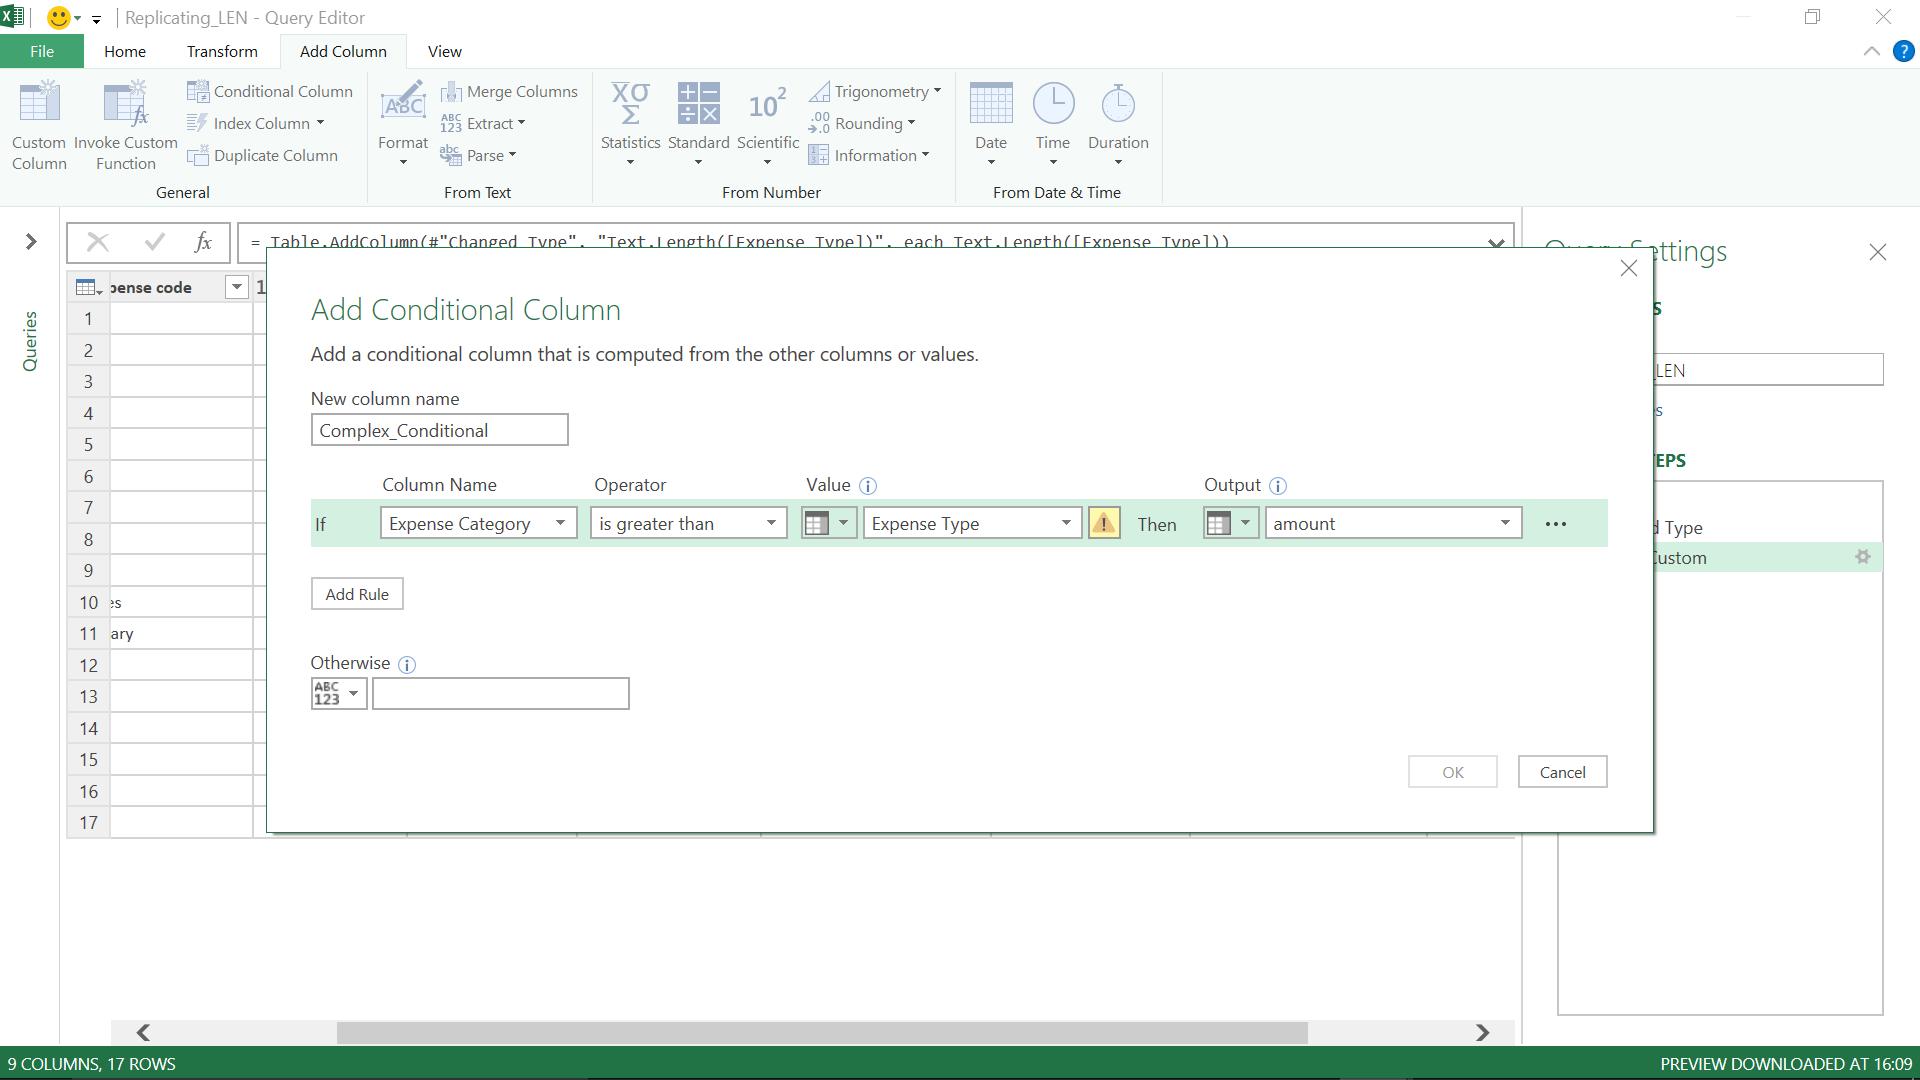
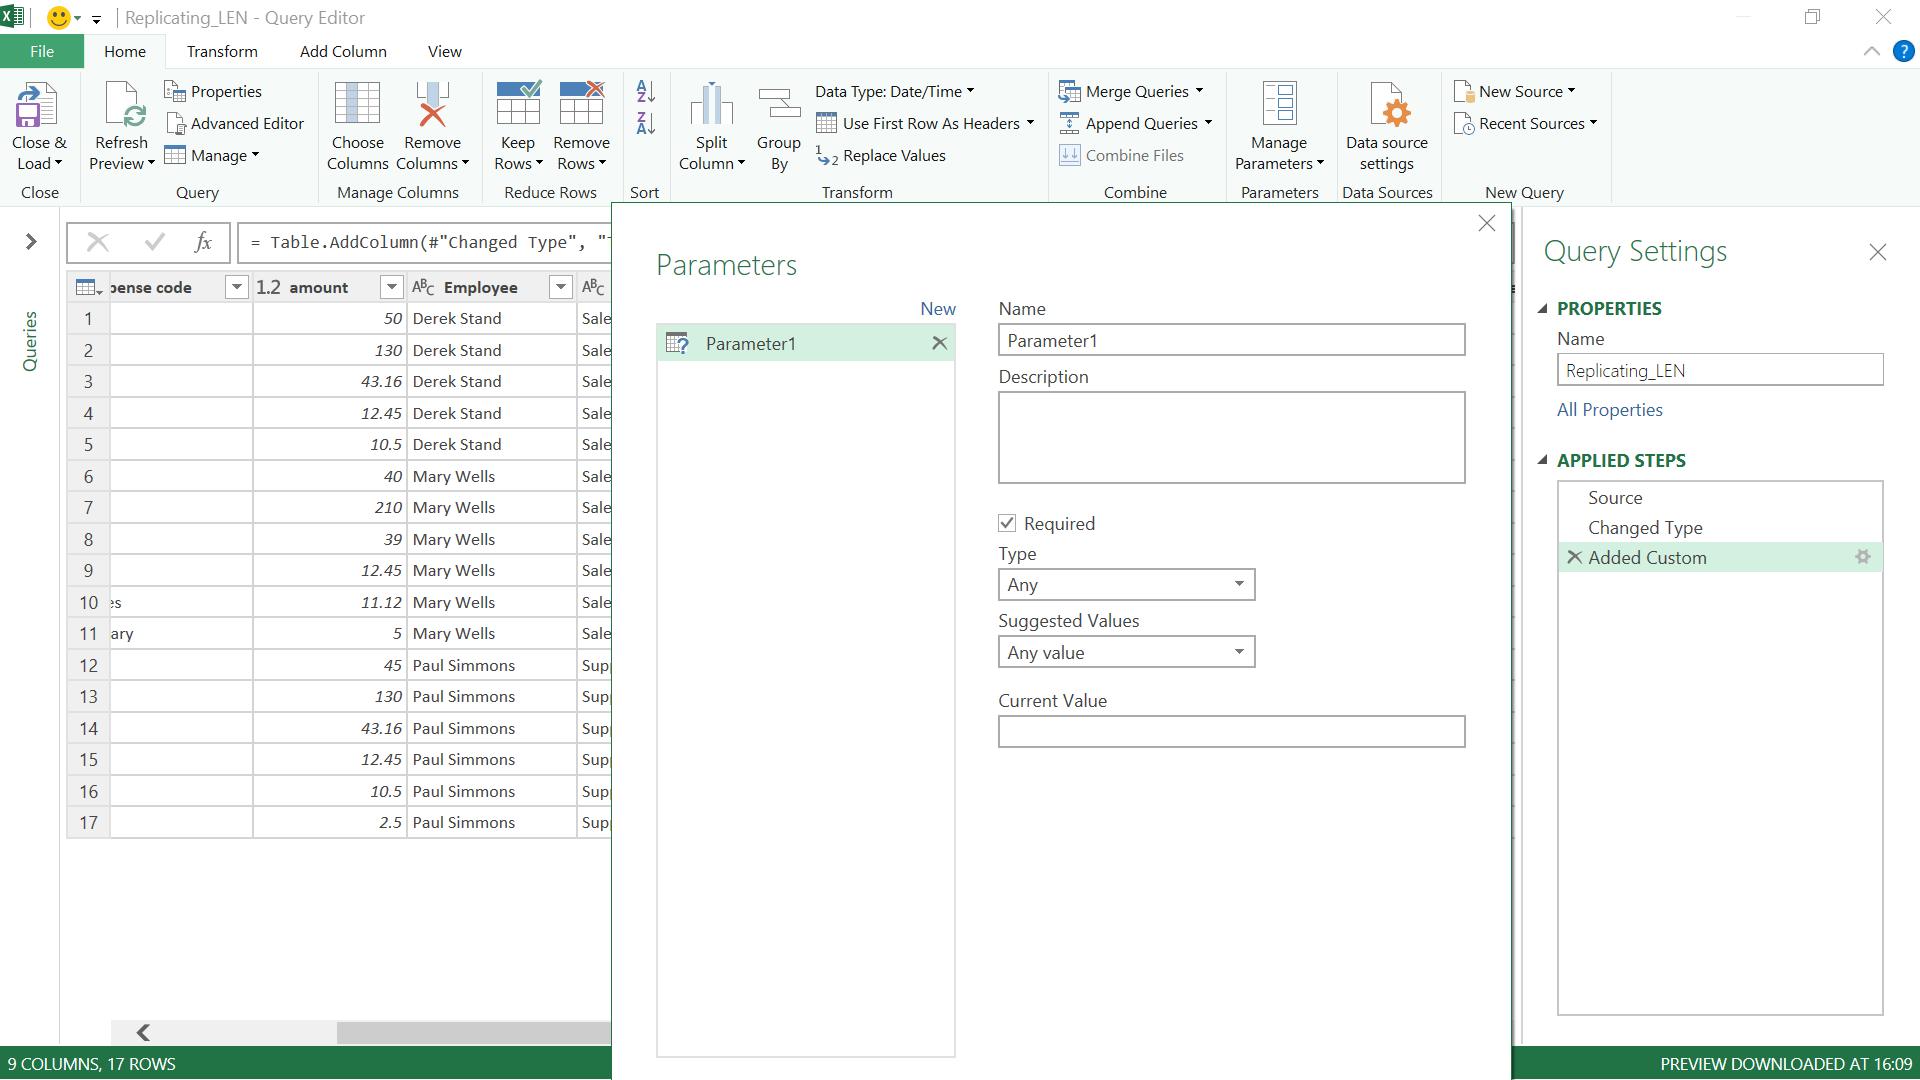
The warning icon is back and I have to go back and change my column. My final option in the ‘Value’ box is to pick a ‘Parameter’. However, in this case it is greyed out. This is because I have no parameters defined in my query. Parameters and their uses deserve a whole blog entry of their own, but for now the screen below shows where parameters would be entered. On the ‘Home’ tab there is a section on ‘Parameters’ which allows me to manage, edit and add them.
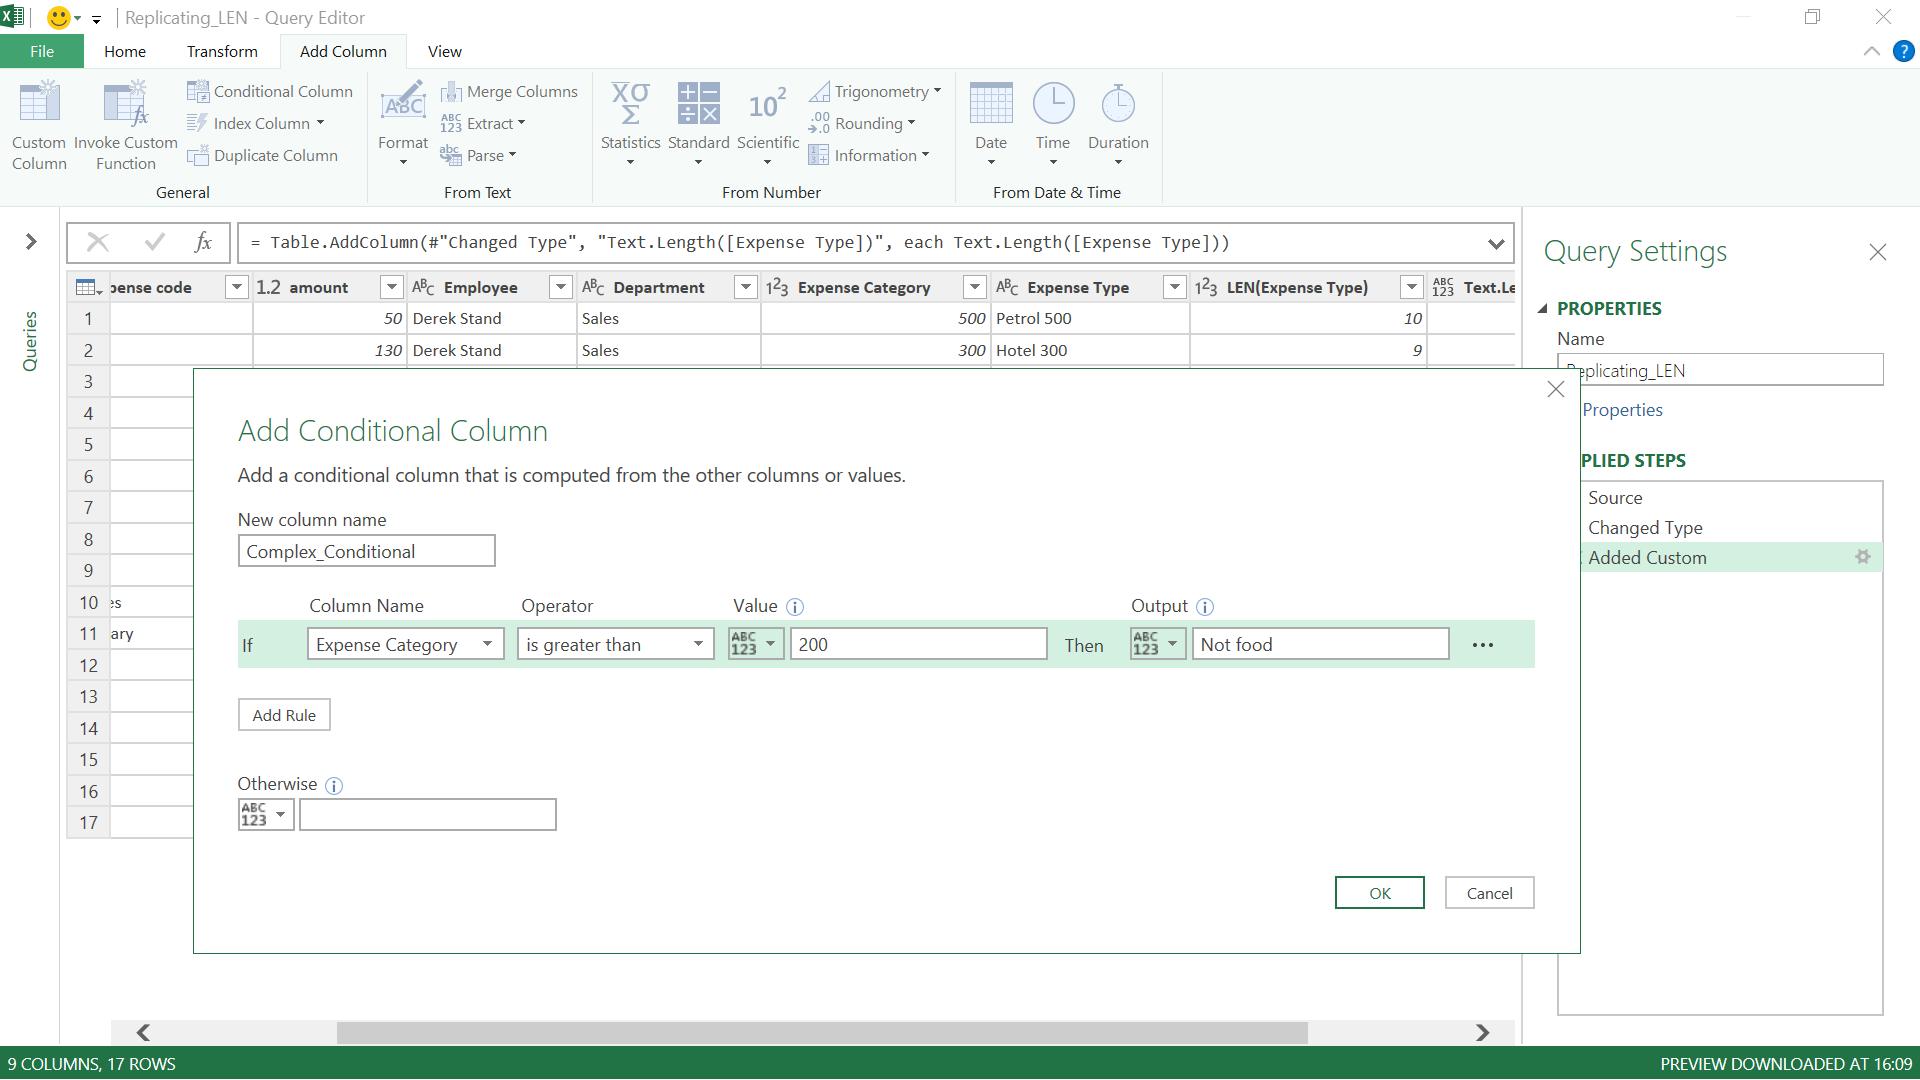
Back to my conditional column – I have picked my numeric field Expense Category, chosen to determine if it is greater than 200, and now I can decide what appears in my conditional column.
Again, I have three options: I can output a value, a column or a parameter. In this case, I can output any datatype, so there are no checks. I choose to show that the expense is ‘Not food’ and move on to decide whether to enter more rules or to just pick what happens ‘Otherwise’:
I choose to add a few more rules, and specify a value in the ‘Otherwise’ section (which again can be a value, column or parameter).
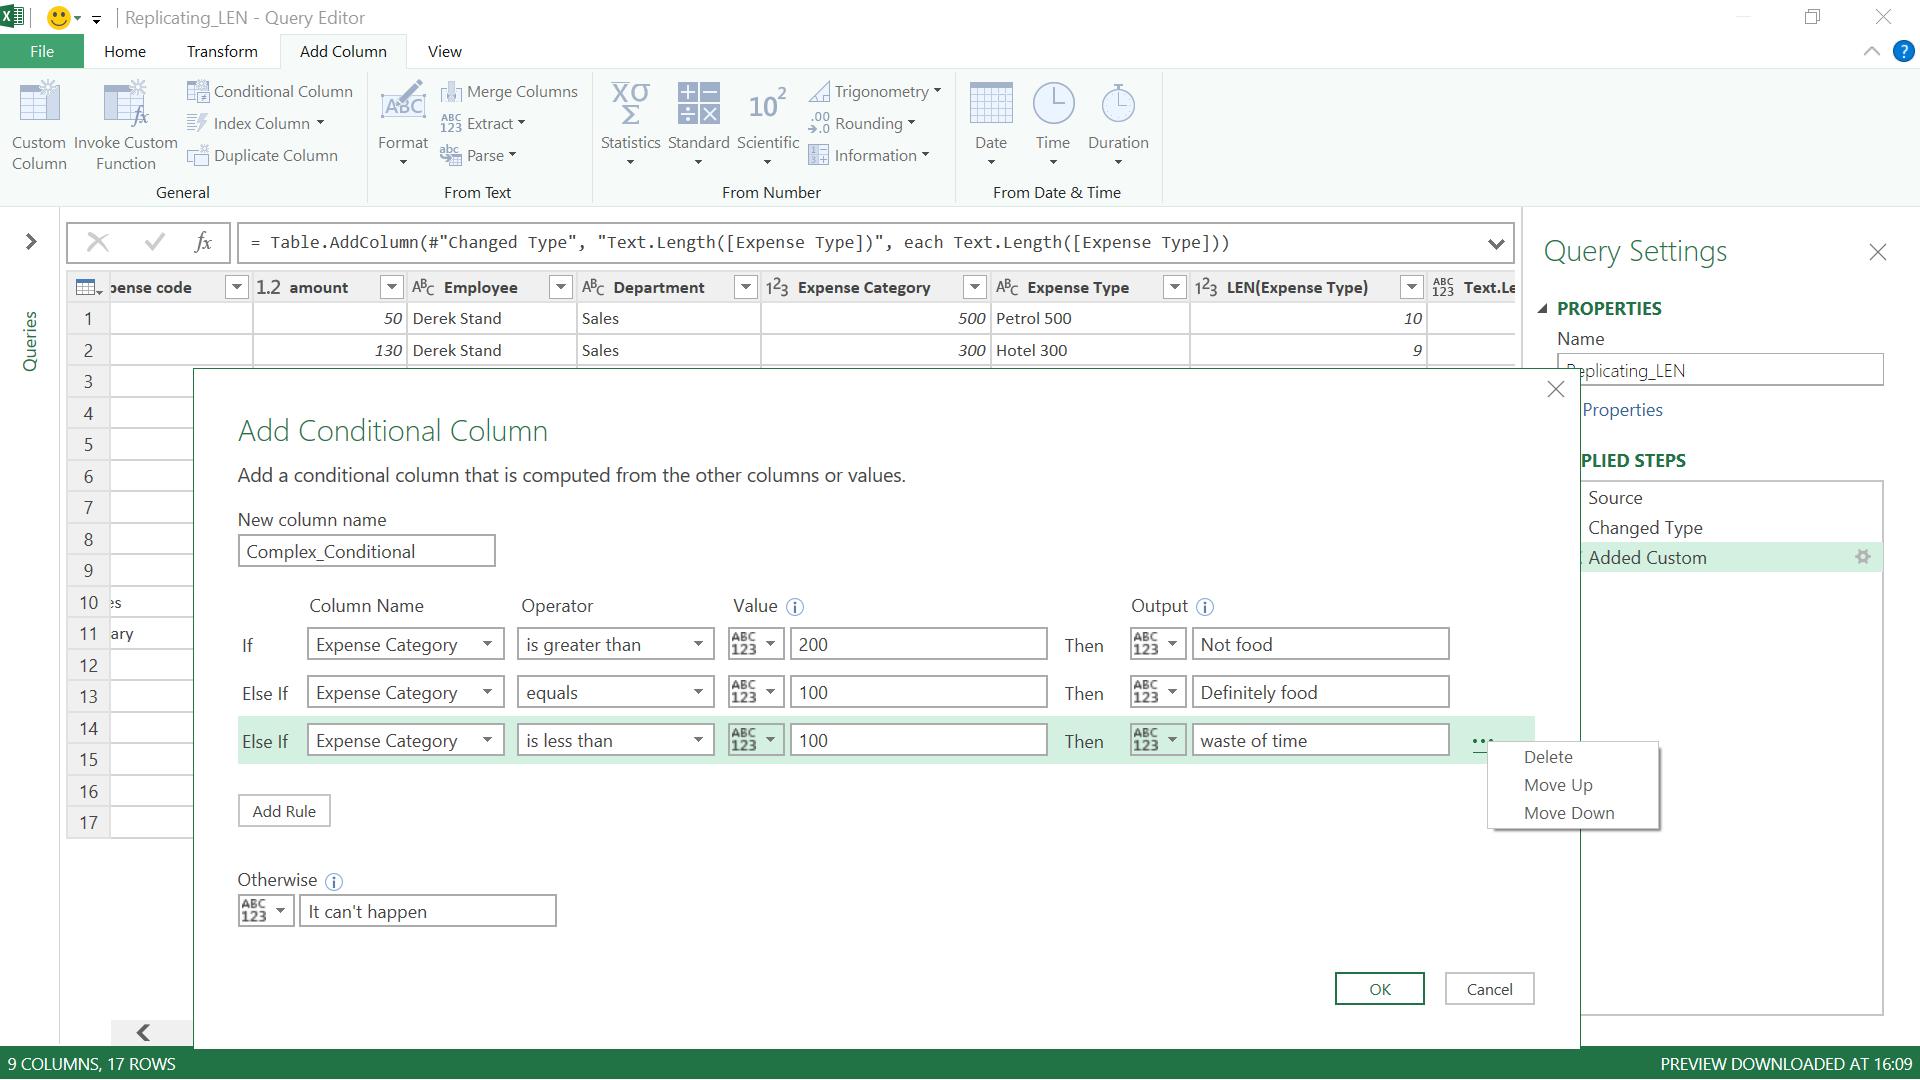
Note that, if all my data is covered by the first couple of rules, there is no point adding more, as they will never be applied. I can move rules up or down to change the priority of how they are applied else delete them altogether. I click ‘OK’ to see my new column and my new step.
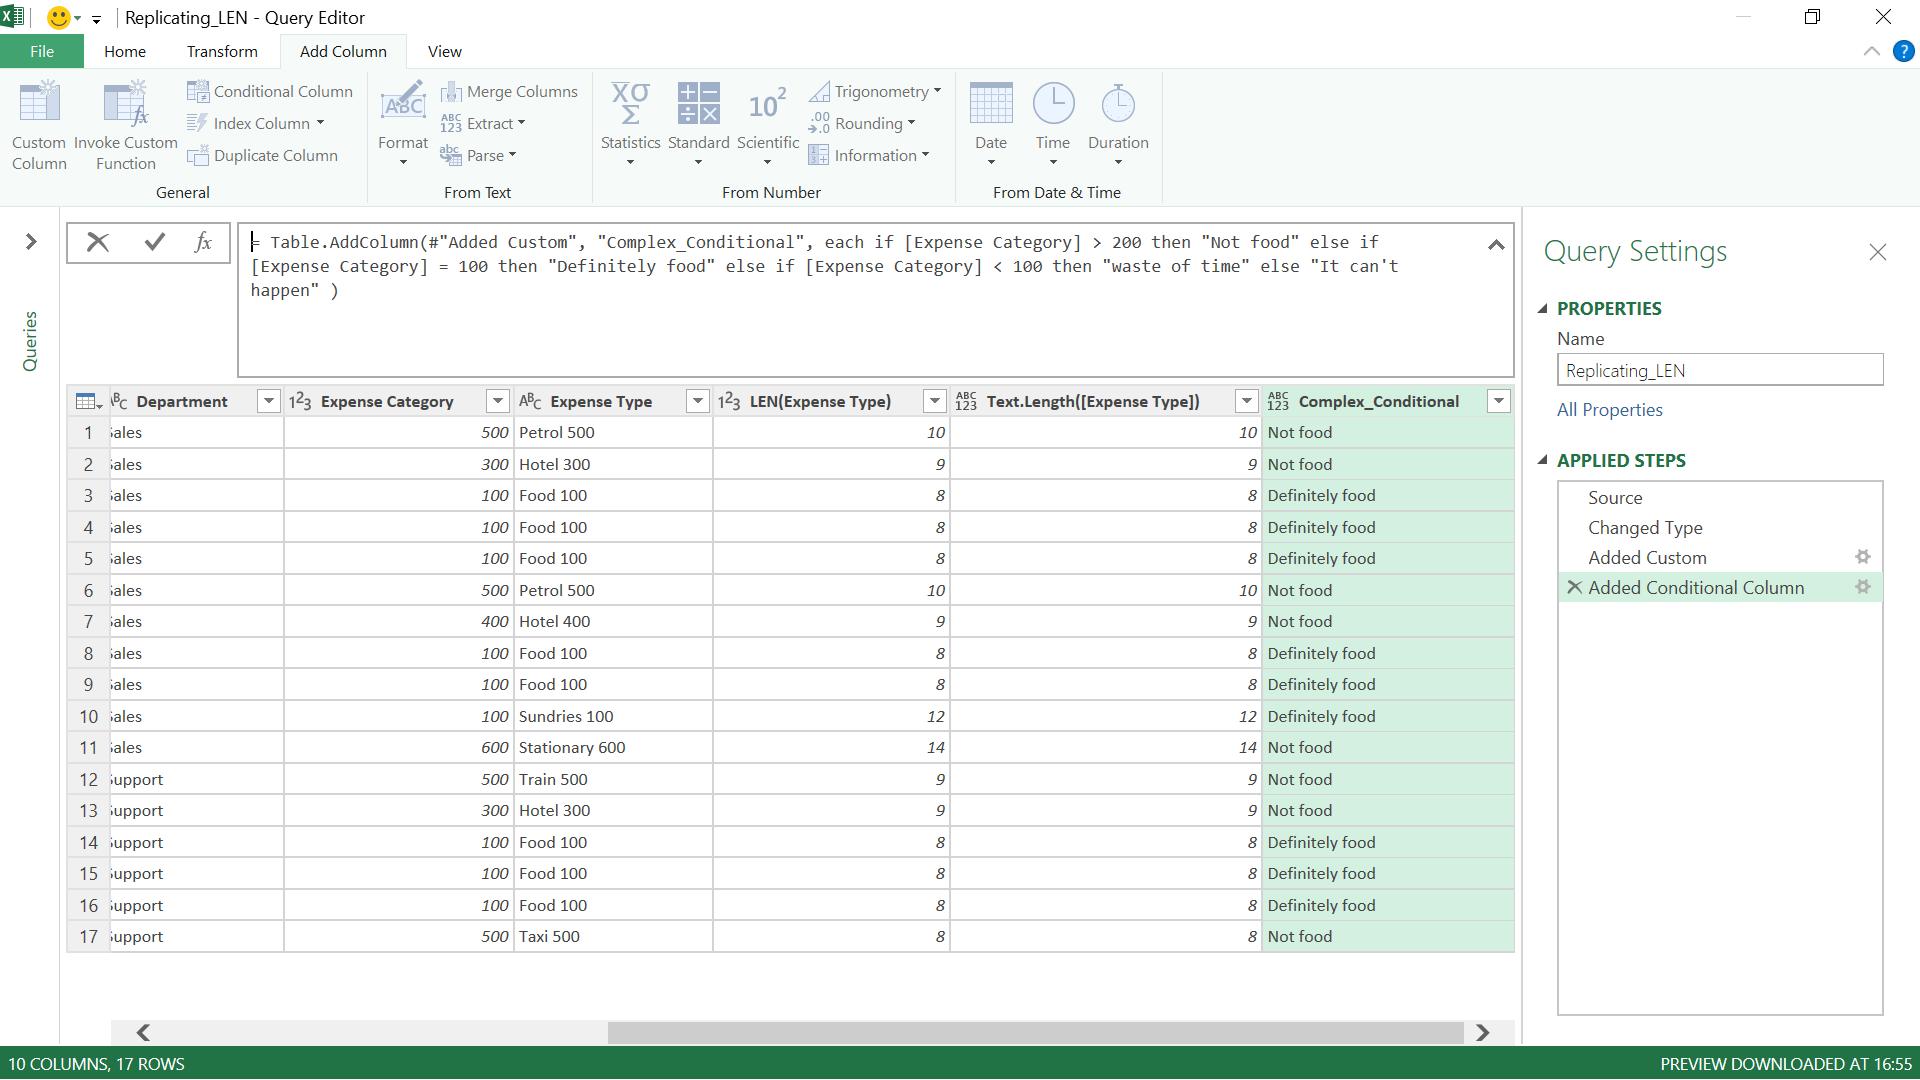
My column looks fine and in the window above my data I can see the M code statement:
= Table.AddColumn(#"Added Custom", "Complex_Conditional", each if [Expense Category] > 200 then "Not food" else if [Expense Category] = 100 then "Definitely food" else if [Expense Category] < 100 then "waste of time" else "It can't happen" )
It’s a bit of a mouthful, so I can tidy it up and make it easier to read. I can either do this in the ‘Advanced Editor’ which will show me all the steps or if I just want to change this step, I can do so by clicking in the box and lining up my data accordingly. To do this in the box, if I want to add a line break I use ENTER whilst holding down the SHIFT key.
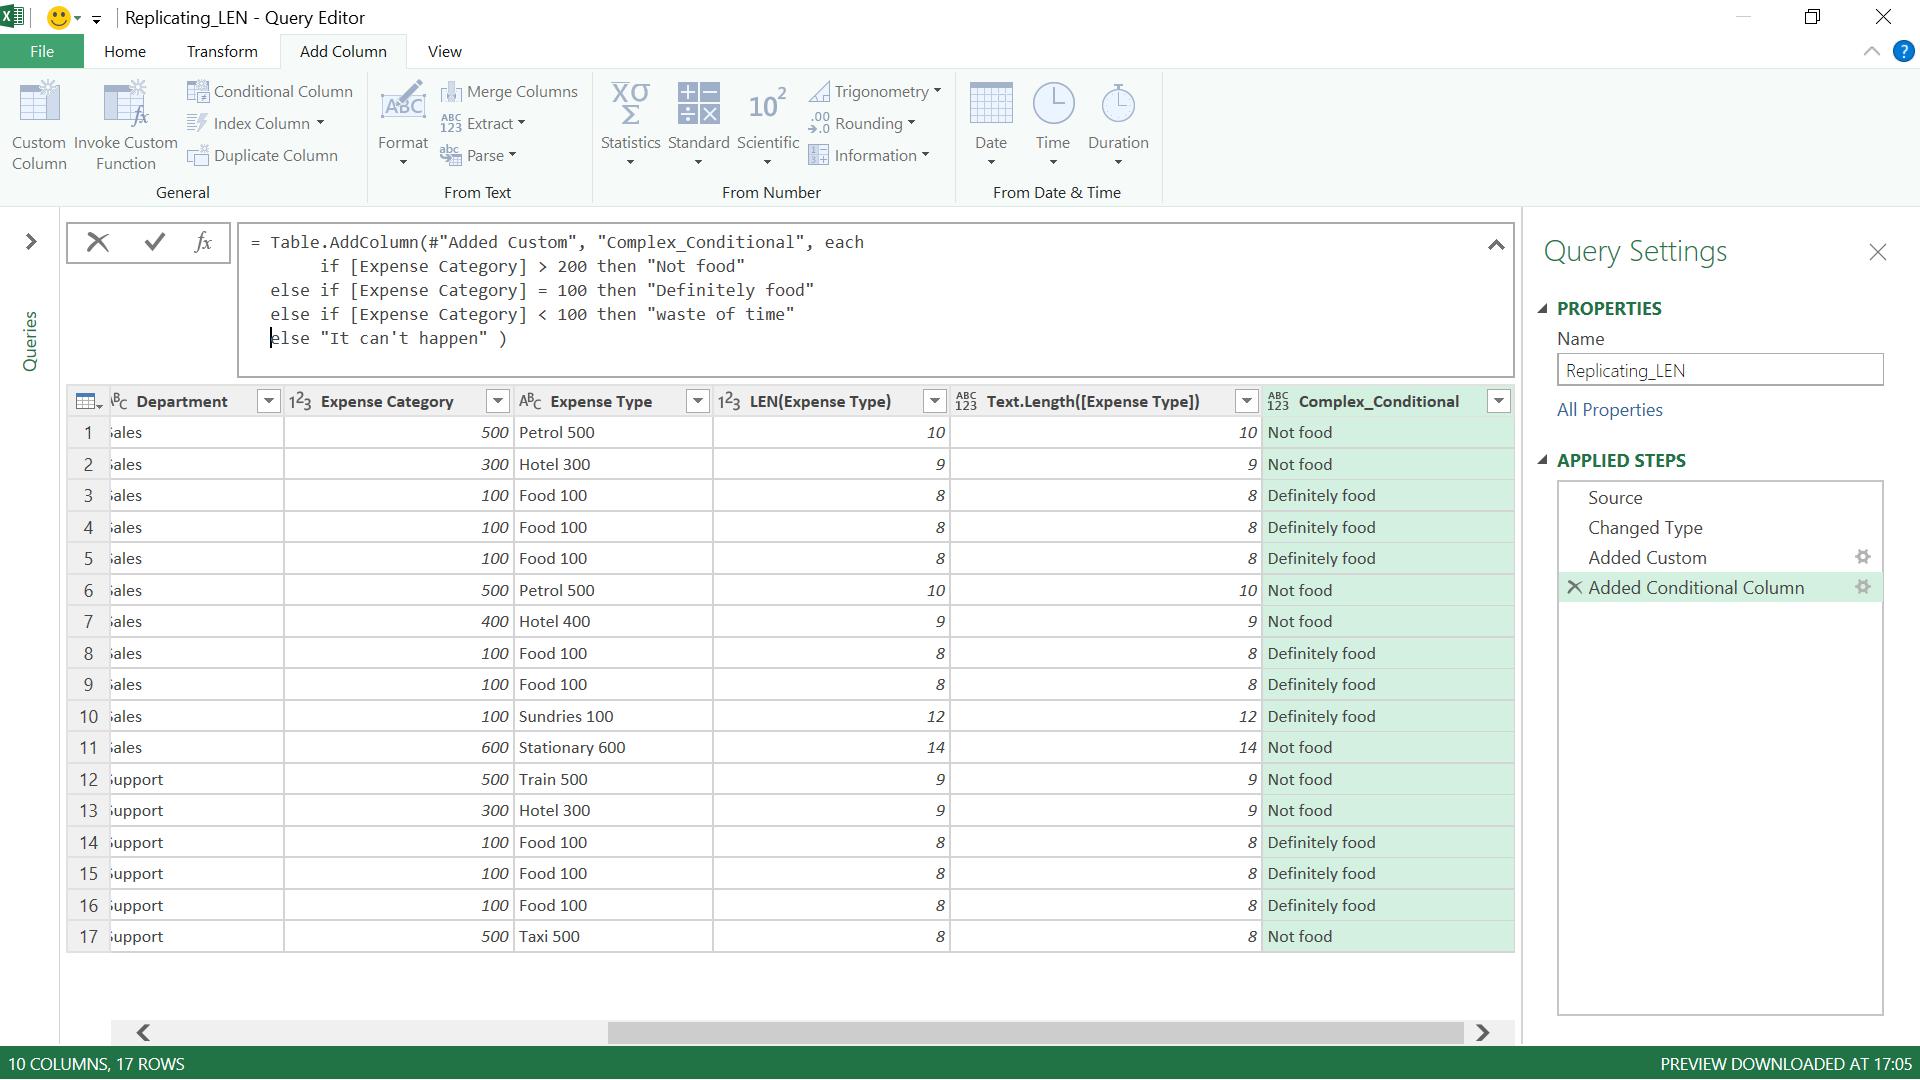
Now that is much easier to read and I can follow what the M code is doing.
Want to read more about Power Query? A complete list of all our Power Query blogs can be found here. Come back next time for more ways to use Power Query!