
Power Query: One Folder, One Query
4 January 2017
Welcome our new Power Query blog. Today we extract multiple files from a folder.
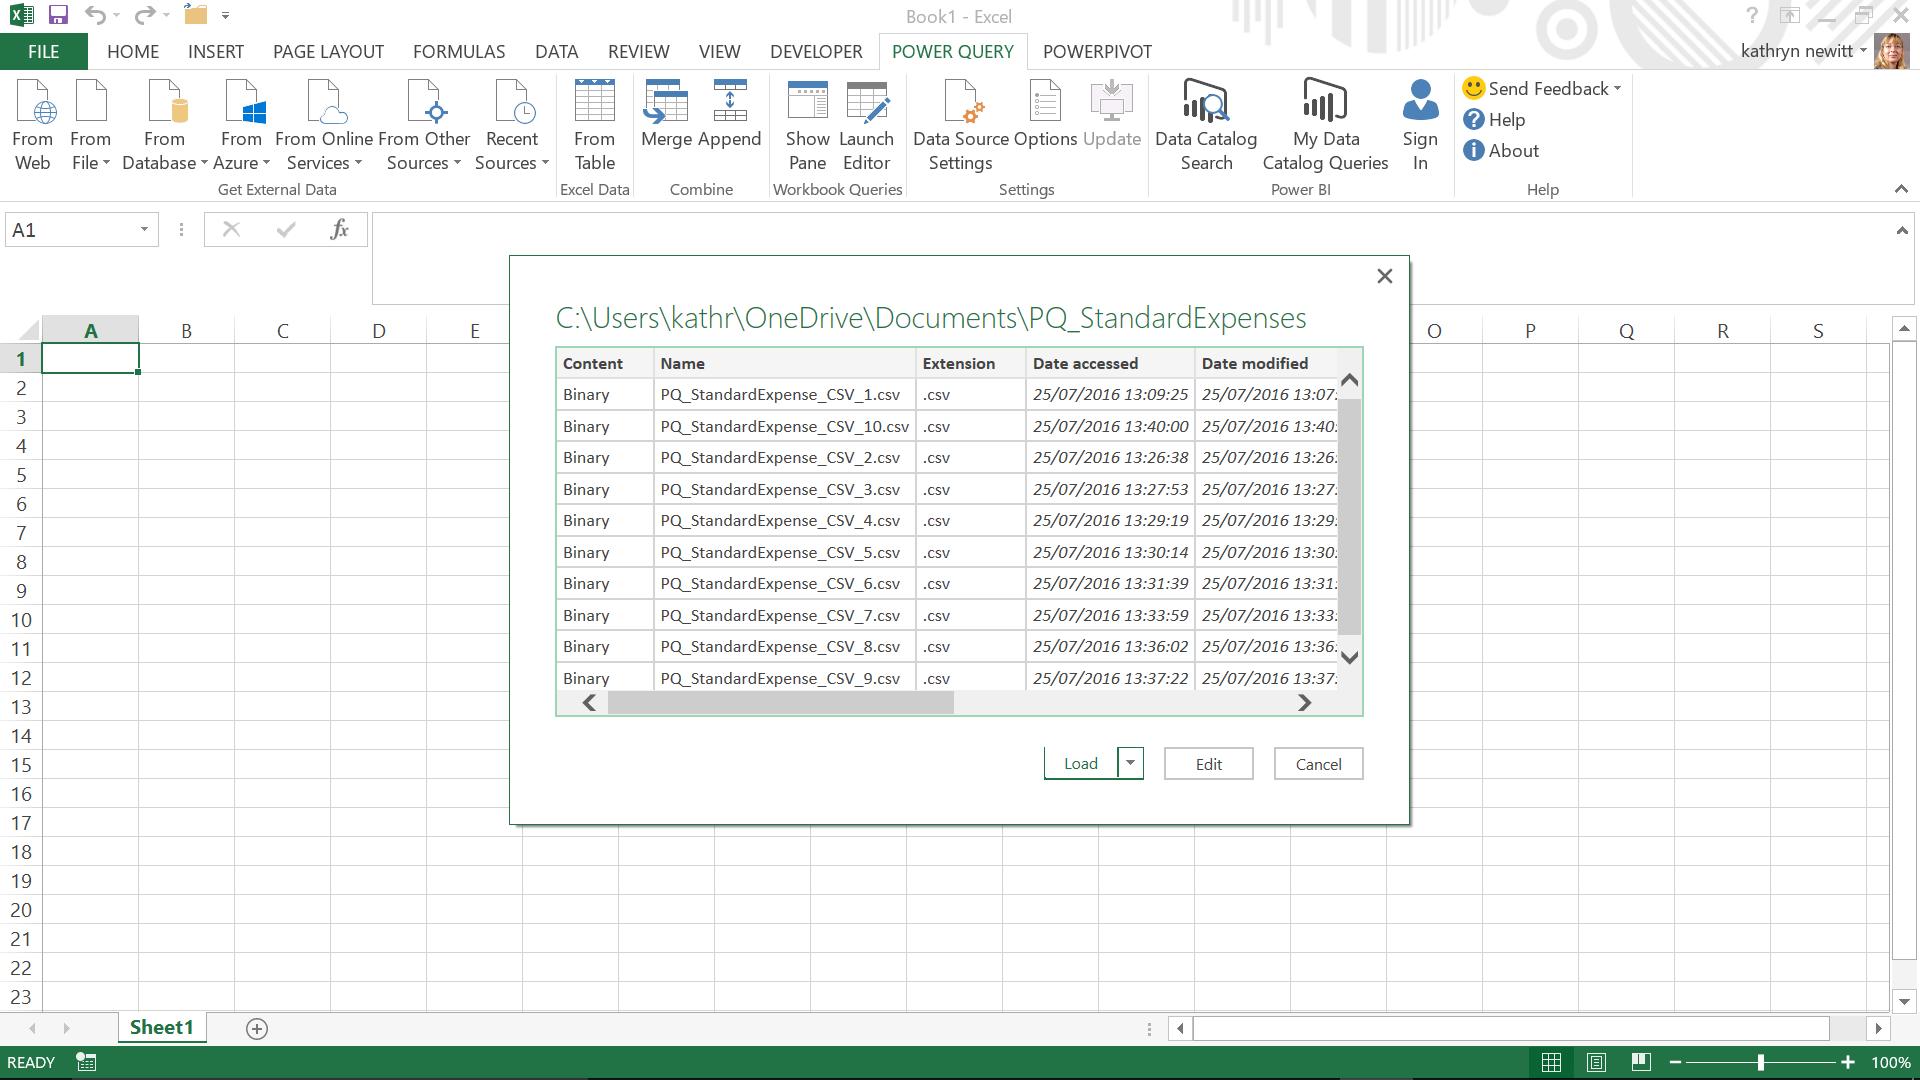
In our last blog entry, we showed how similar CSV (comma separated values) files can be extracted and appended to the same query. Today, we consider the scenario where we have many similar CSV files in the same folder. Instead of appending each one, we can extract all the files from a specified folder. In this example we have ten expense files in a folder called PQ_StandardExpenses. In a blank workbook, we opt to create a new query using the ‘From File’ Option, and drop down to select ‘From Folder’ – a simple browse window appears, and having chosen the correct folder, the meta data is displayed as shown below:
At this point, we could choose to load these files and we’d be done, but editing allows the data to be transformed, and some safety features to be added.
In this case, all the files have the extension CSV, but it is sensible to plan for some kind person putting an excel workbook in the folder and messing up future refreshes. At the same time, we can also allow for users typing in csv instead of CSV when they create their files.
Selecting the extension column, right-clicking gives the option to ‘Transform’ to lowercase:
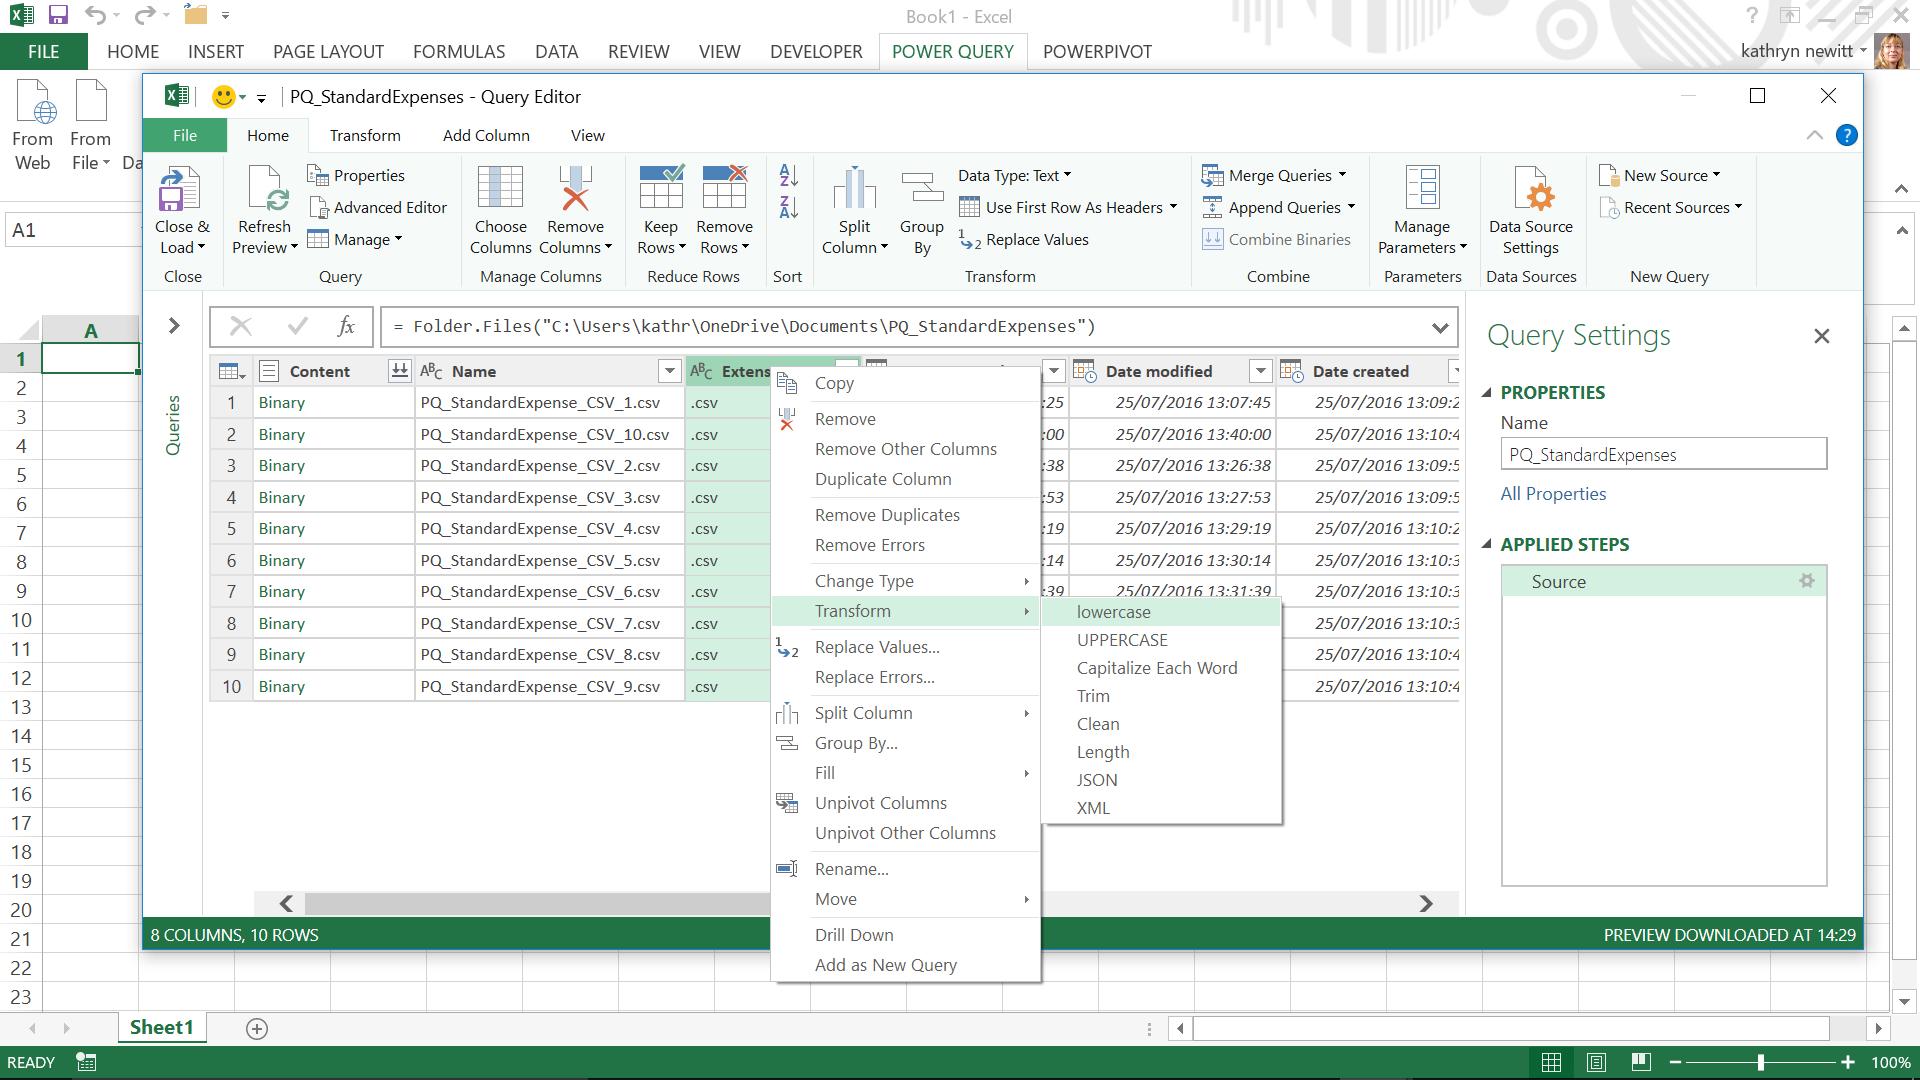
At the top is a standard filter arrow: clicking on this reveals a number of options to transform the data in the column. The ‘Text Filter’ allows selections matching or not matching the specified text – in this case we choose to match ‘.csv’ (note that the full stop is required). The query is now protected from stray workbooks and will include files with .csv and .CSV extensions. Simple!
In order to transform the data in the files, we need to see the table contents, and not just the metadata. Next to the content column header is an icon which appears for binary files, and allows the binary to be combined – the ![]() icon.
icon.
Pressing the button with this icon makes the contents of each table appear under the table headings:
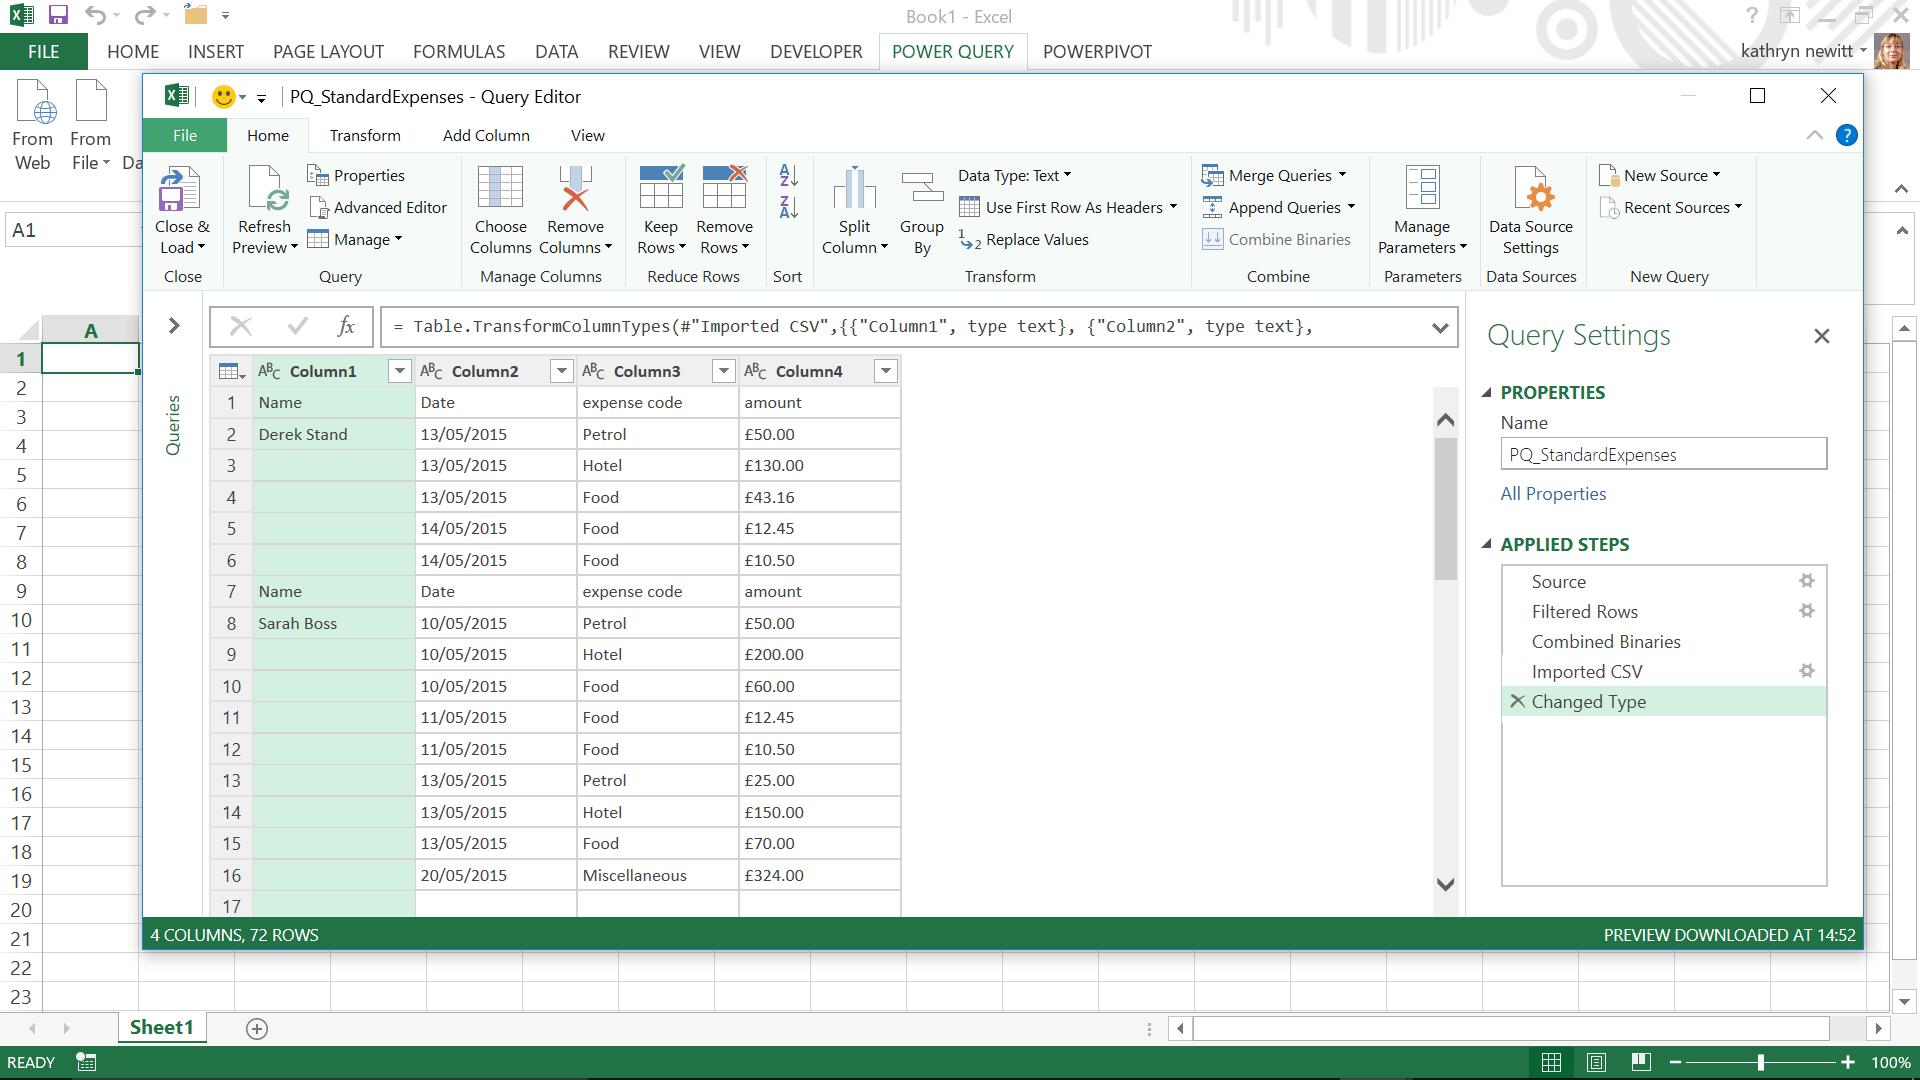
On the ‘HOME’ tab, in the ‘Transform’ group, there is an option to ‘Use First Row as Headers’. This works well, but we have other header rows that we need to remove. One way to do this is to deliberately put an error in these rows so we can select and remove the errors.
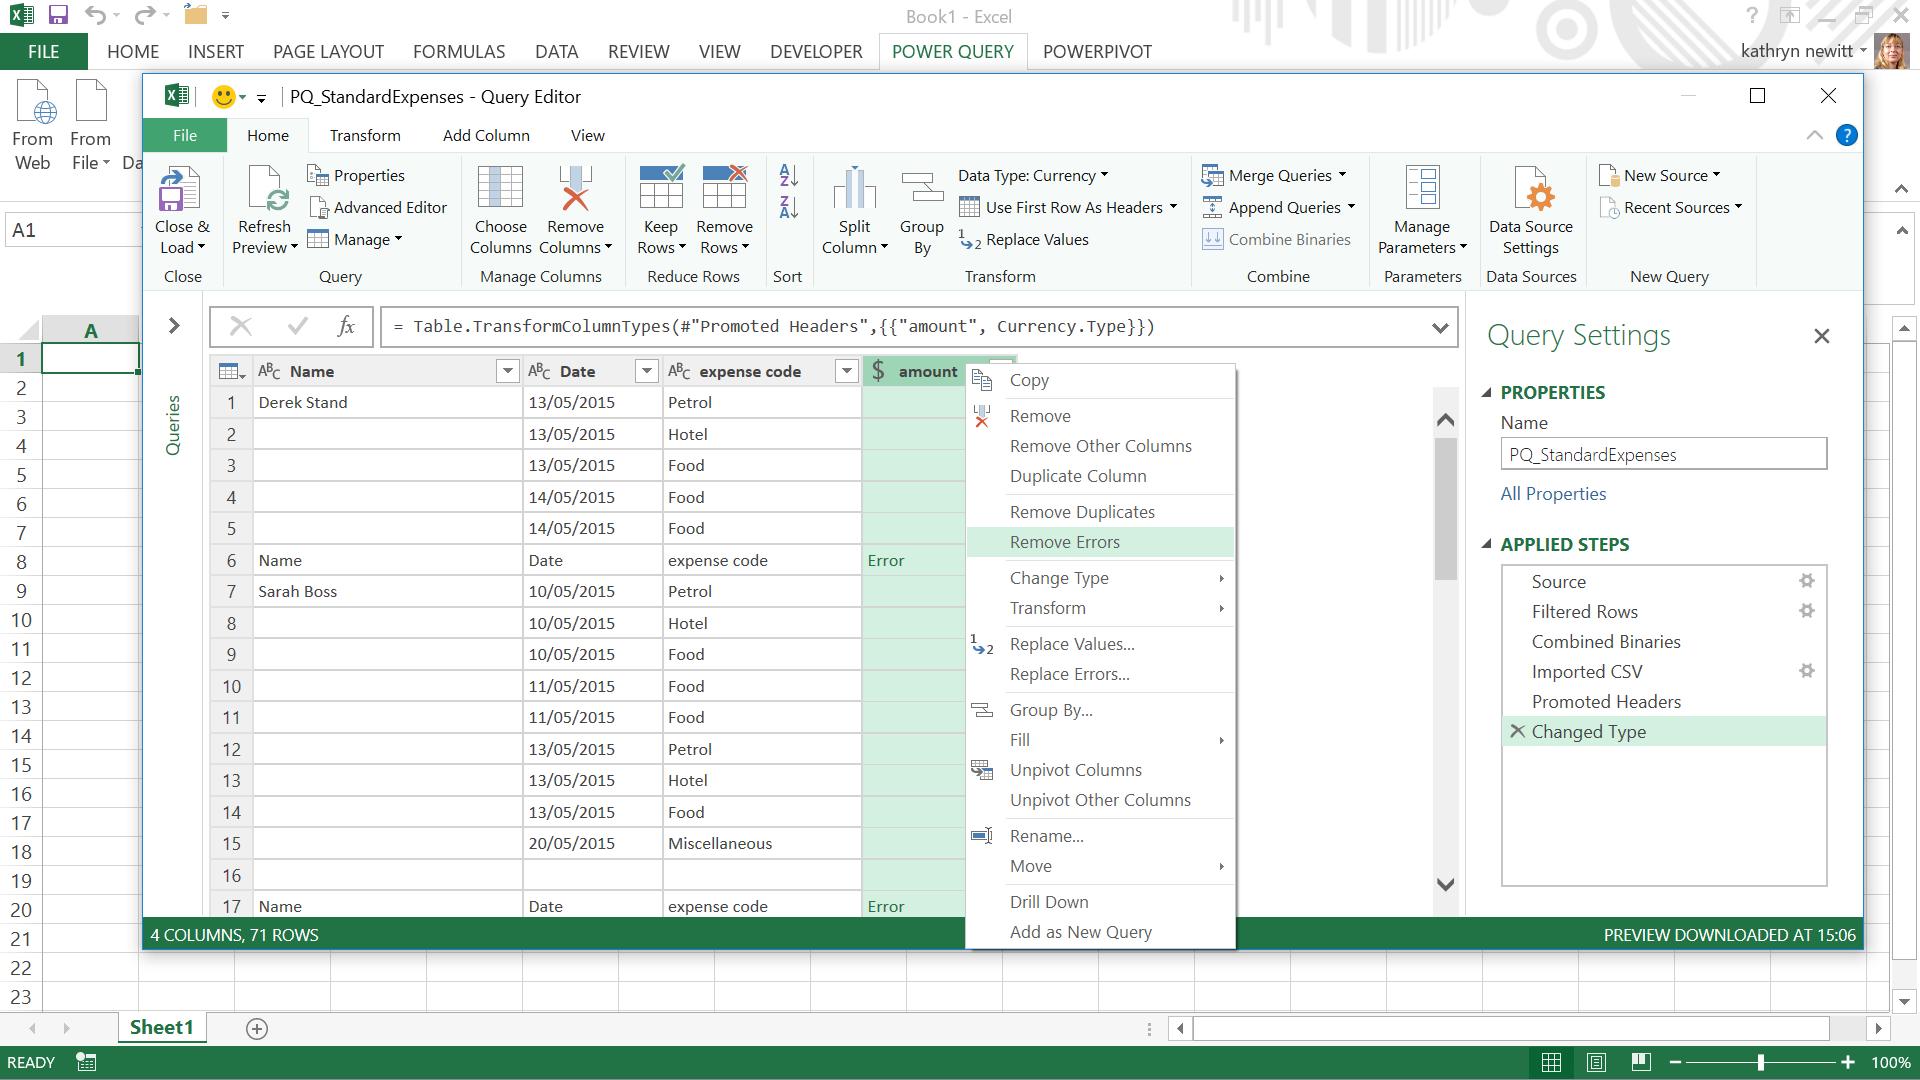
Change the column type on the amount row to currency by selecting the currency column. Then, on the ‘HOME tab in the ‘Transform’ group the top option Data Type is initially set to ‘Text’ because Power Query has recognised that some of the data in the column is text. Changing it to ‘Currency’ is fine for the rows with actual amounts in, but produces errors for the headings. Right-clicking the amount column gives the option to ‘Remove Errors’ viz.
Finally, we can replace blanks with nulls and down fill as we did with the single table. See Power Query - Getting Started for more details.
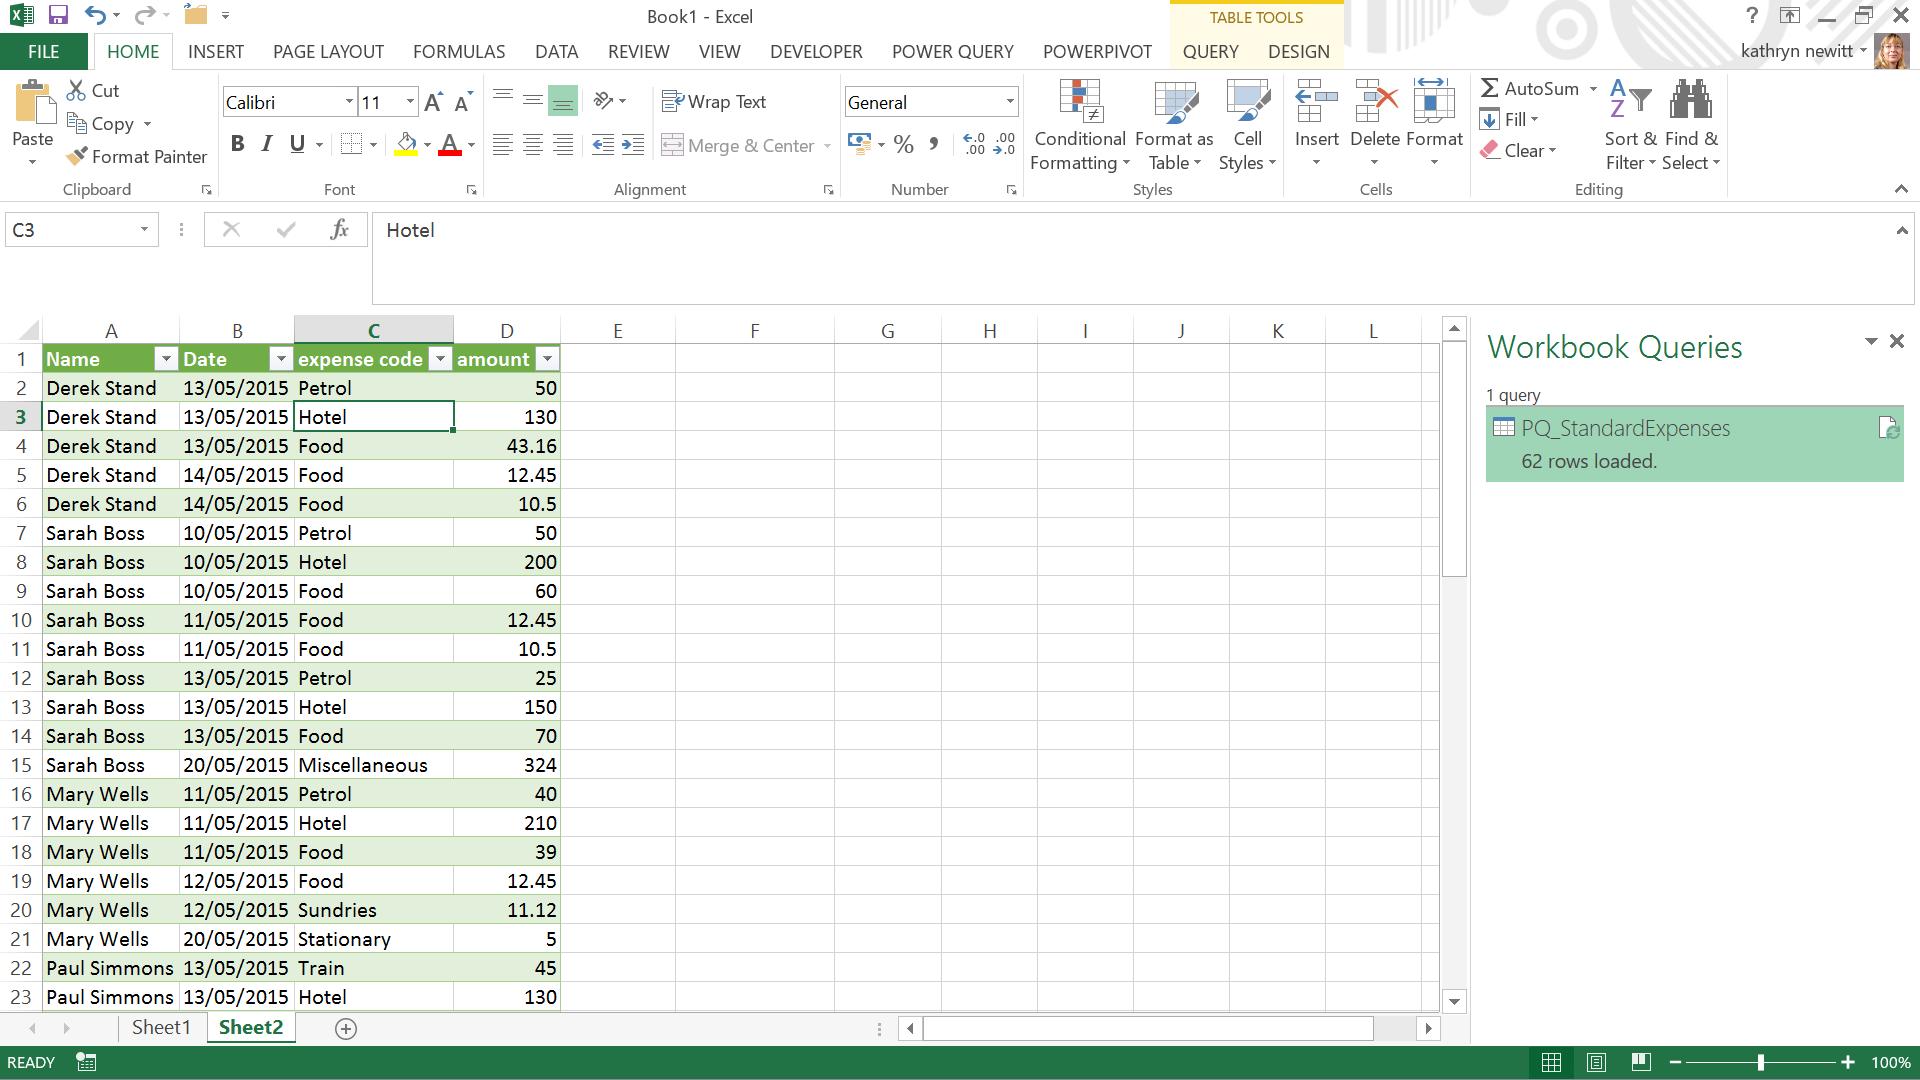
Close and load to see all the data in a workbook:
Extracting from a folder is an efficient way to upload multiple expense files in a similar format, but what if someone sends in a CSV file that has been configured differently? We deal with a simple example of unpivoting data in the next blog entry…
Want to read more about Power Query? A complete list of all our Power Query blogs can be found here. Come back next time for more ways to use Power Query!