
Power BI Blog: Just Speculate Over Numbers - Part 2
10 May 2018
Welcome back to Power BI Tips!
Last time we imported a JSON file from the NY Powerball. This week, we're going to use the Power Query Editor to clean up the data portion of the JSON file.
Let's have a look at our Dataset query in the Power Query Editor:

Now it’s time to navigate through to the data. Click on the data item - “List”.

We’ve now got a List of Lists here. Let’s have a look at what these Lists show. Select one (in the cell but not on the yellow hyperlink) and at the bottom of the screen it will pop up the contents in a preview.
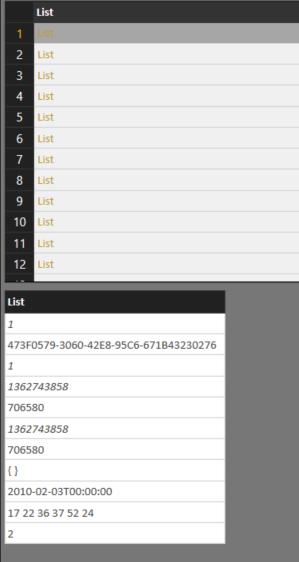
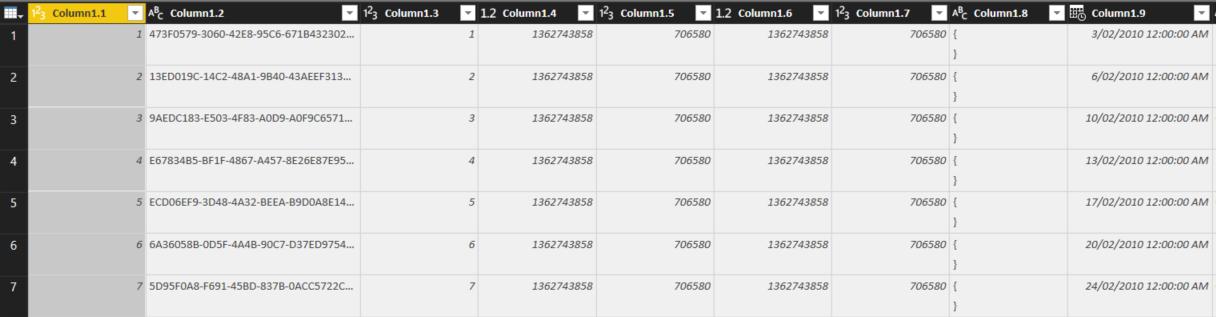
That looks like our data!
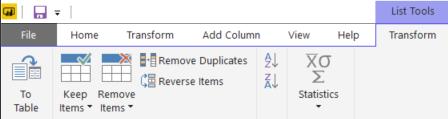
Now we will want to expand all these records but there is no expansion arrow on the column heading. This is because the data is structured as a List and not a Table. We can convert this to a table quite easily.
Because this is a list, you’ll see a “List Tools” section appear in the Ribbon. Under “Transform” in the “Convert” category we want to click the “To Table” button:
It’ll bring up the following prompt:
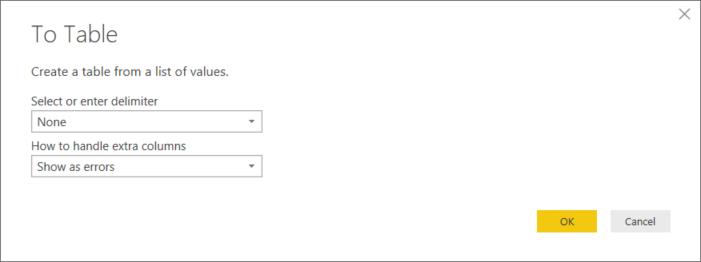
Currently, we only have one column. We can ignore delimiters for time being. Hit OK to proceed.
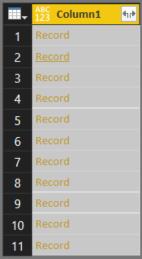
Great! Now we can expand. Click on the expansion arrow:
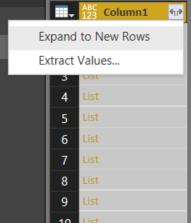
See how it gives two options? Don’t perform this step, but I will demonstrate what will happen when we choose “Expand to New Rows ”.
Each individual item in each List is expanded and then appended to each other. This isn’t what is needed as we know that the data is stored as a table.
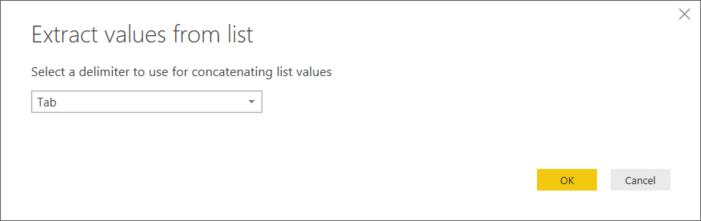
So please click on “Extract Values…” instead. It will prompt you for a delimiter to concatenate the list. I’ve selected “Tab”. I’ve used Tab because this is unlikely to appear in a table whereas semicolons or commas might appear as part of a text field.
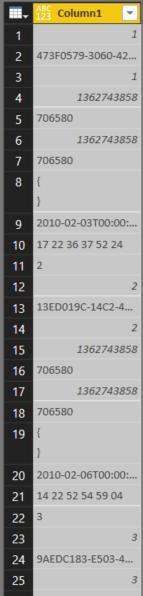
It results in this:

This method has preserved the rows and given each list as one item.
Remember that in List expansion, null values are ignored? We need to modify the code slightly as explored in Power Query: Sorry Not on The List. I’ve adjusted my formula from
= Table.TransformColumns(#"Converted to Table", {"Column1", each Text.Combine(List.Transform(_, Text.From), "#(tab)"), type text})
to
= Table.TransformColumns(#"Converted to Table", {"Column1", each Text.Combine(List.Transform(List.ReplaceValue(_,null,"~~",Replacer.ReplaceValue), Text.From), "#(tab)"), type text})
"_" in the context of M-code indicates the current cell value. In my edited formula, I've replaced "_" with "List.ReplaceValue(_,null,"~~",Replacer.ReplaceValue), Text.From).
What this does is replace any cells that contain a null value with the string "{}".
I’ve used this combination because it’s less likely that this string would be found in our table for us to easily get rid of after we’ve split the columns.
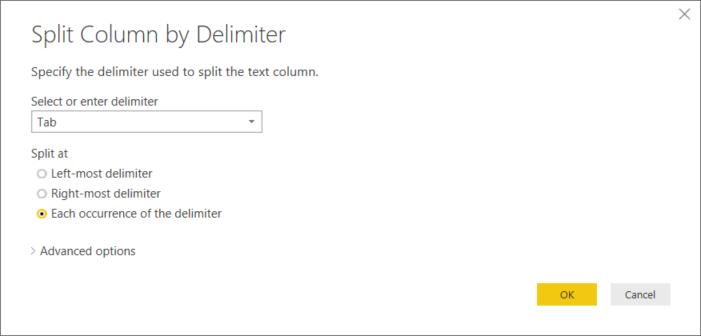
Now “Split Column” by your chosen delimiter.
Voilá! Here’s our data table.
I'm going to scroll down to show you what effect our null replacement has on our table:
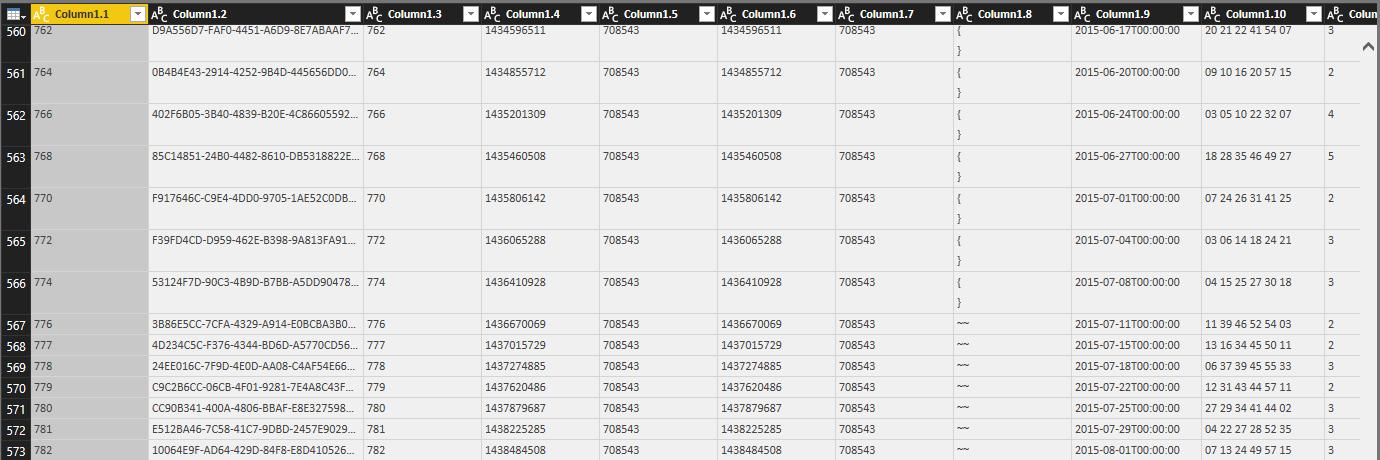
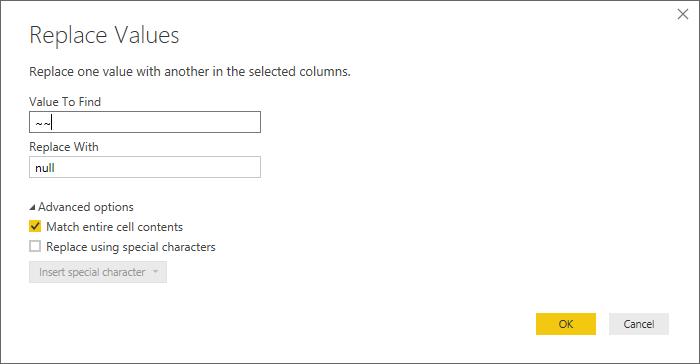
Now, we have to reverse our null replacement. Select all the columns in the table. This can be done by selecting the first column and SHIFT clicking on the last one or alternatively pressing the keyboard shortcut CTRL + A. Hit replace values on the Ribbon and replace our “~~” with null. The Power Query Editor will accept null as a value and not as a text string.
It’s important to check “Match entire cell contents” here because this will only act on the cells where we know for sure that “~~” replaced null prior to table conversion.
It required a bit of massaging but there you have it!
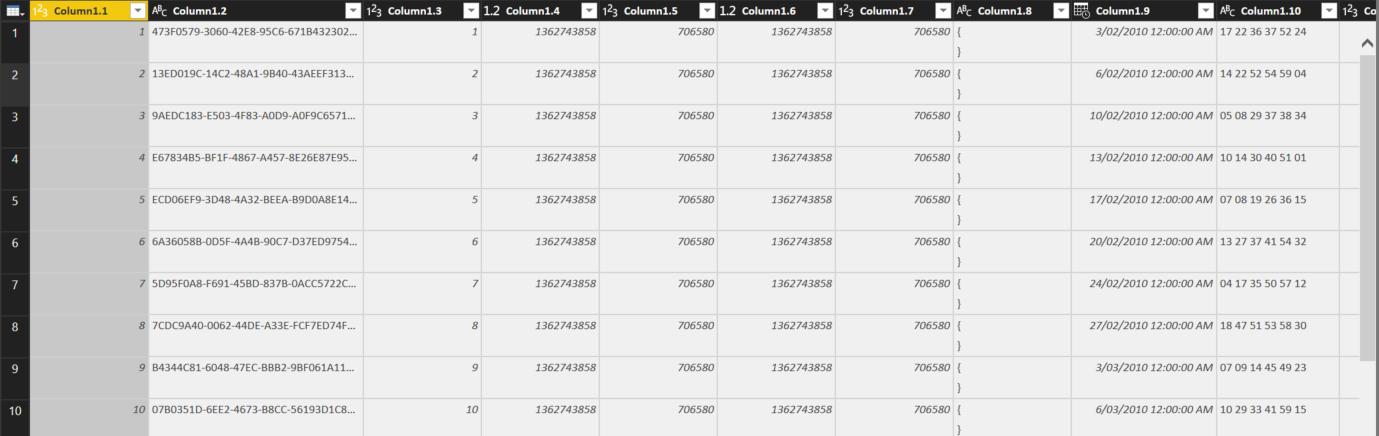
And scrolling back down to double check to see on our null values:

Next week, we will navigate through the meta data to retrieve the field names.
Tune in next week for more Power BI Tips.